Grow Your Own: 13 Money Saving Fruits and Vegetables

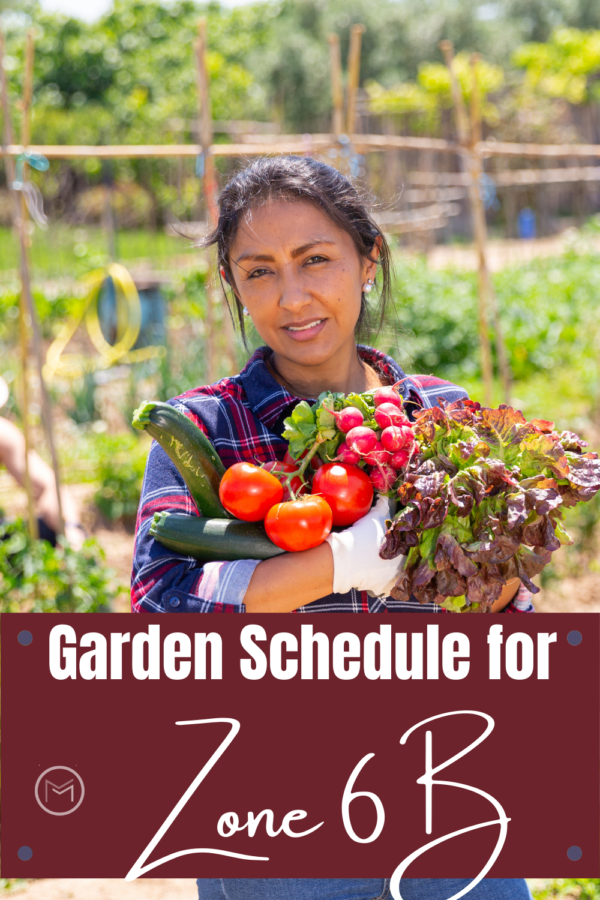
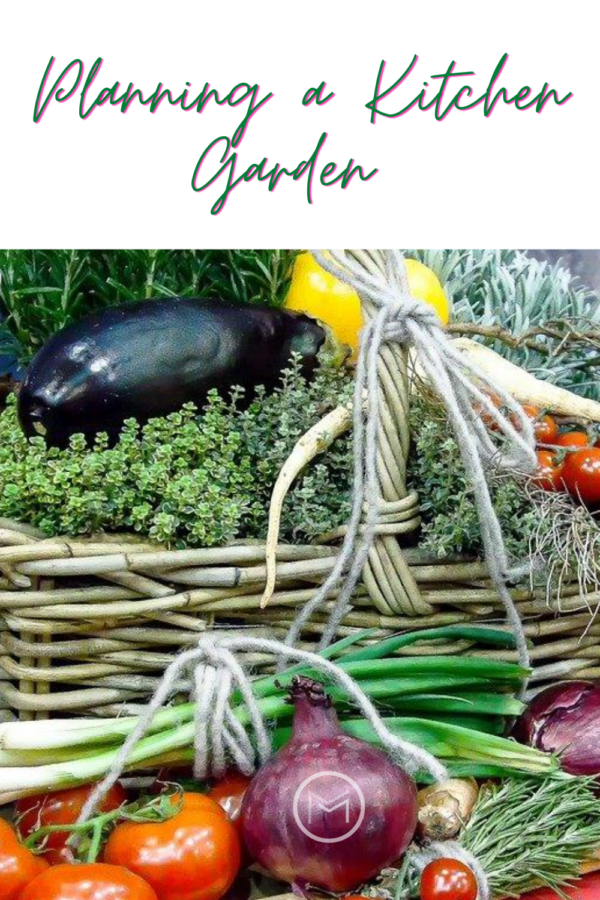
A must for my backyard vegetable gardening are vegetables that I can preserve for meals and herbs for seasoning sauces and other dishes. Each season I select the top money saving fruits and vegetables that I need to plant in my kitchen gardening. Budgeting and doing things in the most efficient and frugal way is my motto.  Additionally, I also plant a few fruits that I can enjoy in the summer.   They taste so much better when they are in season.  Because I grow my own, I don’t have to purchase from the grocery store.  Which saves me money.

garden tips, gardening, money saving tips


Here’s my top 13 money saving fruits and vegetables:


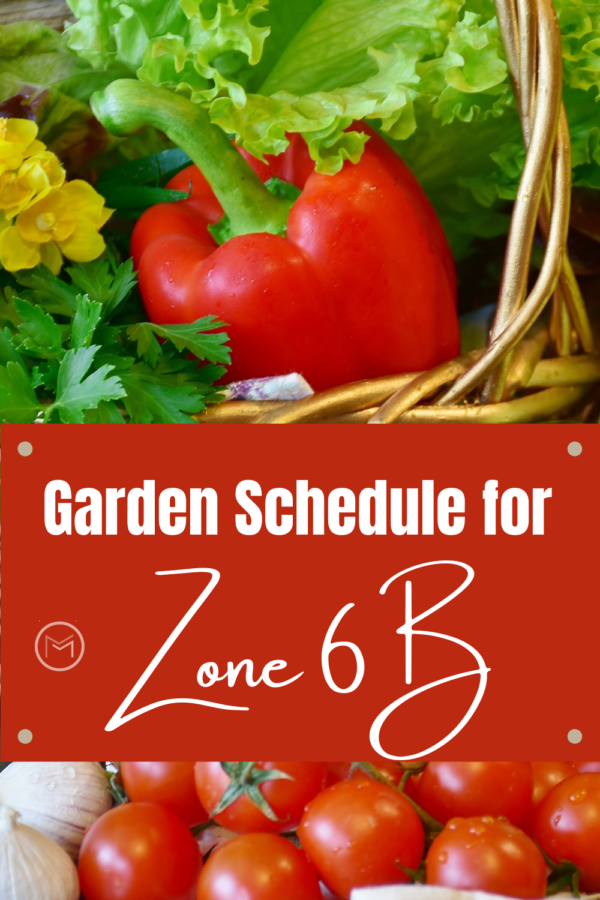
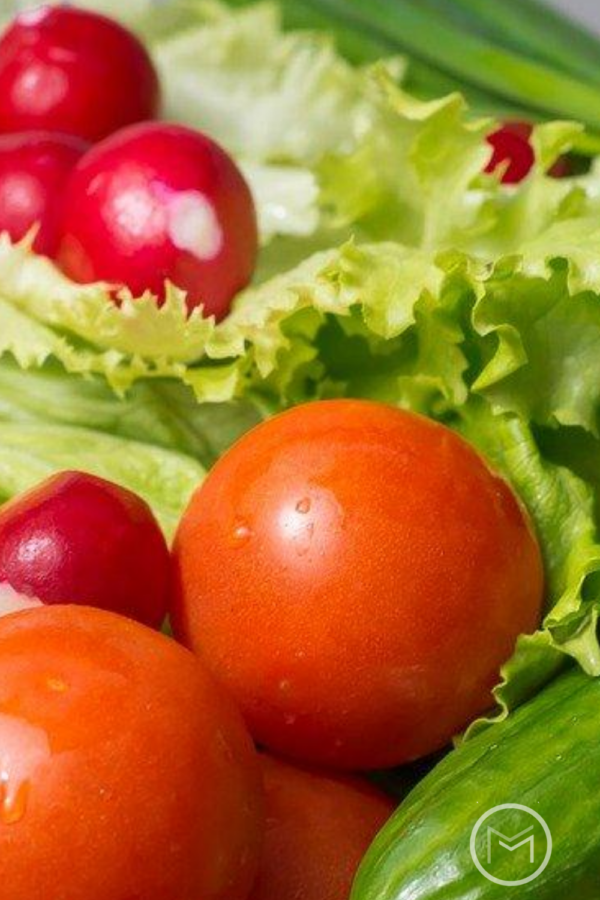
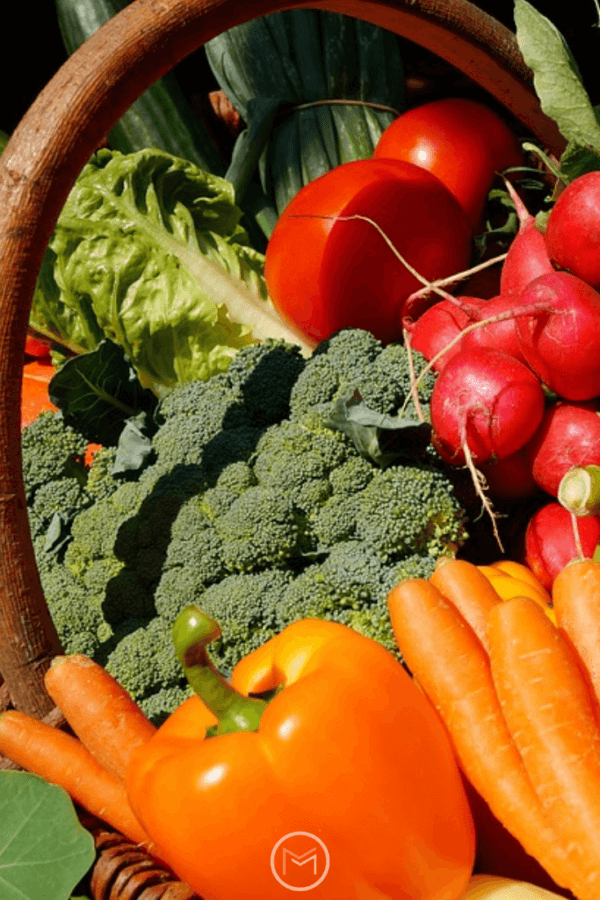
  1. Tomatoes – I plant and harvest enough to preserve whole or quartered for soup.  I also make sauces for spaghetti and other pasta dishes, chili, and salsa. I also grow cherry tomatoes for salads and snacking.
  2. Peppers – I pickle and freeze them. Great in dishes, on sandwiches and on top of nachos and cheese.
  3. Zucchini – I make fresh muffins and zucchini bread.
  4. Green Beans – I freeze green beans for soup and for other side dishes during the winter.
  5. Onions – A majority of my dishes call for onions, so I preserve these for using during the winter.
  6. Garlic – Fresh garlic is great in salsa and sauces.
  7. Herbs – I dry my herbs for winter use.
  8. Potatoes – Red and Yukon Gold potatoes get plenty of use in my house.
  9. Cucumbers – Great for salads and homemade pickles.
  10. Lettuce – I grow leaf lettuce for sandwiches and salads during the summer.
  11. Strawberries – Great for jam.
  12. Watermelon – I love fresh watermelon on a hot summer day. I grow Sugar Babies.
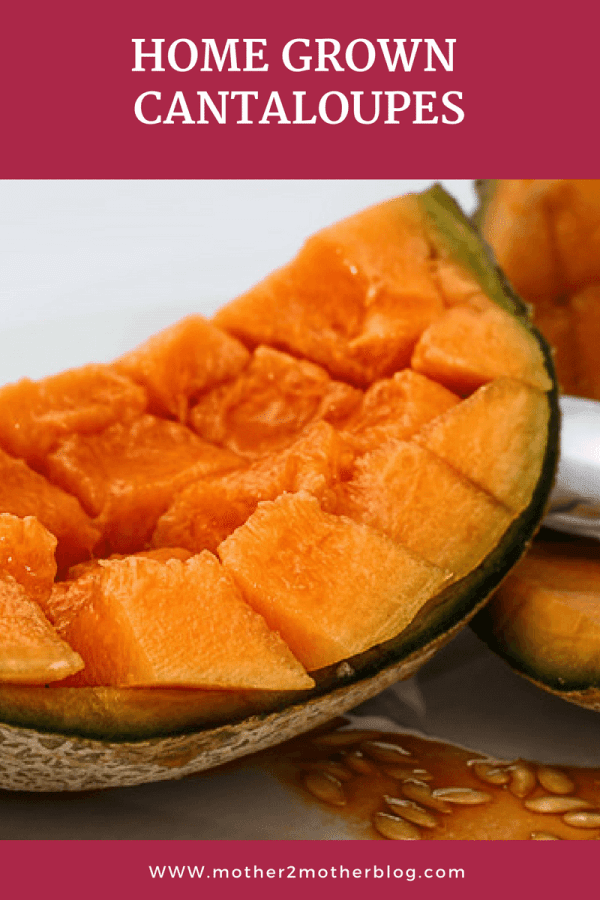
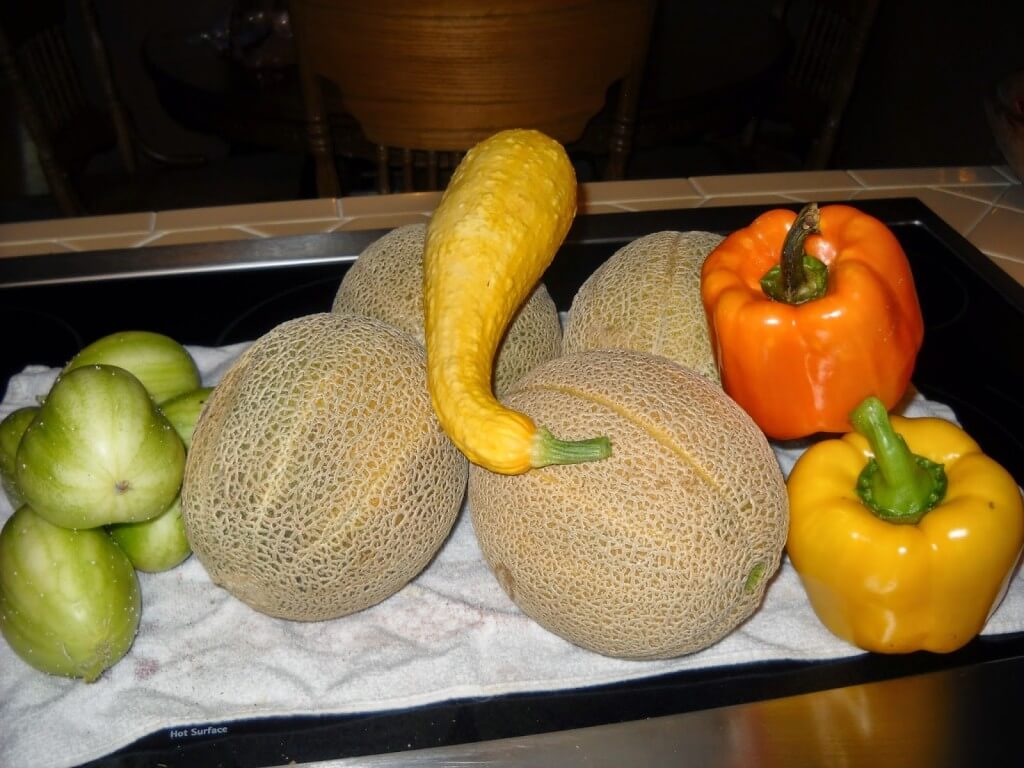
  13. Cantaloupe –  Great breakfast fruit.


Backyard Garden Tips


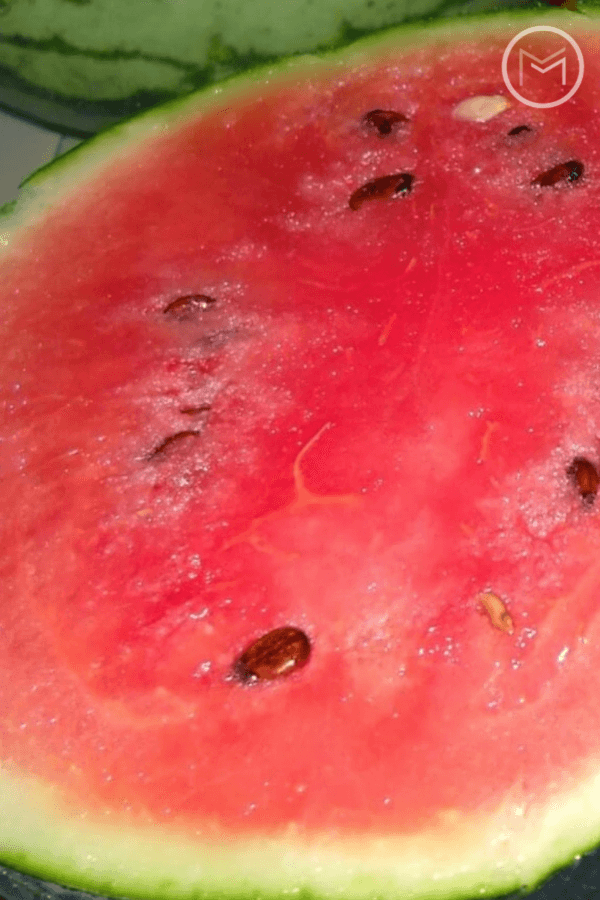
So, this is a picture of one my Sugar Baby watermelons from my backyard vegetable garden.  I picked it at the peak of ripeness and chilled it for a few hours.  It was sweet and delicious.  It’s great being able to walk to your garden and pick a watermelon or cantaloupe on a hot summer day.  What does your family eat most from your kitchen garden or containers?  These are the veggies that you should plant. You will save money on your grocery store bill and they will taste much better.
 You may also like:  Kitchen Garden Sowing Schedule                         15 Ways To Save Money

How To Companion Plant In The Vegetable Garden

Companion planting is the pairing of flowers and vegetables or compatible vegetables.  It’s one of the best backyard vegetable gardening tips  I can offer.  It’s a must in my garden, so I wanted to share the flowers I use in the garden and how I pair them with vegetables.  Furthermore, December and January is a good time to start winter sowing vegetable seeds for your kitchen garden.  So, start planning your seed purchases  so you can transplant them in your garden.  March is a good time for indoor seed sowing.


Companion Planting


Next, I purchase the majority of my flowers from the local garden center off the clearance rack. Flowers don’t have to go into your garden immediately, which will allow you time to find bargains on what you want to plant. Just save a spot in your garden for them and start looking for sales around Memorial Day or the clearance racks around early or mid-June. 

Here’s my list:

  • Marigolds (scented)  – The number 1 flower in my kitchen garden. I plant a combination of scented yellow and orange marigolds with my tomatoes and throughout the garden.
  • Petunias – Great with tomatoes, cabbage, cucumbers and beans.
  • Cosmos – Great for attracting bees, which you need for pollination. I usually find a good deal on Cosmos at my local nursery.
  • Sunflowers – These are a must in my garden. I plant them to feed the Gold Finch, but they are also great for pollination. I use them as a trellis for my cucumbers too. The cucumbers will grow up and wrap themselves around the stalk of the sunflowers.  Direct sow your cucumber seeds at the base of your sunflowers when the soil is warm enough. I winter sow my sunflowers.  Also, see my post How To Make Bottle Greenhouses
  •  Sweet Pea – These are climbers and are great to plant with pole beans.
  • White Geraniums –  Great with tomatoes, corn, peppers and cabbage.  They keep Japanese Beetles away, so place them randomly in your garden.
  • Basil –  Although Basil is not considered a flower, it can planted with tomatoes.  I actually plant basil with my tomatoes plants as well as in my herb garden each season.  Using basil in my sauces and in my chili is a part of my recipes, so I must have plenty.  I also freeze it in ice trays. So, it’s a must in my garden.  I can never have enough.


garden companion planting


Likewise,  I also do companion plant with my vegetables, especially tomatoes.  In addition, planting compatible vegetables help ward off insects that can destroy one or the other plant.  Most importantly, make the most of your space and make use of your plant’s ability to help the other grow. Here’s my list:

  • Tomatoes – Plant with basil, carrots, chives, garlic, cucumbers, lettuce, onions, or peas. Do not plant cabbage, kale, collards, cauliflower, broccoli or turnips with your tomatoes.
  • Peppers – Plant with basil, cucumbers or eggplant. (See the Do not plant list above).
  • Squash – Plant with bush beans or peas.  Do not plant with potatoes.
  • Cabbage – Plant with melons, broccoli, Brussel sprouts, spinach, or tomatoes. Do not plant with sage or peppers.
  • Cucumbers – Plant with peppers or sunflowers. Do not plant with potatoes.
  • Bush Beans – Plant with or near cabbage, carrots, cauliflower, corn, cucumbers, potatoes, or strawberries.  Do not plant with garlic, onions or any vegetables in that family.
  • Garlic – Plant with cabbage or tomatoes.  Do not plant with peas or beans.


Last, you can plant your companion plants together or in the same vicinity.  As a result, consider the pairs when you’re planning your garden layout.  Also, if you have questions about this list or other gardening questions please send an email to The Mailbox using rhonda@mother2motherblog.com.

You may also like: Winter Sowing

DIY Newspaper Seedling Pots

DIY Newspaper Seedling Pots are fun to make and great for the environment. Furthermore, newspaper seedling pots are biodegradable.  And, you can plant them directly into your garden or container.  Most importantly, they will decompose and help nourish the soil.

So, to help cut down on my gardening expense I make newspaper seedling pots.  I can get newspaper from family and friends or from the recycling center. They are all too happy to get rid of it, and I’m happy to recycle it.  These frugal containers have become a big part of my gardening season.  As a result, I thought I would show you how to make these pots.  If you have children that can handle making the newspaper seedling pots, let them spend the afternoon making them for you.   Making newspaper seedling pots is a great gardening with kids project.


newspaper seedling pots


DIY Newspaper Seedling Pots:

What you will need:


Easy Steps:


Step 1 – First, as shown in the picture below use 1 single sheet of newspaper folded in half.  Do not use the glossy or colored sections of the newspaper. The ink is not environmentally friendly. 

Step 2  – Second, fold the sheet of newspaper in half not length wise.

Step 3 –  I used a pint size canning jar.  Also, leave about a 1/4 inch of the mouth of the jar out of the newspaper as shown below.

Step 4 – Roll the jar until all of the newspaper is used. Make sure the newspaper is rolled tightly and evenly.

Step 5 Next, tape the ends of the newspaper together.  Kraft Paper Tape is biodegradable, so you can leave it on your pots when planting them directly in the garden or pot. 


Step 6 – Additionally, turn the jar upside down. The opening of the jar should be face down, and why you should leave about 1/4 inch of the jar out of the newspaper.

Step 7 – Next, fold the bottom of the newspaper as if you’re wrapping Christmas gift.  Tape the folds down with the Kraft Paper Tape. 

Step 8Remove the jar from the newspaper.  


newspaper seedling pots


Step 9 – Last, fold the top of the pot down about a 1/2  – 1 inch to make the pot smaller.


newspaper seedling pots


Fortunately, these seedling pots are ready to start your herbs, tomatoes, peppers, squash, zucchini, melons etc. Simply, fill the pot with seed starter mix (I use Miracle Gro), and you’re ready to plant your seeds according to the package. 

Most importantly, when you start your seeds you will want to water from the bottom up so you won’t displace your seeds.  What do I mean by watering from the bottom?  Place your seedling pots in a tray.  Pour water into the bottom of the tray, and allow your pots to soak up the water instead of watering the seedling from the top.  Watering from the top can dislodge you seed.  Also, add more water if necessary.  You can use tin roasting pan from the dollar store, plastic storage containers, your oven roasting pan, and anything you can find to house your seedling pots. 


DIY newspaper seedling pots


Also, I recommend planting 2 or 3 seeds in your pot.  You have better odds of germination using 2 or 3 seeds. Once the plant(s) has grown 2 – 3 inches, you can leave the strongest seedling and discard the other plants. It’s simple, just pinch off those you don’t want and discard them.  

Finally, now start making those newspaper seedling pots so you will be ready to sow your seeds and remain on schedule with your kitchen garden. Also, it’s best to make the pots in advance so you will be ready to go.
You May Also Like:  Kitchen Garden Sowing Schedule

Vegetable Garden Planting Schedule for Zone 6B

Today, I’m sharing gardening tips on my vegetable garden planting schedule for Zone 6B.  Organization is key when I’m planning my kitchen garden. I have a short growing season, so it’s imperative that I sow my seeds timely.  I want to make sure that I give my plants adequate time to germinate, be transplanted and grow in my containers or garden.  Check out my other backyard vegetable gardening tips before you leave.

You can start sowing your seeds too.  First, I live in Zone 6B.  As a result, I work in my garden from mid-May until October. I can produce quite a few crops in that time period if I stay organized and on track. It also serves as a Check List and keeps me focused on what I will be planting during the season.


garden schedule for zone 6B

I set up my grow lights inside in February or early March.  I sow my tomatoes, peppers, herbs, melons, squash, and zucchini seeds inside.  Indoor sowing gives me a head start on the growing season.  And, starting my plants from seed also saves me money.  As you can imagine, purchasing plants from a garden center can get expensive.  My goal is to grow fresh produce at a bargain price.


Vegetable Garden Planting Schedule: 


vegetable garden sowing schedule


If you are a beginner gardener, check the planting zone for your area. You may be able to sow or plant earlier than my schedule.  So, you may have a longer growing season than I do.  Adjust the schedule according to your zone.

Also, I’m more of a summer gardener than spring.  However, I do plant lettuce which is a cool weather crop.  I’m thinking of sowing my lettuce in containers this season.  We’ll see how that goes.  I’m also going to grow carrot and radishes this season.  (Be sure to check the blog for those posts).  These are cool weather crops, and can be planted in the spring and fall. 


garden schedule for zone 6B


Collard greens will be planted in the fall this year. I like to have fresh collard greens to serve at Thanksgiving and the Christmas holidays.  And I love cauliflower in a cheese sauce.  Yum!

So, seeds should be sown indoors 6 – 8 weeks before the growing season begins.  You don’t want to start them too early because they could become too large before you get them transplanted. Furthermore, your plants could start blooming and you don’t want that to happen either. 

I will also be starting my sunflowers using the winter sowing method in the next few weeks.  You can check out my winter sowing seed starting method.  I hope that you find my vegetable garden planting  schedule beneficial. You can download it here.


How to Plan a Kitchen Garden

Today, I’m sharing gardening advice on how to plan a kitchen garden. Fall and winter is the perfect time to start planing and sowing seeds indoors or outdoors.  As a matter of fact, the best time to start planning is when there’s snow on the ground and it’s cold outside.  A well planned garden will lead to a successful garden.

If you’re striving to get healthier, there’s nothing better than fresh vegetables. I have been gardening for years and now considered a master gardener.  My focus has been on tomatoes, peppers, garlic, green beans, watermelons, and herbs.  However, I do add in sunflowers and marigolds.  Planting a kitchen garden helps save on the grocery bill, and you will be able to to freeze and preserve your harvest.

planning a kitchen garden


Here’s a few steps on how to plan a kitchen garden:


  • Plan your garden layout – Will you be using raised beds, row gardening, or containers? Will you plant a small, medium or large garden? The size of your garden will determine how many plants you will need to purchase or need to start from seed.  You also need to start thinking about the containers you will be using or pricing material for your raised beds if this is the route you will be taking.   How many bags of gardening soil will you need for your pots and raised beds.
  • Decide what you want to plant – Do you want to do herbs only or a variety of vegetables? Will you be planting Hybrid or Heirloom seeds/vegetables?  How many will you plant.  My suggestion is that you plant what you like and will use during the summer and winter months.  Will you be canning your harvest or sharing it with food banks or neighbors and friends.
  • Order seeds – Browse catalogs and on-line websites to determine what you need to purchase or join seed swaps. You can order seed catalogues and browse them on the cold, snowy days.  You will be able to purchase seeds that you won’t find locally.  Also, the Dollar Store and Dollar Tree both have a selection of seeds for bargain prices. I’ve purchased from both, and had success with them germinating.  I also purchase from Gurney, Johnny’s, Parks Seed, Territorial and Baker Creek seed companies.
  • Prepare for indoor sowing – If you indoor sow, set up a schedule for sowing your seeds.  Make sure your lights are working properly, you have sufficient containers, potting mix etc.
  • Start winter sowing  – You can start summer flowers and vegetables in containers and place them outdoors to get a head start on the growing season. I start my sunflowers using the winter sowing method. I have also been successful winter sowing vegetables.  I’ve been so successful, that I no longer use the indoor sowing method.  But, you decide what works with you.   If you decide to winter sow, check your plastic containers supply.  Make sure you a variety of sizes and shapes.  I love using Gatorade bottles, 2 liter soda bottles, quart or gallon milk jugs work great too.
  • Check your inventory – make sure you have everything in working order and you have sufficient supplies for your garden.


planning a vegetable garden

Think ahead.  For example, I’ve decided to increase my basil plants from 2 to 6.  I love using fresh basil in my tomato sauce.  But, I also like to share it with my sister and daugher.  I also freeze fresh basil for use in dishes throughout the winter.  Placing dried herbs in my Christmas gift baskets was a big hit.  People love homemade gifts.  Especially, if they’re yummy.

I normally put in 10 -15 tomato plants, 3 – 4 belle and hot peppers, 2 squash, 2 zucchini,  6 cucumbers, 24-30 cloves of garlic and a few rows of green beans.  Other years, I may take out or put in something different.  I will be cutting back on the vegetables that I have an adequate supply stored.  I will be replacing some of the plants with cauliflower, cantaloupe, water melons, leaf lettuce, collard greens, and a variety of herbs.

So, I use the direct sowing method for my green beans, cucumbers and lettuce.  However, I use the winter sowing for my sunflowers tomatoes, herbs, squash, zucchini, peppers, cauliflower, fruits and flowers.

I will be doing a series of posts on sowing seeds, gardening in containers, row garden preparation, preserving the harvest and everything in between on the blog.  Stay tuned.

I hope that you found my steps on how to plan a kitchen garden helpful.  If you have a question while planning, starting your seed, implementing your garden or just feel overwhelmed, send an email to The Mail Box using rhonda@mother2motherblog.com, and I will respond to your questions.  Lets get healthy together!

 If you like this post you may also like:How To Dry Kitchen Garden Herbs;                                                                   How to Harden Off Garden Seedlings;  Planting and Harvesting Garlic

How To Make Homemade Tomato Sauce

It’s homemade tomato sauce making time!  Last week-end I made my first batch, and it was delicious.  So, I’m going to tell you how to make homemade tomato sauce that your family will love.  Using tomatoes from my backyard vegetable garden, I canned 7 quarts of the best homemade tomato sauce on the east coast.  My sauce is versatile, I use for pasta dishes and mix some in my chili.  It makes the best addition to a pot of chili on a cold winter day.  
Furthermore, it’s kid approved.  My grandchildren pound on the table for it.  As a matter of fact, my daughter has requested 20 quarts for her household alone.    
how to make homemade tomato sauce
I believe the secret to great sauce is lots of garlic.  Fortunately, I grow my own garlic and fresh herbs.  It’s great being able to go to my backyard vegetable garden and harvest basil, oregano and garlic.  See those white pieces in the sauce below, that’s my home grown garlic.

Here’s my recipe for 7 quarts of homemade tomato sauce:

  • 30 lbs.  of tomatoes (I used a combination of Roma and regular beefsteak)
  • 15 gloves of garlic
  • 1 cup of white onions  (2 medium onions)
  • fresh basil, parsley, and other seasonings to taste
  • 2 cups of sugar
  • 2 small cans of tomato paste to help thicken the sauce


homemade tomato sauce


  • First, remove the skin from the tomatoes. If you have a sauce maker, now is the time to use it.  I don’t have a sauce maker, so I make my sauce like my grandmother. I remove the skin from the tomatoes by blanching them, and immediately placing them in a large bowl of ice water.  Check out my post on How to Blanche Tomatoes.
  • Next, place the skinless tomatoes into a large bowl.  Squeeze the tomatoes into small pieces. Yep, that’s my clean hands in the bowl (below) squeezing those tomatoes into pieces.  You can also use a potato smasher to squeeze the tomatoes.  Most importantly, wear gloves if you’re allergic or feel more uncomfortable sticking your hands into the tomatoes.
  • Breaking the tomatoes into pieces helps the sauce to cook down faster.  Secondly, it keeps the sauce from getting too thick. I like a little movement with my sauce. I can always thicken it later with paste depending on what dish I am preparing.
  • If you have a sauce maker, you can skip these steps.  The sauce maker removes the skin and seeds from the tomatoes.  If you don’t have a sauce maker, you can follow my steps and remove them by hand. In my opinion, they’re really not that noticeable once the sauce cooks down.


  • Place a colander into a large bowl or pan.  Place cups of the sauce mixture into the colander and press the sauce down with a spoon until the seeds and juice run out into the bowl.  The holes in the colander will be large enough for the juice and seeds to pass through.
  • To remove the seeds from the juice you will need a fine wire strainer or sieve. The strainer should allow the juice to run through, but small enough to hold the seeds.  Pour the juice into the strainer to remove the seeds.  Once you get a rhyme going, it doesn’t take long.
  • Now, add the juice back into the tomato meat and repeat until you have the majority of the seeds removed from the juice and meat of the tomatoes. You won’t be able to remove 100% of the seeds, but that’s okay,  The seeds enhance the flavor and you won’t even know they’re in the sauce. That’s why I don’t have a sauce maker, I am the sauce maker as grandma used to say!


  • Your next step, chop the garlic and onion into fine pieces. If you have a chopper use it, it will save you time. (You can also prepare the garlic and onion ahead of time.)  Cover the bottom of the stock pot with Extra Virgin Olive Oil and heat until it’s hot.  Add the garlic and onion, cook until tender, 2 -3 minutes.  Be careful not to burn it, it will ruin your sauce. Stir it constantly.  In my opinion, homemade tomato sauce is about the garlic, onions and fresh herbs. Besides the love that goes into it.  These ingredients are what separates it from the grocery store sauces.
  • Pour in the tomato mixture and bring to a boil.
  •  Once the tomato mixture is boiling point, lower the heat.
  • Next, gradually add in your paste.  I only add 1.5 cans of paste to my sauce with 2 cups of sugar.  You may like the taste of 2 cans and less sugar.  Add your ingredients gradually until you reach desired taste.  Add lots of fresh basil to the mixture.
  • Finally, simmer for 5 hours. Be sure to stir it constantly.  You want to make sure the tomato pieces, garlic and herbs don’t fall to the bottom of the pot and stick. The longer you cook it, the thicker the sauce will become. You will want to taste the sauce throughout the cooking process to determine if you want to add more herbs, sugar or additional paste to thicken it.


Also, you can freeze the sauce or can it.  Because I don’t have room in my freezer I choose to can my sauce. I prepared my jars and can the sauce according the directions included with my canner.  I placed 2 tablespoons of lemon juice and 1 teaspoon of Himalayan pink or canning salt in the bottom of my quart jars.

Next, I hot pack quart jars with the sauce and water bath them for 45 minutes.  Or, you can freeze the sauce in quart size freezer bag.  Allow the jar to sit overnight to ensure the jars seal. Once they are sealed, they are ready for the pantry.

Last, save money by freezing or canning homemade tomato sauce for the winter.


Noteworthy:  The sauce takes time so enjoy a glass of wine or play with the kids while you’re preparing.  It’s worth the work and wait.  


How To Shuck Corn In Your Microwave

I spent the day making tomato sauce and preparing fresh corn for the freezer.  Did you know that the easiest way to remove the silk and husk from corn on the cob is by microwave.  One of my backyard vegetable gardening tips is how to shuck corn in your microwave
I like to multi-task, so while I’m water bathing my tomato sauce I shuck corn in microwave.   The method is heaven sent.  If you have dozen of ears to prepare for your freezer, the microwave is the way to go.  It’s also a great way to prepare it for dinner when you’re short on time too.  
how to shuck corn
I spent the day making tomato sauce and preparing fresh corn for the freezer.  I decided to use the microwave to shuck corn, remove the silk and husk, while I prepared the sauce for the water bath canner.  This method is heaven sent and I wanted to share it with you.  It’s great way to prepare it for dinner when you’re short on time too or when you’re trying to juggle canning activities at the same time.
microwave corn husking
During the summer, I usually husk and prepare at least 4 dozen ears for the freezer.   I love using fresh corn in chowder, mixing it with my fresh green beans, or in soup in the winter.  So, I pack it in quart size bags, which is just the right serving size for my dishes.
Here’s how to shuck corn in your microwave:
 
Step 1 – Place 5 – 6 ears of corn in your microwave, depending on size you may be able to only fit 4 – 5.  I had 6 ears here, but I had to remove 1.  The ears were pretty large.
 
Step 2 – Heat the ears on high for 4 – 5 minutes.  If you’re going to eat it immediately, the rule is 4 minutes for each ear.  So, it would be 16 – 20 minutes total.  When I’m preserving, I use 4 minutes for the entire batch so I don’t over cook the corn.
how to shuck corn


Step 3 – Remove the ears from the microwave carefully.  They will be hot.  Cut the stalk end about 2 inches from the end of the corn with a chef’s knife or whatever large, sharp knife you have on hand.  You’ll lose a few rolls of corn, but it’s a time saver.


How to shuck corn


Step 4 – Squeeze the corn through the husk from the top, silk end.  The corn should slide out of the husk virtually silk free.


It’s the easy way to shuck corn.  I packaged 4 quarts today and will probably put up another 4 quarts later in the week.   Try purchasing fresh corn from a local farmer, it is good.  I had to stop myself from eating it so I could have enough for the freezer.  Fried corn with a little butter and red peppers is yummy!  It’s kid approved, my grandchildren love it.

If you’re a preserver or need to better utilize your time preparing dinner, this is the way to go. You may also like How To Freeze Corn.  What’s your favorite dish using corn?


How To Dry Kitchen Garden Herbs

Today, I’m sharing gardening advice on how to dry kitchen garden herbs.  I pulled the remaining herbs from the garden today so I can dry them. So, I’m writing this post so you can grow and dry your fresh garden herbs too. Garden herbs are really easy to grow, and they add wonderful flavor to sauces and chili.  I love using my dried herbs during the winter.
I dry basil, dill, parsley and oregano.  I also freeze fresh basil in olive oil to use in dishes throughout the winter.  The dried and frozen herbs are delicious in dishes soups, pasta dishes and more.

How to dry kitchen garden herbs:

  • Remove the leaves from your herb plants and rinse the leaves thoroughly.
  • Snipe off your leaves with your fingers or scissors.
  • Dry the herb leaves on a paper towel.
  • Mark brown paper lunch bags with the names of your herbs.  For example, if you’re drying basil put Basil on your paper bag.
  • Once the herbs have dried, place the herbs in designated bags.
  • Seal each bag with tape.  Any tape will do, as long as it holds the bags closed.  I used scotch tape to seal my bags.
  • Set the bags in a cool.  Check your herbs regularly to see if they are dried and can be crumbled.  It will take several weeks for them to thoroughly dry.  However, you should check them to ensure they are drying as expected.


This is dry dill (below) that has been removed from the bag. Be sure to remove all stems from the herbs before storing.  I use jelly jars from my canning stash to house my herbs.  You can use plastic containers, zip lock bags or any other container that is airtight. You want to keep them dry so they will remain fresh.


how to dry dill. dill,


This is parsley that I have dried.  It’s great on potatoes. It is now airtight and stored in one of my jelly jars. These are nice to give as gifts too. I add a label and place into a gift basket along with salsa, chips, jam, pickled peppers and cookies for Christmas gifts.


I also freeze my basil leaves.  Once I’m ready to use the basil leaves,  I crush them into my dishes while cooking.  I just grab the bag from the freezer, take out a handful of the leaves and crush them directly into my sauces and chili. Fresh basil smells wonderful and taste even better in dishes.
Grow a few herbs next season.  You don’t need a large space, small pots in your kitchen window will suffice. Grow what you use.  Basil, parsley and dill get plenty of use in my house. Happy Gardening!


Growing Cantaloupe in Your Kitchen Garden

My second favorite item on my backyard vegetable gardening list is home grown cantaloupes. My garden is winding down and I’m feeling a little sad.  So, I sooth myself when I’m closing the garden for the year by planning my garden for the next season.  I spend months deciding what I want to plant and that usually cheers me up. Yesterday, I pulled my last squash and cantaloupes. I have tons of tomatoes and green beans left.  So, I will preserve and freeze those next week-end.  I see tons of tomato sauce and salsa on the horizon.  Tomato sauce and salsa are great ways to use in the garlic, basil and oregano in the garden too.  


how to grow cantaloupes


These are Hale’s Best Cantaloupes below, which is an Heirloom seed.  Let me tell you they are delicious.  I’ll be having fresh cantaloupes for the next few days, and I can’t wait.  I started the cantaloupe plants under grow lights in mid-March and moved them into my garden in June.  If you’re wondering how to grow cantaloupes in your kitchen garden, I have the answer:

  • You can direct sow the seeds in the garden when the soil warms up.  Follow the instructions on the seed packet.
  • You can winter sow your seeds in bottle green houses.
  • Start your seed under grow lights.
  • Purchase plants from a nursery or garden.


I mulched around the plants with straw and left about 6 feet of space for them to spread. I harvested eight cantaloupe from 2 plants. Not bad for a pack of $1.00 seeds.  I’ll be saving seed from these melons to plant next year and the year after that.  Hales Best Cantaloupes are the sweetest and most delicious on the market.


I’m a frugal gardener.  I put my garden in for pennies by purchasing Heirloom seeds and than saving the seeds from year to year.  Purchasing plants from garden centers can get expensive.  Especially,  if your goal is to garden on a budget.  I choose what I want to splurge on, and groceries is not one of those things. If you plan to save seed from your garden, make sure you don’t purchase or use Hybrid seeds or plants.  You want the same characteristics of the parent plant versus inbreeding/cross breeding.  So, heirlooms are the way to go.


I planted Belle peppers, which performed nicely too.  After picking them off the plants, I usually chop and freeze my peppers if I don’t have a dish that requires them planned.  I like to get them into freezer bags as soon as I pick them off the vines. The sooner you lock in the freshness the better. Did you know that orange, red, and yellow peppers are green before they turn into these beautiful colors?  I love stuffing the colorful peppers.  They make a nice statement on the table.

So, if you want these colorful peppers, you have patience.  It takes a while for them to transition from green to the red, yellow or orange stage. Additionally, there are also male and female peppers.  Finally, check out how to determine and use male and female peppers here.


10 Reasons I Preserve My Garden Vegetables

Backyard vegetable gardening is hard work, but oh so worth it.  Today, I’m going to talk about preserving garden vegetables.  There’s nothing like fresh fruits and vegetables  that have been preserved for winter use. There’s nothing better than pulling out fresh tomatoes in the winter to make sauce and salsa.  
I add preserved tomatoes to my homemade vegetable soup in the winter.  The taste is amazing.  There’s nothing better than a bowl of homemade soup during a blizzard.  Not only do I preserve tomatoes, I preserve belle peppers, chili peppers, green beans, corn, and herbs.  Did I mention that I also grow my own garlic for my tomato sauce.  I preserve anywhere from 20 – 25 quarts of sauce each season.  My homemade tomato sauce is kid approved.  My grandchildren love it, so I share with my daughter and siblings.  

preserving garden vegetables


I just chopped 2 quarts of belle peppers for my freezer.  If you’re wondering if you can freeze belle peppers without blanching, the answer is yes.    Here’s how:

  • Wash peppers thoroughly and dry.
  • Remove the core and seeds.
  • Place peppers in a quart freezer bag. Be sure to remove the air from the bag.  To keep the peppers from freezer burn, double bag the peppers.
  • Write the date on the bag with a permanent marker.

I love using fresh belle peppers in my dishes.  The best way to preserve vegetables and fruits is to freeze them. I just place the peppers on a cookie sheet.  Place the sheet in the freezer so the pieces can freeze before placing them in the freezer bag.  However, you can just place them in a freezer bag as shown.  Just give them a good whack with a kitchen mallet to break them apart when I needed.


Backyard Vegetable Gardening


To prevent freezer burn, put the peppers in a quart size bag.  Than place the quart size bag in a gallon size freezer bag.  Make sure you get all of the air out of the bags.  Most importantly, make sure your peppers are cool and dry before you freeze them.

Gardening gives me a sense of fulfillment and preserving garden vegetables puts the icing on the cake. Being able to serve organic, fresh veggies and fruits to my family is a blessing.  Here’s why preserving garden vegetables is at the top of my list:


  1. Fresh vegetables and fruits are more flavorful than grocery store purchases.
  2. I use fresh tomatoes in chili, pasta sauce and salsa during the winter.
  3. Fresh peppers are available for omelets, meatloaves, spaghetti sauces and casseroles etc.
  4. I have fresh garlic available for spaghetti sauce and other dishes.
  5. Fresh apples and peaches available for warm cobblers during the winter.
  6. I grow organic fruits and vegetables.  The less chemicals used the better.
  7. I save hundreds of dollars on my grocery bill.
  8. My family raves about my dishes. It’s the herbs and other fresh vegetables and fruits, but don’t tell them it’s a secret.
  9. Fresh vegetables and tomatoes make the best soups on those cold winter days.
  10. Nothing like fresh herbs to toss in dishes during the winter.

Finally, preserve garden vegetables and fruits too. Planting a tomato plant on your deck or patio, and you will be able to freeze them for winter use.  Not interested in vegetables, how fruits or sunflowers.  So, preserve garden vegetables and fruits for a welcome winter treat.

You may also like:  Johnny’s Seeds.