Preschool Educational Activity Color Matching

Today, I’m sharing parenting tips on preschool educational activity. My grandchildren loved playing this game.  So, I thought I would share it with you.  Its a great way to teach children their colors as well as match items.  Preparing preschoolers for kindergarten is essential.  So is preparing kindergarten for first grade.  The earlier we start teaching our children the more advanced they become in their education.

Furthermore, parents must stop waiting for schools to completely educate our children.  Giving them extra assignments and spending time teaching them is a great bonding experience.  Just as important, you as the parent can assess your child’s skills rather than waiting for a progress report.  Trust me, their teachers will appreciate your efforts.  It also gives you some insight when you have a parent teacher conference.  You’re actually speaking from a first hand perspective.


preschool educational activity


Benefits of Preschool Educational Activities:

  • Develops fine motor skills
  • Improves memory
  • Improves the ability to distinguish similarities and differences
  • Visual memory
  • Improves attention to detail
  • Great for cognitive development


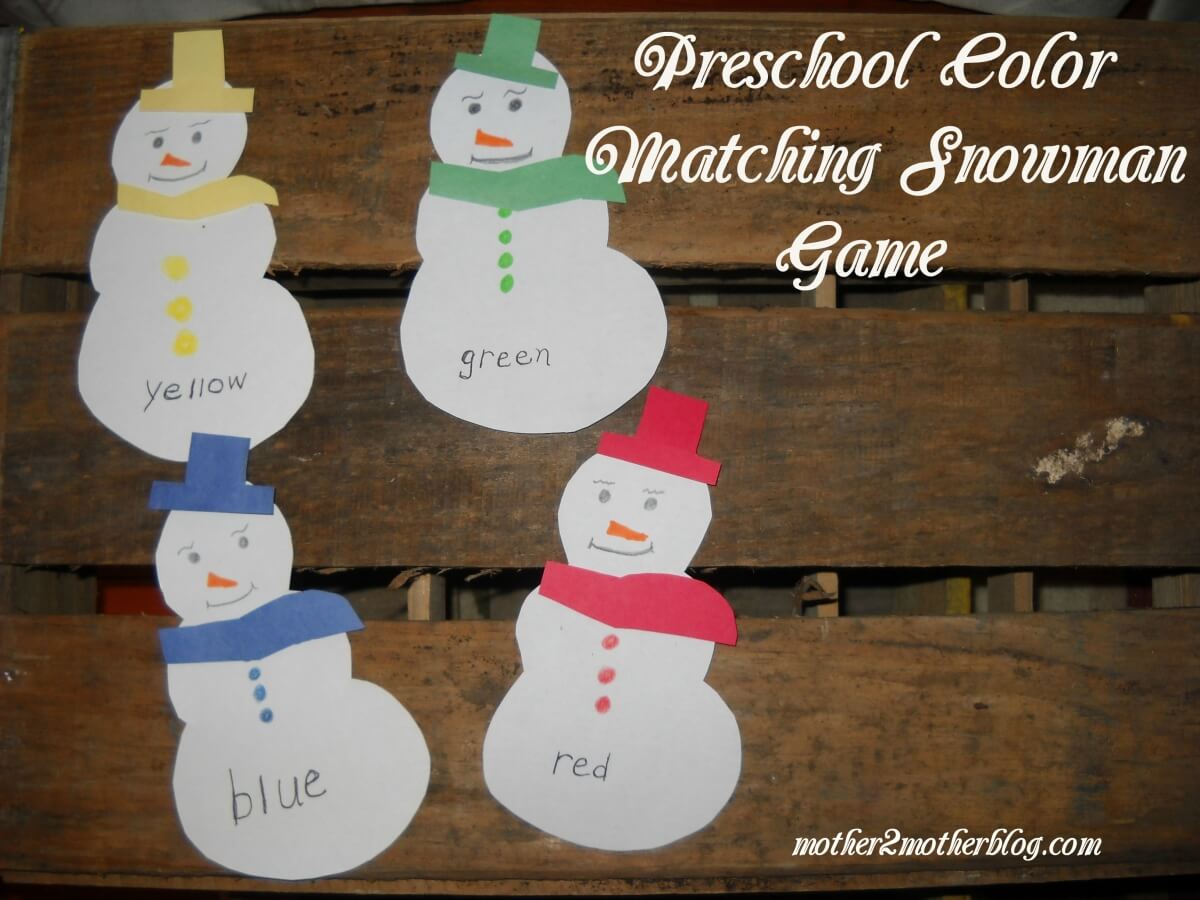
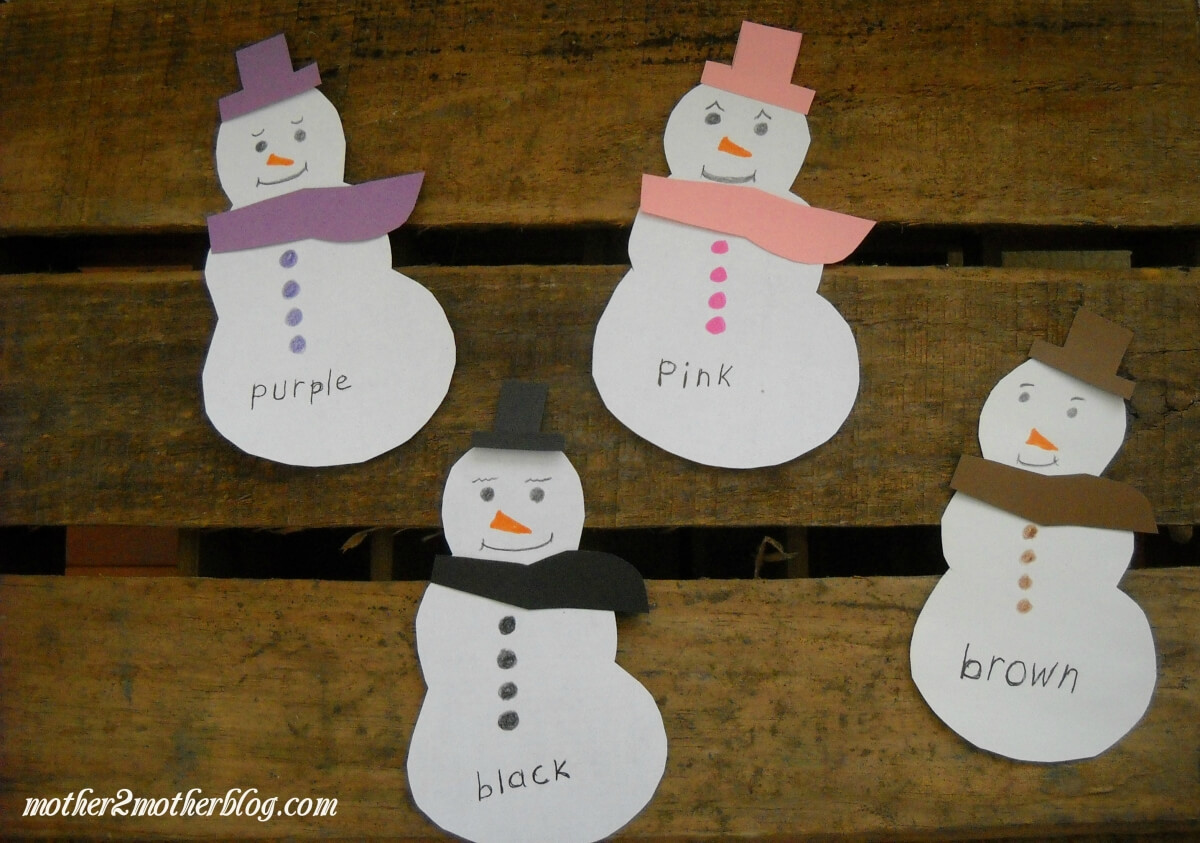
My granddaughter is adamant that playing matching games helps improve memory.  She is quite astute when she is playing games that require memory skills. My preschool educational activity will help to enhance your child’s ability to recognize colors.  Simply match the scarf and hat with the same color dots on the snow man.  They can also enhance their vocabulary by learning how to pronounce the colors and learning how to spell each color.
Kindergarten Match Game


First, you will need the following items to make these adorable snowmen:

  • white construction paper or cardstock for the body of the snowman
  • color construction paper or cardstock for the hat and scarf
  • colored pens or crayons to match the hat and scarf
  • scissors
  • pencil for tracing

Note:  I used copier paper for the snowman and construction paper to make the hat and scarves.


Step 1 –  I found it easier to make a sample snowman. Next, I folded a sheet of construction paper in half and than folded it again. I placed the sample snowman on top of the folded sheet and cut around it.  I was able to create 4 snowmen at once using this method. This step really cuts down on time.

Step 2 – Select various colors of construction or cardstock for the hat and scarfs.  I cut these out free hand.  As you can see from the picture, they are not uniform.  The goal is have a variety of colors for the match.

Step 3 – Make faces for the snowmen as shown with a black crayon or pen.  Or,  get creative and come up with your own style.

Step 3 – Make the buttons on the snowman the same color as the top hat and scarf.  You can use crayons or pens for this step.  ( I found the pens to be easier to use). Once the buttons are made, print the color the button, top hat and scarf on the bottom of the snowman as shown.


Last, I hope you enjoyed my preschool educational activity.  You may also like:  Snowman Preschool Math Game – Mother 2 Mother Blog


11 Ways to Recycle Christmas Cards

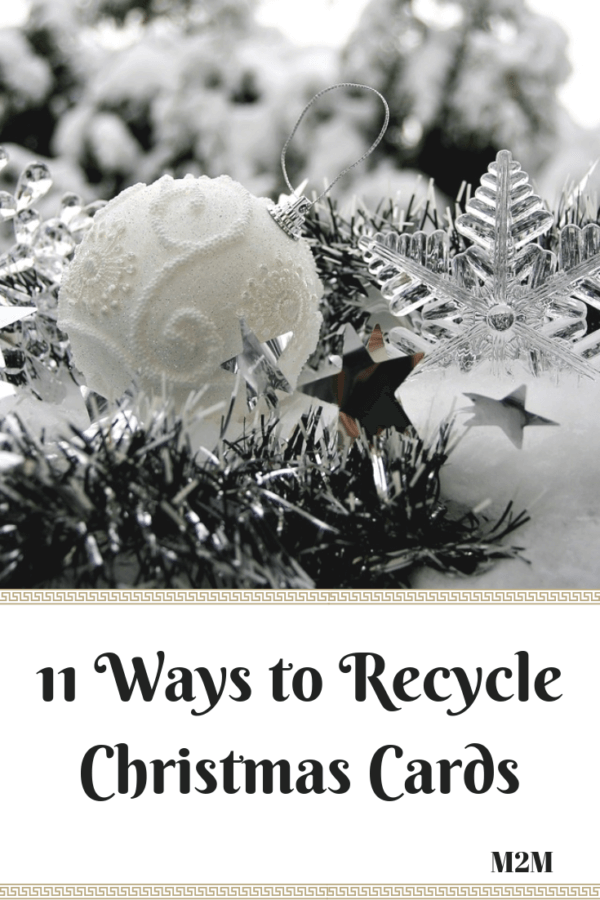
Today I’m sharing parenting tips on ways to recycle Christmas cards.  Year after year we receive beautiful Christmas cards, but we have no idea what to do with them after the holidays.  They’re too beautiful to throw away, so we just place them in a box and store them from year to year.  Christmas is around the corner.  Again, Christmas cards will be arriving in the mail or handed out at the office. Many have beautiful scenery or a picture of Santa.


Christmas Decor


Here’s a list of way to reuse them:

Name Tags –  First, use designs on the card for gift name tags.  Cut out a square from the design on the Christmas card.  Next, Embellish it with To and From lines.

Embellish Gifts Bags – Second, cut out design and embellish gifts wrapped in Kraft or plain colored wrapping paper.

Frame Them – Furthermore, you can frame the cards and make a vignette or wall display.  Pick up a few frames at your local Dollar Store.


recycled Christmas cards


Scrapbook Pages – Use cutouts from the cards to create designs to Christmas scrapbook pages.

Lid Covers for Jars –  Additionally, you can use a large circle punch to create a design for the top of jars.  You can fill the jars with cookies, candy, hot chocolate and more.  Be creative.

Drink Coasters  – Buy ceramic tiles and cover them with designs from


recycled Christmas cards


Design a Wreath – Recycle Christmas cards by making craft items.  Christmas Cards make great wreaths.

Embellish a Fireplace Mantel – So, your mantel is bare.  Display cards along your fire place mantel or shelves.  Add lights or greenery to the mantel to create a festive mood.

Decorate a Door Frame –  Furthermore, when I was growing up, sending Christmas cards to family and friends was a tradition.  One of my favorite childhood memories was seeing the Christmas cards received during the holiday season around the door frames in the house.

Create Jigsaw Puzzles – Also, recycle Christmas cards by creating jigsaw puzzles. I purchased this jigsaw puzzle maker for my scrapbook pages and I love it.

Christmas Ornaments –  Use a circle punch to create designs from the cards.  Next, use a hole punch to make a hole at the top of the circle.   Thread a piece of ribbon through the hole and tie on a tree or tree branches.

Last, we hope you like a few of our recycle ideas and will put them into affect.  Finally, you may also like 7 Christmas Morning Tips You Need.


End of Year Budget Friendly Teachers Gifts


teachers gifts


It is hard to believe that another school year is coming to a close.  My granddaughter will be entering second grade in the fall, and my grandson will be entering six grade.  He was the inspiration for starting this blog, and he will be walking through the doors of junior high.   Where has the time gone.

It’s always nice to thank our teachers for their dedication, and helping our children reach another milestone in their life.

teacher gift ideas

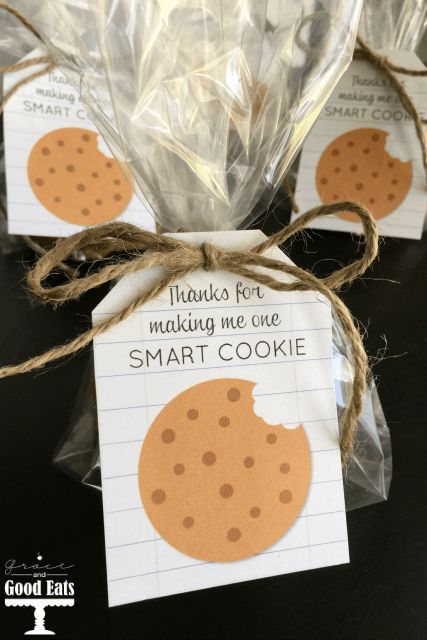
Smart Cookie –  Our first budget friendly teacher’s gifts is cookies.  Who doesn’t love cookies.  You can bake a batch or pick up a half dozen at your local bakery.  Wrap them in cellophane with a cute ribbon and attach this free printable.  You can use twine, colorful baker’s twine or ribbon.  So cute.

teacher gift ideas

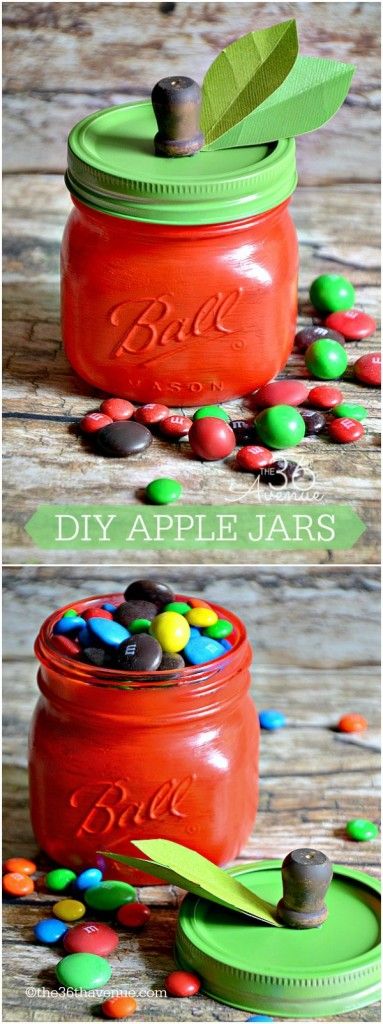
Apple Mason Jars – Second, another one of our favorite budget friendly teachers gifts are anything in an apple theme.  These mason jars are adorable.  Fill them with candy, and pass them to your teachers.

teacher gift ideas

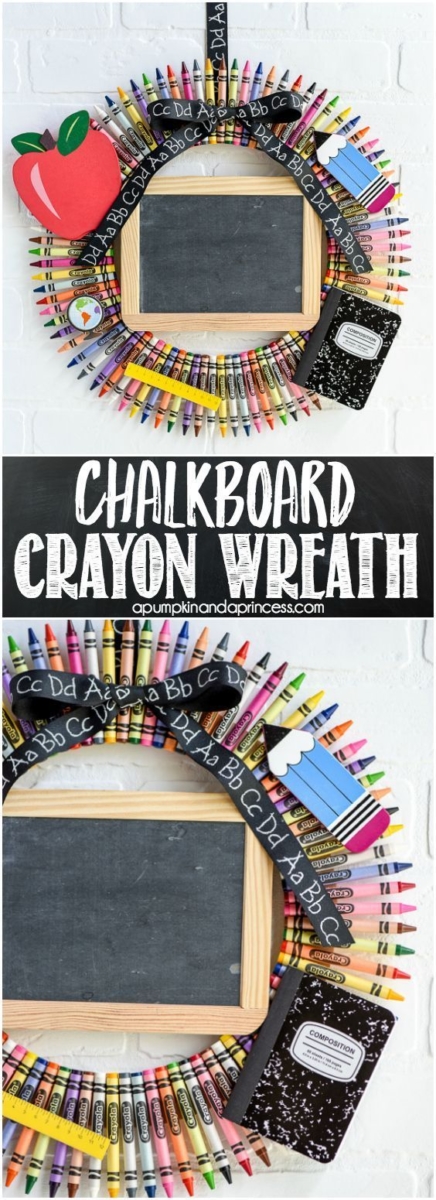
Crayon Wreath – Next, what a cute  idea for a kindergarten or first grade teacher.  You can purchase the wreath form and chalk  board from Michaels.  Add other embellishments, and you will have the perfect gift for a teacher.

teachers gift ideas

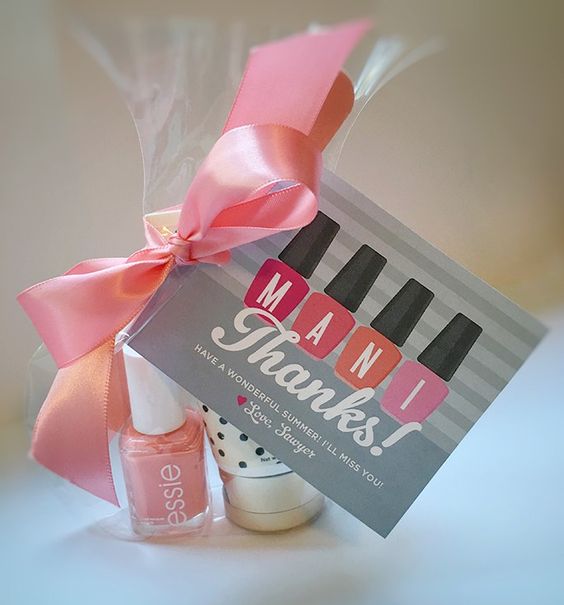
Mani Thanks –    Also, I love this idea.  It’s a perfect gift for someone who has worked with children for most of the year, and now they’re ready to relax.  Home manicures can be relaxing and fun.  I love these colors too.

teacher gift ideas

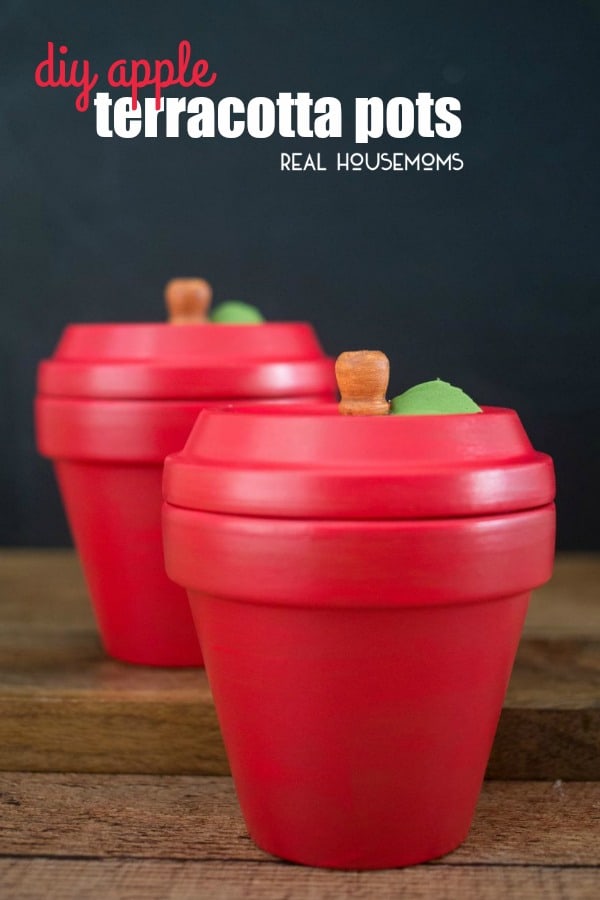
Terra Cotta Apples –   Next, these apple terra cotta pots are adorable.  They’re great for hiding classroom material, and keeping areas neat and organized.  This should definitely go on your budget friendly teachers gifts list.

teachers gift ideas

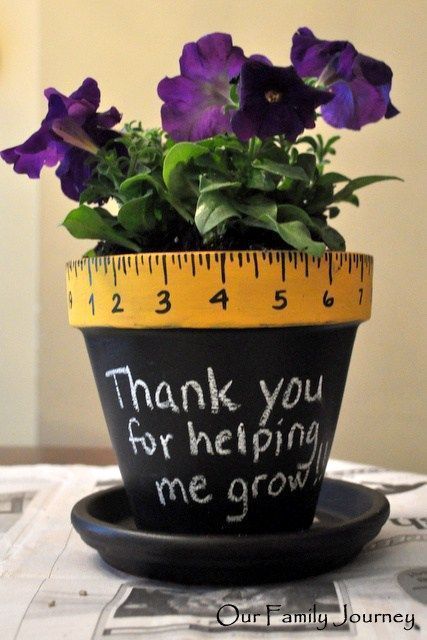
Thank Your for Helping Me Grow –  Unfortunately, I’m receiving a 404 Error for this adorable pot.  Black chalk paint was used for the base, and a yellowish orange for the rim.  Purple petunias were used in the pot.   This is so cute, I just couldn’t leave it off the list.

teachers gift ideas

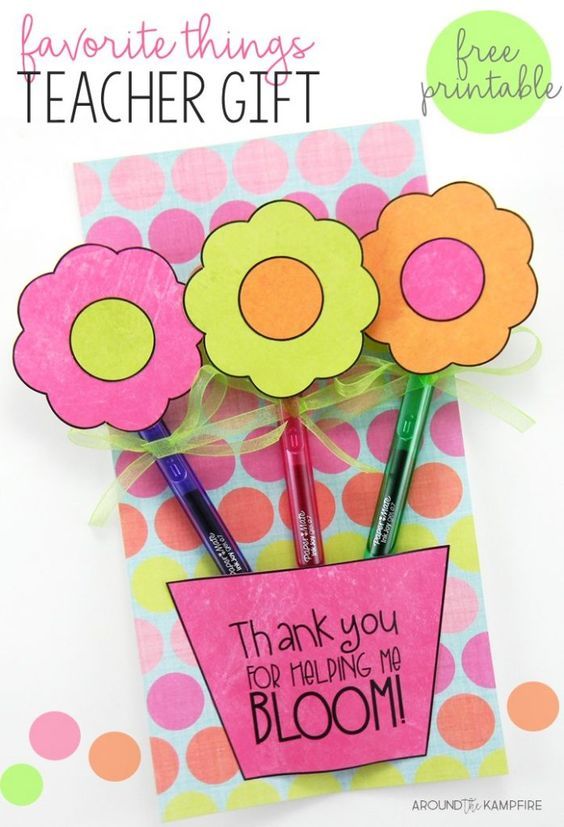
Thank You for Helping Me Bloom – This is a cute idea for a girl’s gift to her teachers.  The post has templates for the printables.

teacher gift ideas


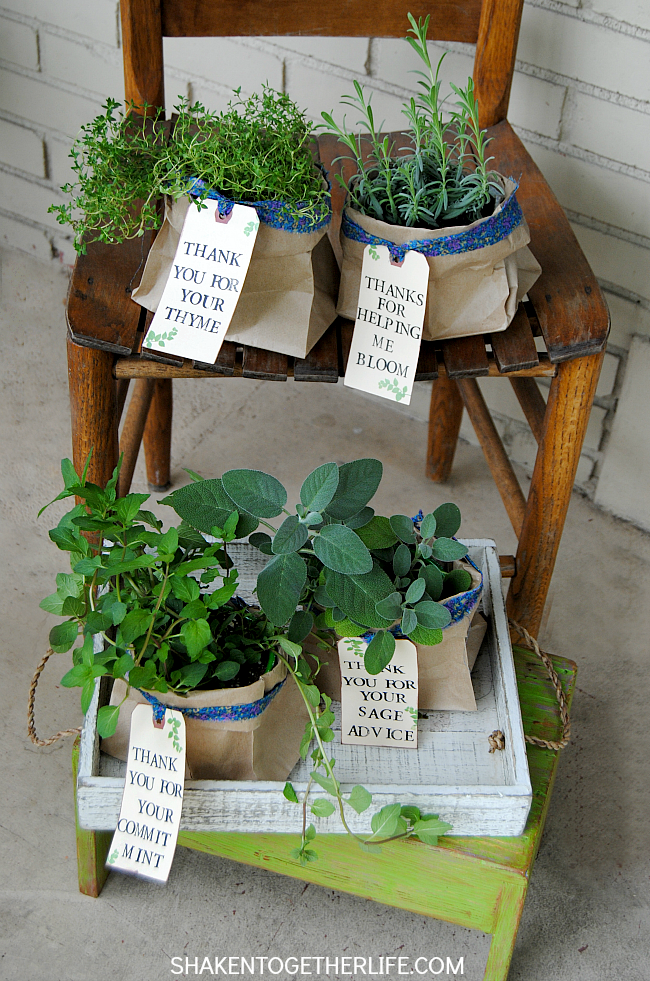
Thanks for Your Thyme – As a gardener, I love plants.  I love the Thyme and Bloom ideas.  This is a perfect idea for older children.


Finally, I hope that y0u will use a few of these ideas to make end of year gifts for your children’s teachers.  They are unappreciated and an underpaid.  I know, I have 3 teachers in my family.  They will love the gift.


17 Kid’s Spring Crafts


kid's spring crafts

craft ideas, spring craft ideas


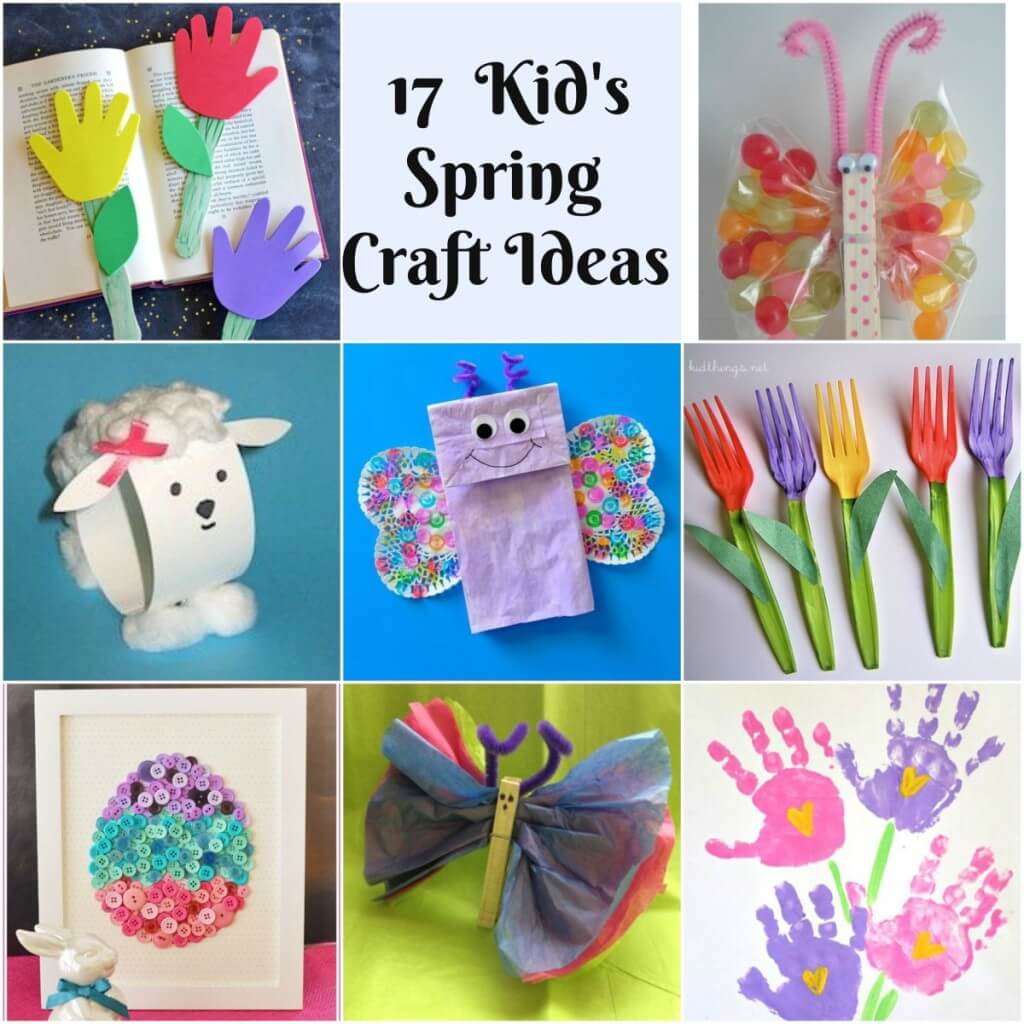
Spring has arrived finally.  Most kids will want to get outside and enjoy the warm weather and fresh air.  However, spring brings rainy days.  All is not lost, rainy days are perfect for doing crafts with the kids.  We have rounded-up 17 kid’s spring crafts to occupy them on rainy days this spring.   Our round up contains crafts for all ages:

Hand Print Book Marks   – This one of my favorite crafts.  The handprints will make perfect mementos for Mother’s Day.  Also, they’re perfect for holding their place in books on their summer reading list.

Butterfly Snack Bag – Next, I think these snack bags are so cute.  I’ve made these for my grandchildren and one of my nieces.  Pretzels and cheese are a favorite and apple slices and grapes make great snacks too.  I actually purchased colored clothes pin, chenille pipe cleaners and wiggly eyes from the dollar store.

Sheep Craft – This adorable sheep is perfect a rainy day.  White card stock and cotton balls are the stars.  Add a little bow and a face and she’s good to go.

Paper Bag Butterfly – Save a few lunch bags for this craft.  In addition to the lunch bags, you will need heart shaped doilies from the Dollar Store and Do A Dot Markers.

Plastic Fork Tulips –  Additionally, these fork tulips are so cute and one of my favorite kid’s crafts.  They would make a great Mother’s Day gift too.  White plastic forks from the dollar store, paint, green construction paper and your creativity is all you need.

DIY Easter Button Egg – This DIY button egg is so cute.  Let the kids pick out the craft buttons in their favorite colors and than start gluing.  The blogger provides an egg template.  Note: This craft calls for a hot glue gun, so it is not recommended for small children unless you will be using craft glue.

Tissue Paper Butterfly – This tissue paper butterfly is budget friendly and easy to make.  Purchase supplies from your local Dollar Tree.

Handprint Bouquet –  This handprint craft is so cute.  Also, this is a great Mother’s Day or birthday gift for grandma, Auntie, a God Mother or a just I love you gift.  I love the pastel colors used in the crafts

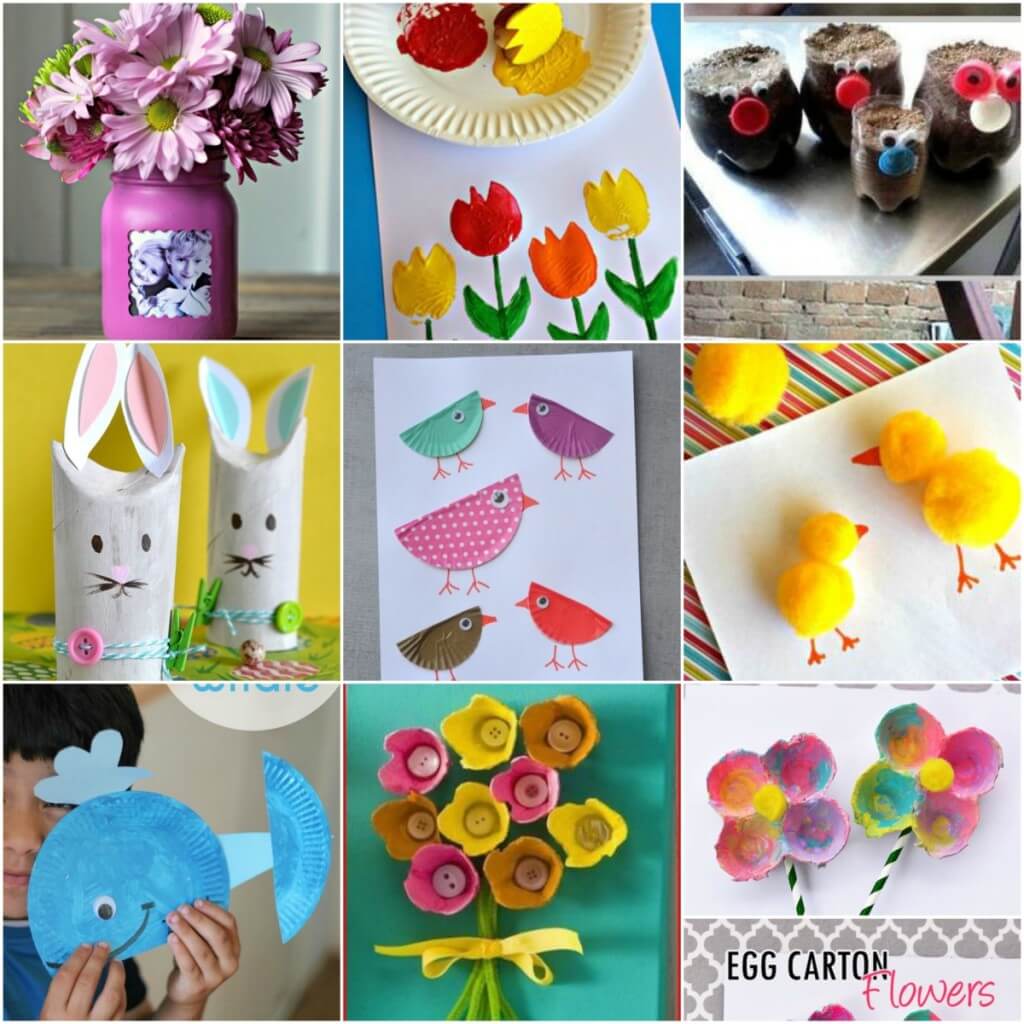
Mason Jar Picture Frame – Mason Jars aren’t just for canning foods.  They’re perfect for drinks and crafts.  This picture vase is a great gift idea for Mother’s day or a birthday gift.  Furthermore, why not paint it red for a Christmas gift.  Use your imagination for the color of the jar.  Also, I’ve seen the frames at the Dollar Store.

Tulip Potato Prints –   So, who knew that potatoes could be used to make beautiful art.  Potatoes were used to make this adorable tulip bouquet.  I’ll be trying this one with my granddaughter for sure.  We’ll be making bouquets for all the ladies in the family.

Plastic Bottle Planters – What a great way to recycle plastic bottles.  It’s also a great way to introduce children to growing plants or flowers.  It could lead them to wanting to plant vegetables and herbs.  Petunias, parsley, marigolds are few suggestions for the planter.

Toilet Paper Roll Bunnies –  Save a few of your toilet paper rolls for this craft.  Add in white paint, construction paper, a black marker and buttons.  Your on your way to making these cute little bunnies.

Cupcake Liner Birds – Cupcake liners are the stars in craft project.  Pick up a pack at your local dollar store.

Pom Pom Chicks – These puffy little pompoms make cute little baby chicks.  They would be great on a card, and with a little help a perfect craft for toddlers.

Paper Plate Whale – This paper plate whale is one of my favorite kid’s spring crafts.  It’s a nice break from the flower bouquets and handprints.  So, sit your so or grandson down and put him to work.  I’m already picturing it on grandma’s refrigerator.

Kid’s Egg Carton Art –  Cardboard egg cartons make great kid’s spring crafts like these beautiful flower bouquets.  Save a few and help your kids make these flower bouquet for grandma or an aunt.  Some paint, chenille pipe cleaners, buttons, and a ribbon can be purchased from the Dollar Tree.

Egg Carton Flowers – Here’s another egg carton craft.  Again, egg cartons are great for gardening and crafts.  Save your cardboard egg cartons to make these cute egg carton flowers.  They will make a perfect Mother’s Day  or any day gift.

Finally, we hope that you like a few of our kid’s spring crafts, and you will spend time on a rainy day making them.


13 Fun and Frugal Christmas Gift Wrap Ideas

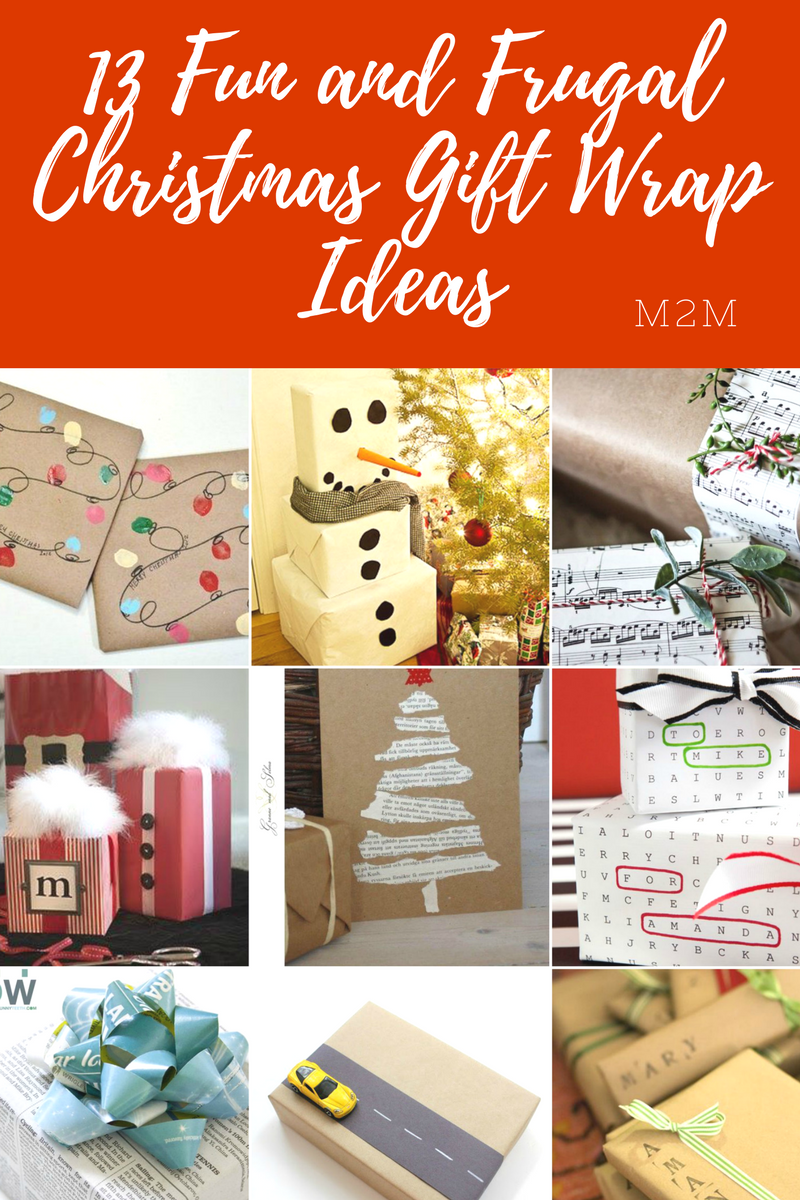
Tired of the same boring gift wrap in stores?  Today, I’m sharing fun and frugal gift wrap ideas.  We have the solution, you just have to choose what you love. We’re sure you can find a few Christmas gift wrap ideas from our suggestions below. Included are a Santa theme, snowman, dried fruits, race car and more. So, grab a cup of coffee or a glass of wine or eggnog and check them out!



Christmas Gift Wrapping Ideas


Check out our Christmas Gift Wrap Ideas:


Christmas Gift Wrap Ideas


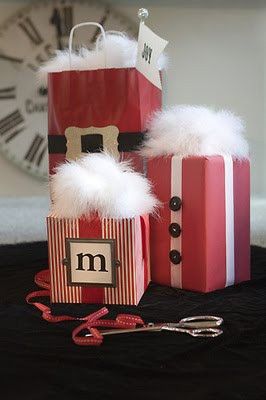
These adorable Santa inspired gift bags and gift boxes say that and more.  Unfortunately, there were no instruction on how to create these.  But, don’t be intimidated.  Get creative!  Plain red wrapping paper and gift bags, faux fur, buttons  and labels.  Hit the craft stores like Michaels and Hobby Lobby.  You can find the accessories there.


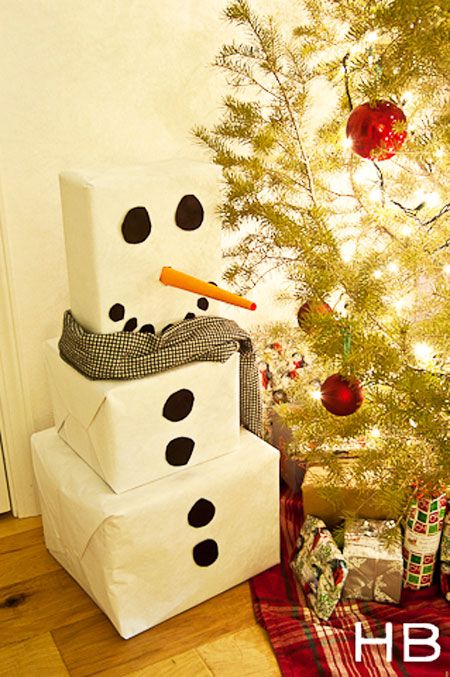
How fun is this frosty the snowman siting by the tree waiting to be opened.   It’s simple, use white craft paper, black and orange construction paper for the buttons and nose. Find a scarf in your closet or the kid’s and you’ll be admiring this guy in no time.


Christmas gift wrap idea

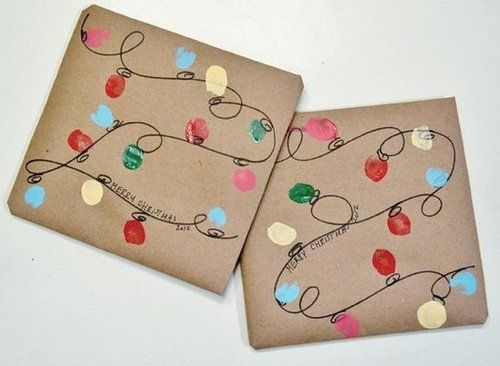
A Christmas gift wrapped in Christmas lights.   What sets this gift wrap apart from the others is the lights made by little ones finger prints.  Also, check out my Kindergarten/First Grade Christmas Lights Crafts.  You’ll need brown Craft Paper, a black marker and washable craft paint.  Make it a family project.


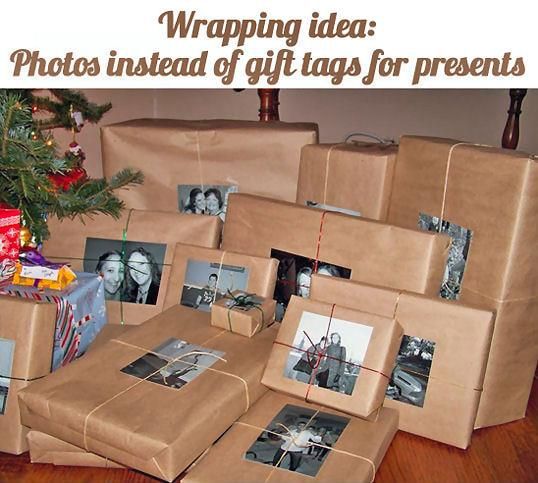
I love this idea.  Instead of using gift tags, use one of your favorite photos of the gift recipients.  Brown Craft Paper, twine/string and a great photo is all that is needed.


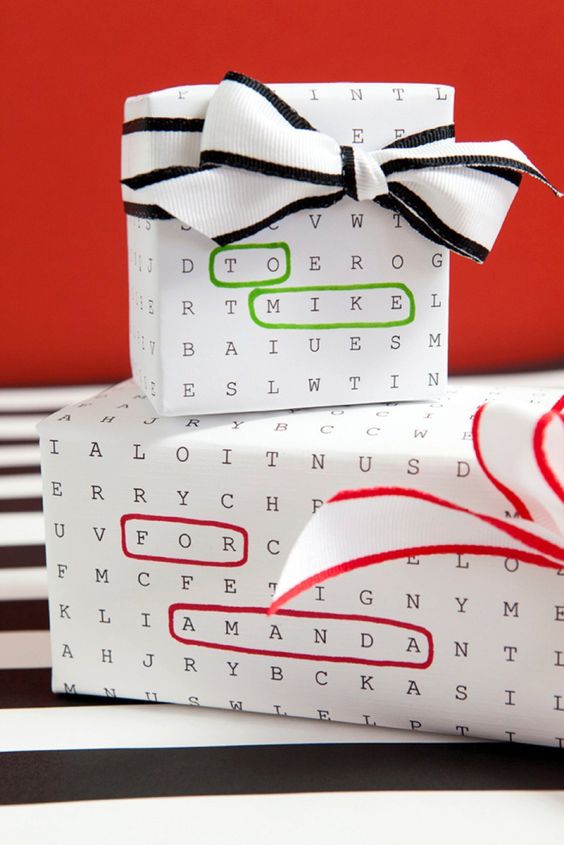
Word Search gift wrap.  I love word search puzzles.  I even have my grandson hooked on them.  This idea is perfect for small gift boxes.  You create the word search puzzle and than print it on 12 by 12 paper.  Find the words that you want to highlight and than wrap your gift.  Merry Christmas baby!


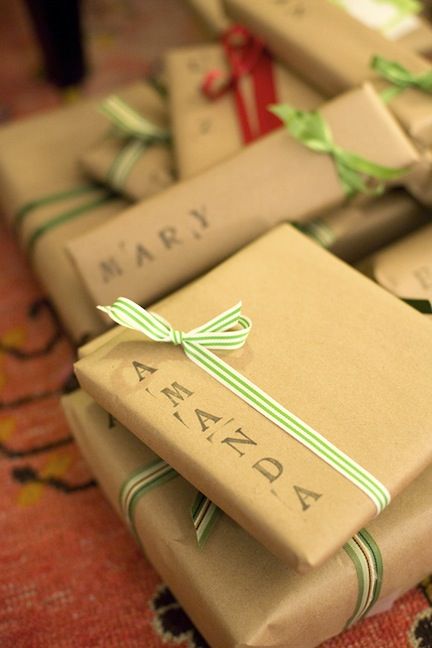
Brown Craft Paper seems to be the way to go with gift wrap.  It’s inexpensive and can go a long way when wrapping gifts.  Personalize it with stenciled names on the gifts and a ribbon.  You can find stencils here.  Unfortunately, I was unable to find the original post on this idea.  The idea was picked up on Pinterest.


Christmas gift wrap ideas


I love to stencil.  So, I thought stenciling a Christmas design on brown Craft Paper would be fun.  It adds a perfection touch to brown background.  Many craft stores have Christmas stencils, brushes/sponges and paint.  Get creative.  You can do the ornaments as shown, reindeer, or whatever suits you.  Check these Christmas stencils too. However, I would stay with the white paint.  It looks amazing on the craft paper.  You can find the paint and stencil brushes at Michaels or other craft stores.


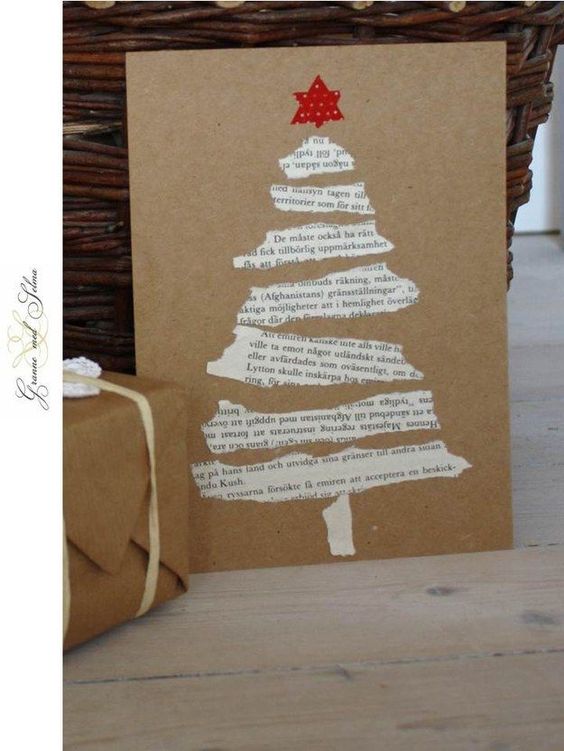
A Newspaper Christmas on gift wrapped in brown Craft Paper or any plain colored wrapping paper will work.  Simple, but makes a statement.  If you’re not the greatest artist, purchase stars from your local craft store.  Another idea, print The Night Before Christmas poem and make the tree from it.


Christmas gift wrap ideas


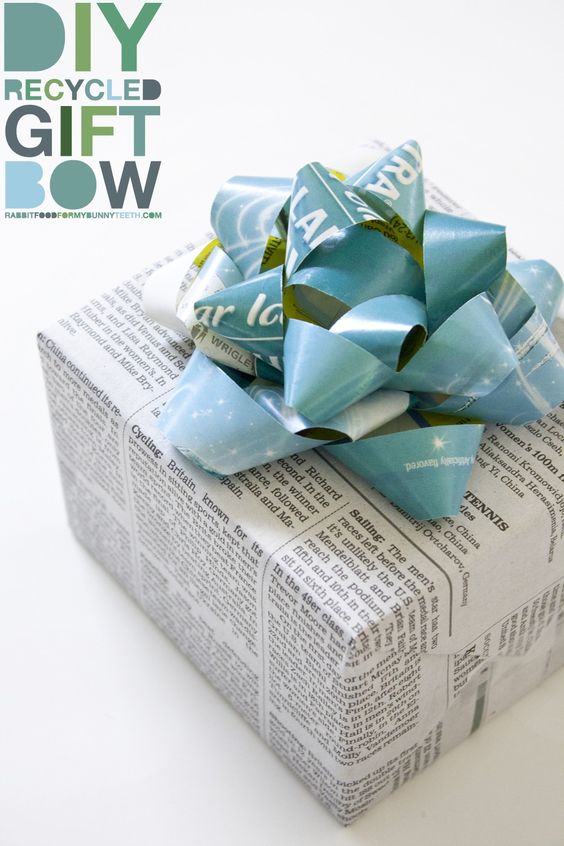
I love recycling old things.  Wrapping a gift in newspaper is something that I would do.  Somewhere doing my browsing a blogger suggested that if you have a sports fan use the sports section.  There’s the comics, style, real estate and the ideas go on.  Finish it with a nice bow.


Christmas Gift Wrap Ideas


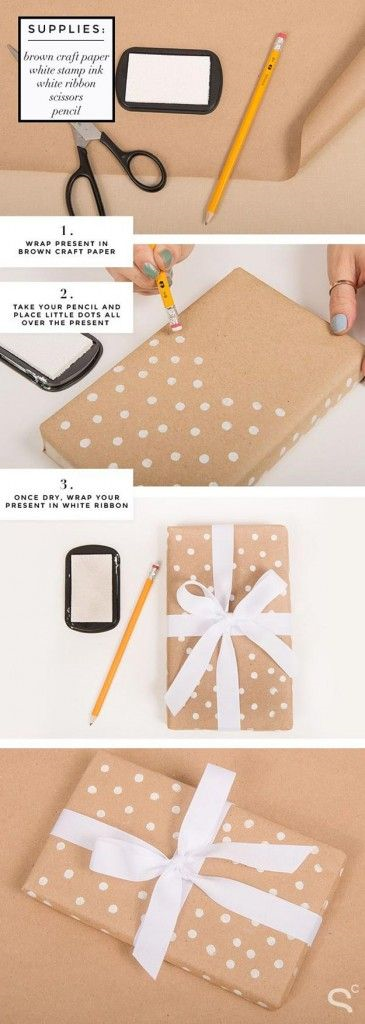
Also, Polka dot gift wrap is what’s happening here.  Brown Craft Paper, white ink pad and pencil with a clean eraser.  Finish the gift with a bow.  You can also do a Let it Snow theme.  Don’t cover the gift entire with the dots.  I would place them a various degrees to make it look their the dots are falling.


Christmas Gift Wrap Ideas


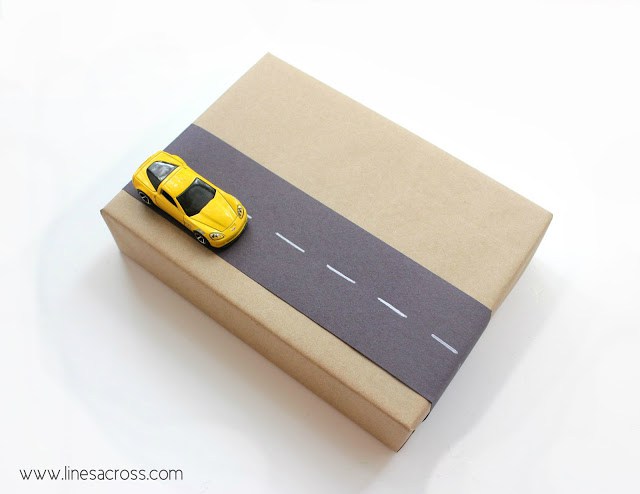
Next, I thought this gift wrap was a perfect idea for the race car lover.  My grandson loves Hot Wheels and still does.  He’s 10. Wrap the gift with brown gift wrap, use black construction paper for the track and a white paint pen for the road markings.  The Dollar Tree, Dollar General and/or Big Lots has a nice selection of Hot Wheels that won’t break the bank.  So, get creative!


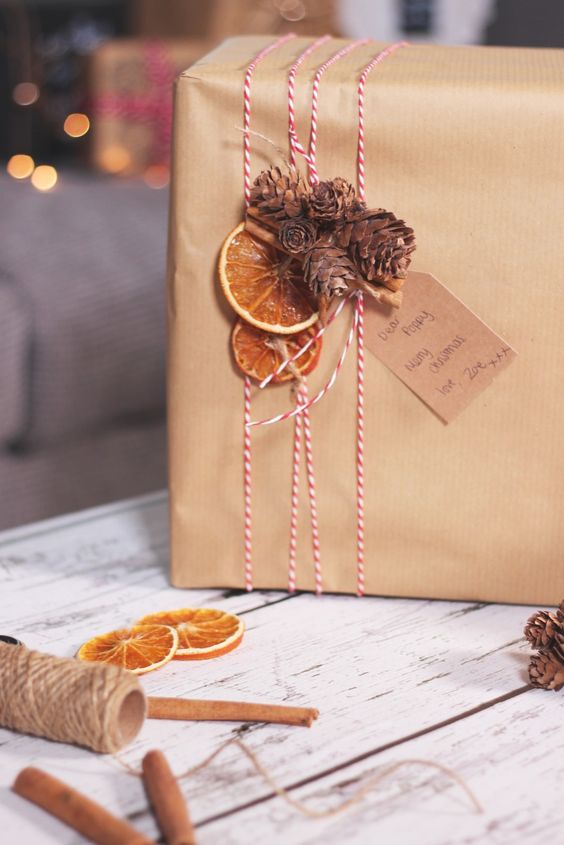
Furthermore, using dried fruits on gift wrapped boxes is a great idea.  This blogger used dried oranges, but apple slices would work too.  Check out my post on drying orange slices here.  You can add cinnamon sticks and/or miniature pinecones.  Most importantly, a glue gun should be your friend for this project.  You will want your fruit and other accessories to stay on the gift.


Christmas Gift Wrap Ideas


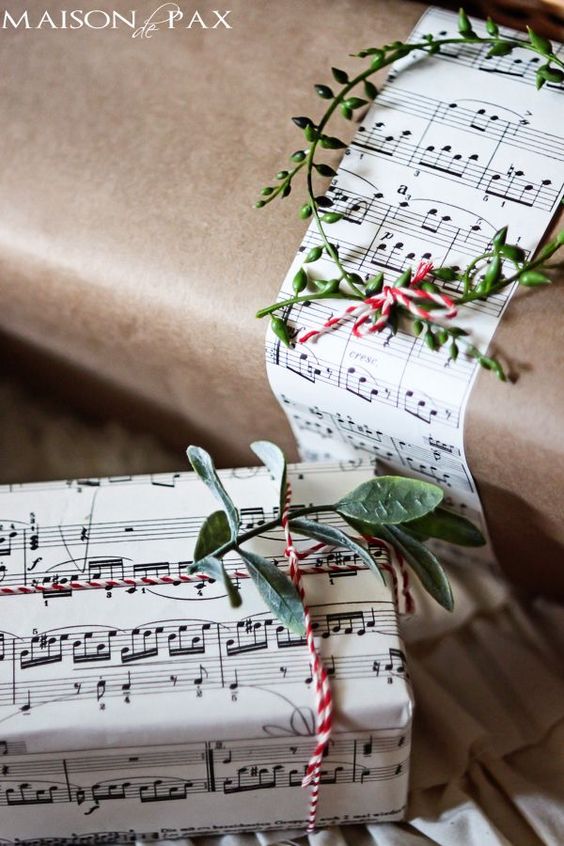
Last, this is one of my favorite gift wraps.  Wrapping gifts in sheet music.  Get creative, this blogger used a full sheet of music to wrap gifts as well as strips of the music sheet.  Furthermore, google free sheet music or check your local music store for a deal. Finish it with a bow, string or greenery from your local Dollar Store.

So, we hope that you found a few Christmas gift wrap ideas that have inspired you.  You may also like 15 Festive Christmas Cookie Ideas.

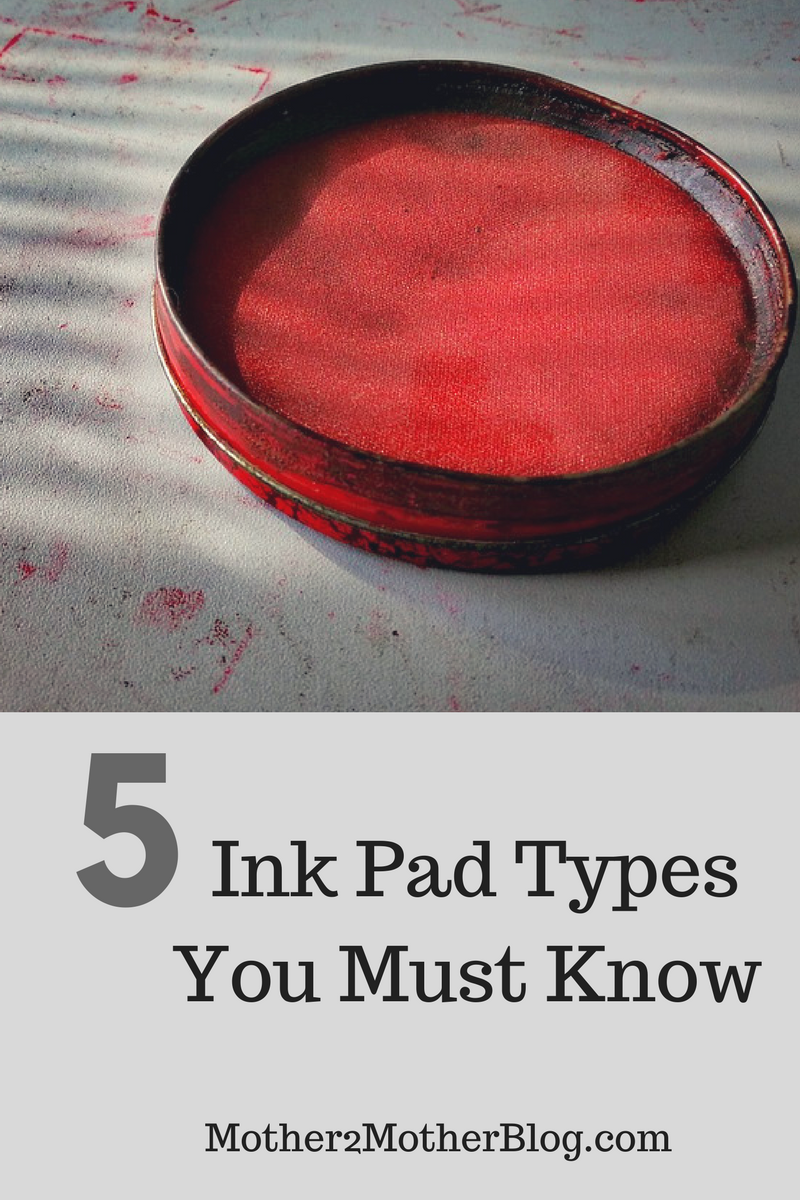
5 Ink Pad Types You Must Know About


ink pads

If you’re a crafty mom, chances are you’ve got a few rubber stamps in your craft box. Stamps are a fun and easy way to liven up a scrapbook page or to make your own unique clothing. But, stamps will never live up to their full potential if you’re not using the right stamp ink pads.

There is more to ink pads than what meets the eye.  For example, ink pads can be purchased in dozens of colors and varieties. There’s also certain ink that’s meant for certain fabrics.  Furthermore, are you wondering which stamp ink pads for rubber stamps are best for your project?  If so, below is everything you need to know about stamp ink pads.

1. Pigment Ink Pads

Pigment ink pads are dye-free. Instead, they use solid pigmentation in a glycerin base. These ink pads are thicker bodied and more vibrant compared to dye ink pads. These ink pads are similar to paint. Instead of soaking into the surface, the ink dries on top of the surface. This keeps the color opaque and strong.  The best part of using pigment ink pads is that the color doesn’t fade and the creation will last for years to come.

However, Pigment Ink takes longer to dry.  But, the wait is well worth it. To ensure you achieve the look you’re seeking, avoid using this type of ink on glossy paper.  Also, materials such as metal and plastic require the ink to be set using heat. This minimizes the risk of smearing and smudging.  For extra fun, use pigment ink with an embossing powder!

2. Dye Ink Pads

These ink pads are most commonly used with rubber stamp creations. They’re inexpensive and can be used on all sorts of paper. You can find dye ink pads in a wide variety of colors.

There are several options with dye ink pads including:

● Water-based
● Waterproof dye
● Distressing inks
● Alcohol inks

Dye ink pads tend to produce transparent colors. When stamped, lighter colors are pastel and subtle. On the other hand, darker colors usually turn out bright and vivid. To get the best stamping effect, don’t use dye ink pads on glossy, coated or non-porous surfaces. The dye won’t dry and is more prone to smudging.

3. Chalk Inks

Ever wanted to achieve a soft look while using ink? Looking to create a design that looks as if it’s a chalk creation? If so, chalk inks are your dream option.  Chalk inks provide a chalk-like look without the hassle of dust and offers a sophisticated look.  Stamping using chalk ink looks best on dark paper. The dramatic contrast between a matte ink and a dark background are striking!

Chalk ink is also great to use for creating background for scrapbook pages and even stationary. Benefits of using this type of ink include:

● High absorbency
● Can be used on a variety of surfaces
● Doesn’t bleed, fade, or smear

Similar to pigment inks, chalk inks are long-lasting. This means you can enjoy your creations for years to come!

4. Specialty Ink Pads

Specialty inks are suitable for stamping on most materials including metal, plastic, wood, glass, paper, and even leather. Also, Specialty Ink on washable fabrics will fade.

Do you want to faux stained-glass windows? If so, a specialty ink is just what you need. On clear surfaces, this ink looks just like stained glass!

Specialty inks are also great for making outlines. The ink dries in less than 5 minutes. Paints and markers work well with this type of ink.  Specialty Inks can be found in opaque dark, opaque pastel, and even metallic colors.

5. Spectrum Ink Pads

Spectrum ink pads offer many colors in one pad. You’ll find that some pads separate the colors in different compartments to avoid bleeding. But, others are housed in the same ink pad which allows for smooth color transitions. Spectrum ink pads aren’t as long lasting as others. Spectrum Ink Pad need to be re-inked more often because colors can become muddy.  Especially, lighter colors.

Spectrum Ink Pads can be purchased as water-based, chalk inks, and even pigment inks. Use these ink pads to create gradient designs for scrapbook pages, shirts, customized stationary, and much more. Spectrum ink is also great to use as a basis for a color palette for any of your designs.

Conclusion

Walking into the stamping aisle in the local craft store can be overwhelming, but now you’ll know exactly the ink pad you need for your stamping project!  So, go ahead, leave your mark!  What ink pads do you prefer to use? What stamping project are you most proud of? Share your creations in the comments!

Penny Embellished Picture Frame

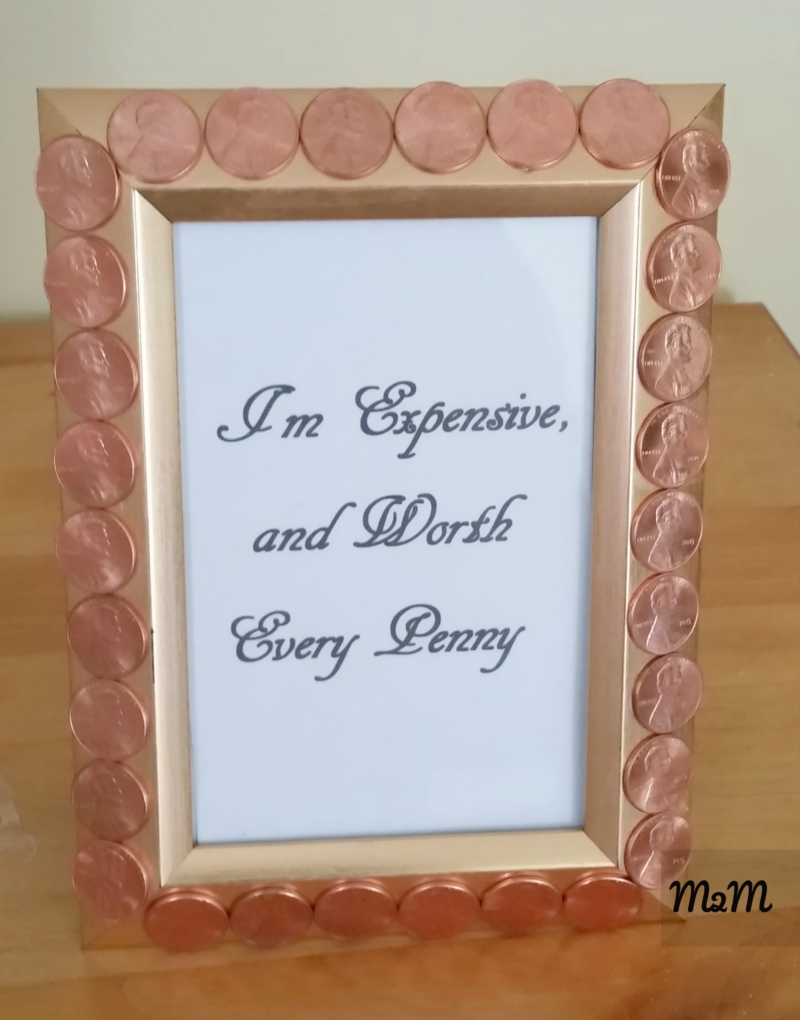
penny embellished frame

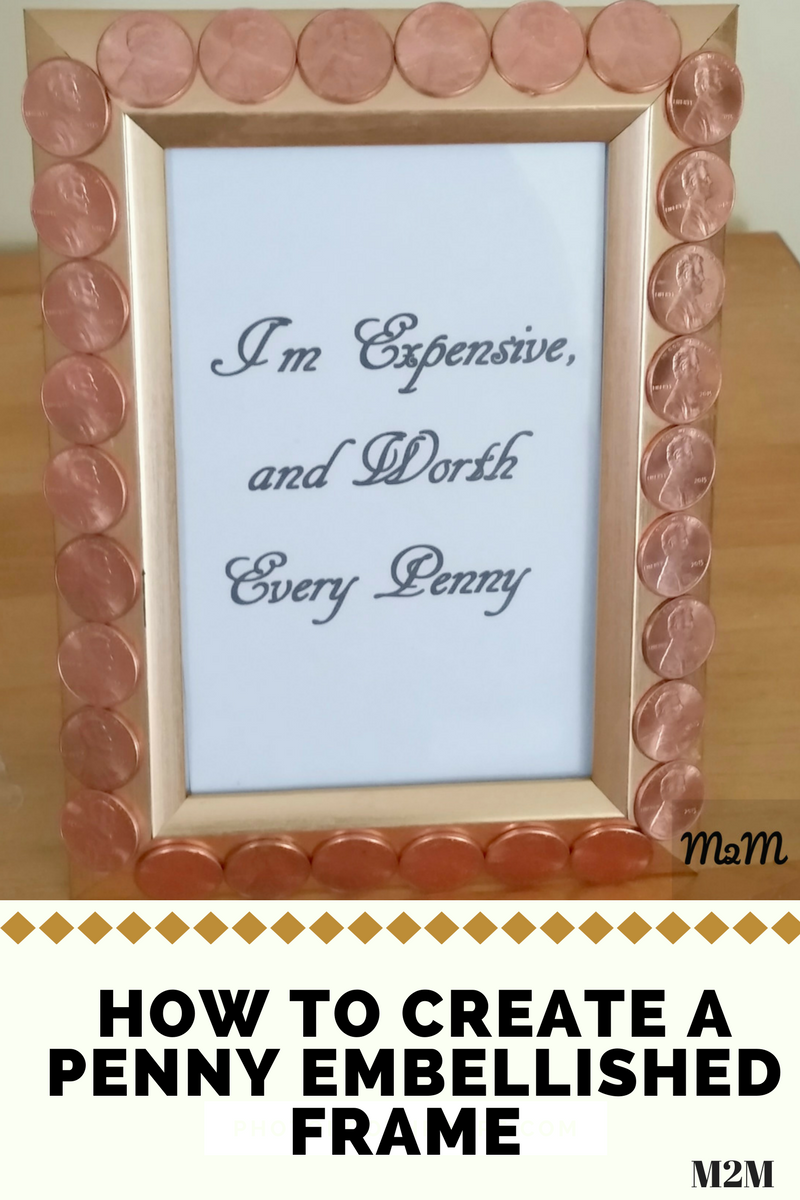
Looking for a unique gift for a friend.  Try making this penny embellished picture frame.  You can use it to frame a picture or a printable.  It’s unique and budget friendly too.  So, pick up a gold frame from the Dollar Tree or your favorite dollar store, and let the fun begin.

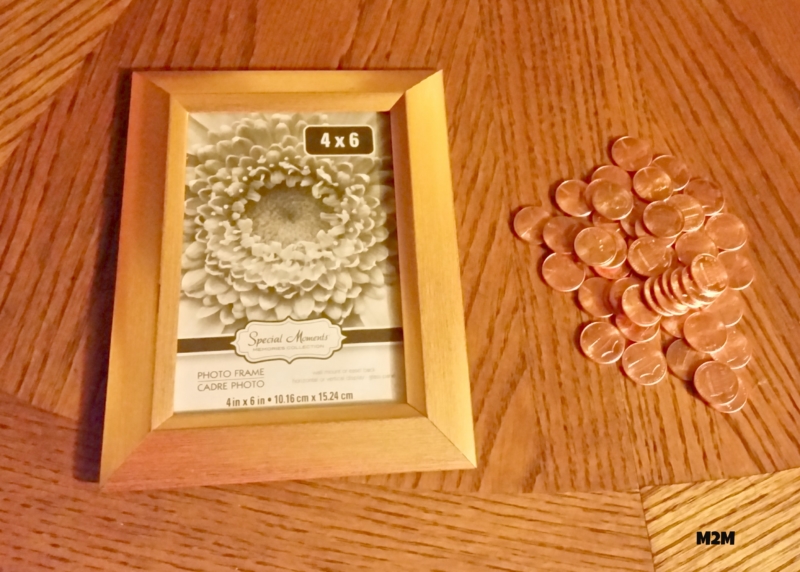
You will need the following items:

  • Gold Frame (I used a 4 x 6)
  • Glue gun
  • New pennies
  • Wet cloth


A 4 x 6 frame uses approximately 32 pennies.  The size of your frame will determine the number of pennies needed. I started at the bottom and moved around the frame.  Ensure the pennies are heads up and fairly new.  After all, if you will be giving it as a gift you want the frame to shine.

First, remove the paper from the picture frame and replace it with one of the quotes. You will one to complete this step first.  Trying to insert your quote after the pennies have been glued to the frame can be difficult.  The pennies have a tendencies to fall off if you place the frame face down.

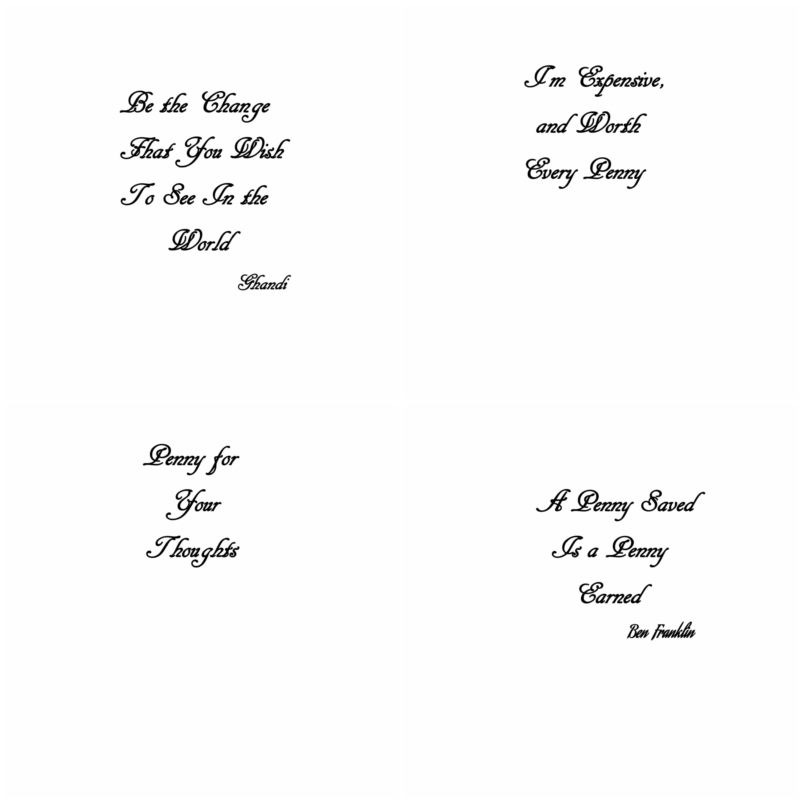
Check out our quotes and feel free to download one for your frame.  I didn’t include a border because I didn’t want to distract from the frame once the quote was added.  Sometimes less is more.

penny quotes


Place a dab of glue on the back of each penny, and press it on the frame.  I found that the hot glue held the pennies in place better than the Elmer’s glue.  If your children will be working on the frame, Elmer’s glue may be better.

However, don’t place a large amount of glue on the pennies.  Pressure will cause the glue to spread, so you don’t want an excessive amount on the pennies.  Position the penny on the frame.  Wipe any glue mishaps before it dries.  Cover the entire frame with pennies.

penny embellished frame


Last, once the pennies have been added, allow the frame to set overnight to ensure the pennies are not disturbed.  We hope you like our embellished picture frame.  Finally, use your penny stash and a dollar frame to create this awesome gift.

How to Make a Poster Using Adobe Spark


crafts


Do you want to make a beautiful poster for an upcoming event or for your business?   Posters are a great way to get people talking.  Whether you want to make a handout or just something to post on social media, you want to be able to make a poster that is eye-catching and informative.  This doesn’t have to be as difficult.  Adobe Spark is the solution to your poster problem.  Read on so you learn how to create posters.  The program is easy to use and has great benefits. To get started, ask the following questions:

Posters are a great way to get people talking

Whether you want to make a handout or or just something to post on social media, you want to be able to make a poster that is eye-catching and informative.  Luckily, this doesn’t have to be as difficult.  Just ask the following questions:

What size do you need?

All posters are not created equal.  The size of your poster will depend on how you’re distributing it. Different websites have different post sizes, and your poster will have to be the right size to be seen in full resolution.  Keeping all of that information straight can be difficult, but there are easy and free ways to manage that.  There are often premade templates for printing or for various social media platforms like Instagram, Facebook, and Twitter.  You can usually create custom sizes, too.  So regardless of how you want to use your poster, you can do it with ease.

How do you want the poster to look?

What is your event?  You wouldn’t want to market a business event with childish graphics or playful fonts. And you wouldn’t want to promote a wedding with dark colors or serious text.  There are plenty of rules when it comes to graphic design. But trying to figure out things like color schemes and font palettes can be difficult if you don’t have experience.  There are some paid programs that will offer templates for you to use. And there are even some free programs that will give you professional designs.  With these easy to edit templates, you can make a poster without having to worry about having a degree in graphic design.

What’s the best content?

Figuring out what needs to go on your poster is important. Depending on what your poster is for, it can have almost anything on it. When using templates, it’s even easier to input your text. These templates might even give you hints as to what can go where on your poster.  Adobe Spark also makes it easy to upload images from anywhere, including Dropbox. But you can also pull pictures from Facebook or even your own computer. It also offers a wide range of photos for your use.

How are you going to distribute it?

Making your poster is only the first step. You can download your finished poster as a file to your computer. This will allow you to add it as an attachment to an email.  You can also print it directly so that you can hand it out in person.  You can also share on social media.

I hope our tips on how to create a poster was helpful. Posters are great for advertising yard sales, bake sales, fundraisers or charity events, you name it.

14 Places to Score Cheap Sewing Supplies

Like anything else, your hobby is dependent on a budget. Not many people out there can spend as they please on their hobbies.  And therefore saving on your sewing stash is not a bad idea.  Don’t we all want to get more for our money?
Most needlecraft aficionados prefer their sewing rooms fully stocked.  However, this usually means having more than they would ever need.  After all, who wants to run out of thread or fabric in the middle of an exciting project?  Hobbies are supposed to relieve stress not cause frustration.  And I don’t know about you, but I jump at the chance of getting more for less! A dream stash of just about everything you need is certainly not as farfetched as you would have thought.

Another good thing about finding affordable supplies on sale is to be able to test out the quality of a new brand. Finding an item for less brings excitement.  Or if you have been wondering about a product, but leery about forking out the full amount puts you at an advantage.

Just be careful of buying things that may be old, especially thread. It’s very important to always buy the best quality thread, as older means weaker. That would just defeat the purpose of sewing in a big way!

To help you save money, Wunderlabel team lists 14 places where you can score cheap sewing supplies:


In guiding you through your journey to economical choices for your stitchery stockpile, we got creative and frugal at the same time. We hope you have found our list of places to score cheap sewing supplies beneficial.  Go on, you know you want to get a head start!

Kindergarten Christmas Craft: Christmas Lights

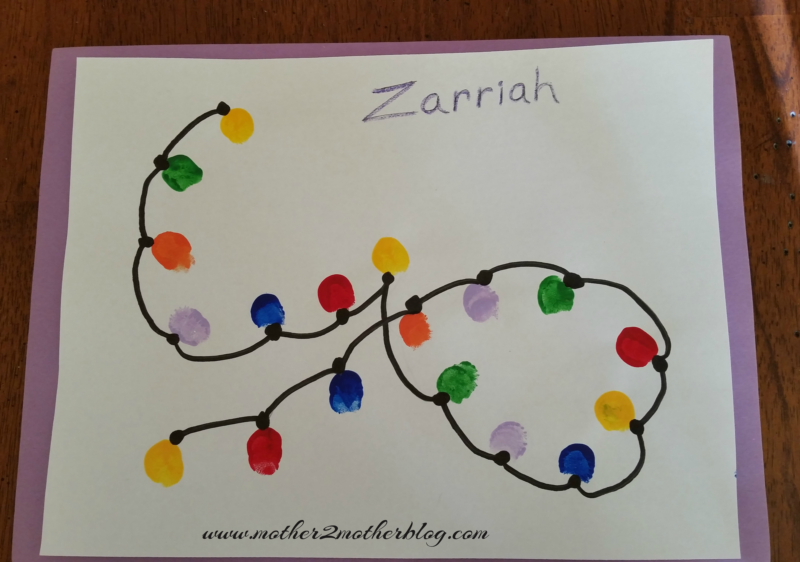
Today, I’m sharing parenting tips on Kindergarten Christmas Craft ideas.  This finger print Christmas lights artwork is sure to be a hit.  The project is easy, fun and messy, which your child will love, with a bright and colorful end.  It’s the perfect way to capture memories of those precious little fingers. Tis the season and Fa La La La!  So, lets get those little ones in the holiday spirit.


kindergarten Christmas craft


Kindergarten Christmas Crafts


Here’s what you will need:

  • Washable paints of various colors  (I purchased mine from Michaels).
  • black marker to make the dots on the lights and wire
  • wet paper towels or a towel for cleaning messy fingers
  • White cardstock


Be sure to have plenty of wet paper towels or an old wet cloth on hand.  You will want to wipe the child’s fingers before dipping them in the next shade of paint.  Lets get this project started:

  1. – Dust off those adorable little fingers.
  2. – Next, have the children dip their index finger(s) into the paint.
  3. – Press their index finger onto the white paper.
  4. – Repeat Step 3 until you have a string of lights  as shown.
  5. – Be sure to allow the paint to dry thoroughly before you proceed.
  6. – Make dots on each of the lights with the black marker.  (Place several places of paper under your sheet before you use the black marker to avoid bleeding on your table or work area.)  Unfortunately, I learned this lesson the hard way.
  7. – Use a pencil and lightly draw a curved line to connect the dots.  Also, write the child’s name on the paper.  Allow them to trace it with a crayon.
  8. – If you have older children allow them to trace the curved lines with the black marker.  Otherwise, you can complete the project or help the smaller children with this step.

We hope you enjoy this colorful kindergarten Christmas craft.   You may also like our Kindergarten Christmas Tree Card.