Ideas for Large Backyards With Small Budgets

Today, I’m sharing gardening tips on ideas for large backyards.  Having a larger garden can be excellent. Not only will you be able to have a larger outdoor space to fully enjoy, you’ll have a chance to add animals, spend time with family, grow crops, and be more self-sufficient with your outdoor space. You can have fun with a large garden, though maintaining it may seem like the hardest thing that you could possibly do! 

A large garden gives you space to have a barbecue area, a patio, even a play area for your children.  You can even hire someone with AKRS Equipment to help keep it running smoothly if you have extensive acreage which is farmland.


  • ideas for large backyards


When you have a large backyard, you have lots of ways to use your space and and increase the value of your home. Maintaining a large backyard so that it stays looking good and healthy is important, and here’s how you can do it.


Ideas for Large Backyards: 


  • Use the right tools –  The larger your garden is, the more tools you’ll need to maintain it. You may need to look at things like tractors and large trailers.  You will need them to help you to clear some of the fields. The right equipment is a must.  For example, a riding mower will be a necessity too.  And, a wagon to haul compost and garden soil to various areas on your property should be added to your list.   
  • Establish a Routine – Your garden will constantly need upkeep.  You will need to mow the lawn, tend to plants and flowers, and clean up any mess at all times.  You will need to be able to maintain the interior of your home as well.  As a result, you won’t be able to get every single thing done in one day.  So, make sure that you get into a routine of keeping up with all of the clearing and keeping the place healthy. 


ideas for large backyards


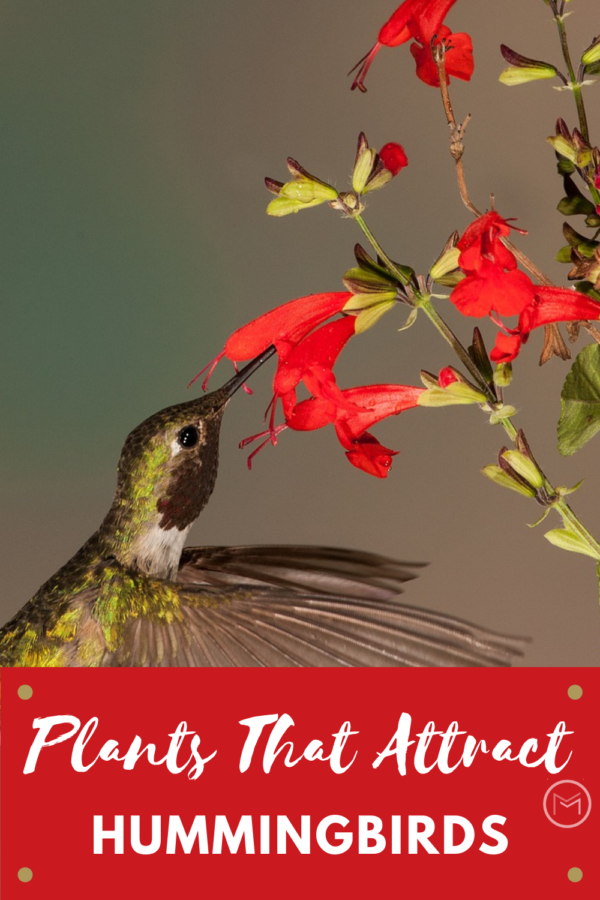
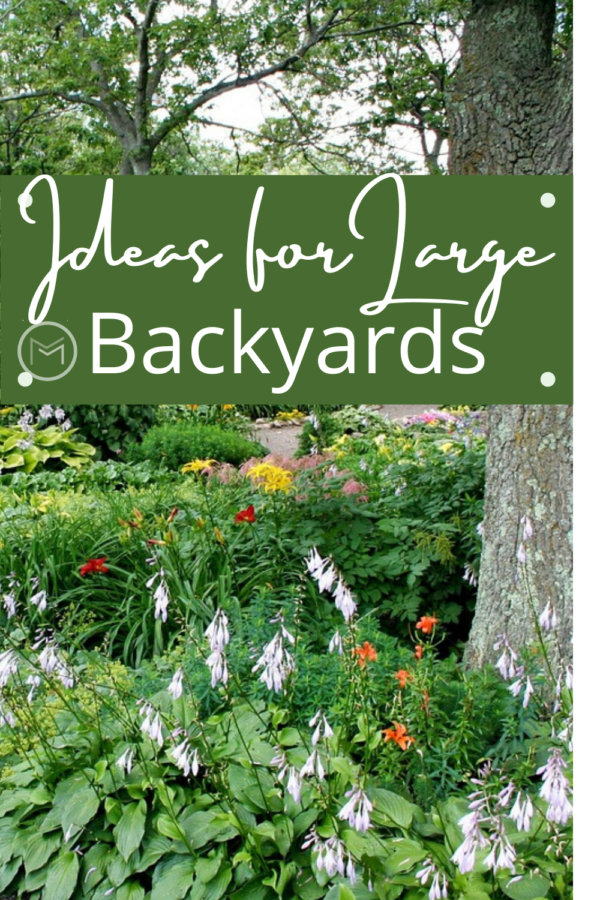
  • Feature the Wild and Native Plants – If you have wildflowers or native bushes and plants growing on your property, make a beautiful garden where you can feature them. Keep large shrubs and trees trimmed and the area tidy.  They can become conversation pieces. 
  • Add Path Ways – A large garden is much easier to maintain when you add paving and paths to the space. It add way to stroll the property and admire the flowers and plants in the gardens and borders.  It also makes watering much easier.  
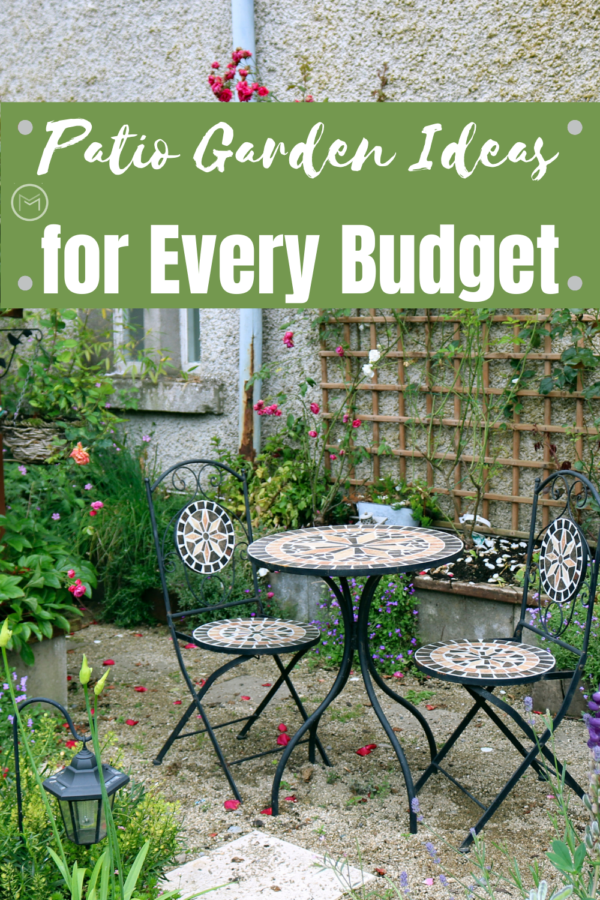
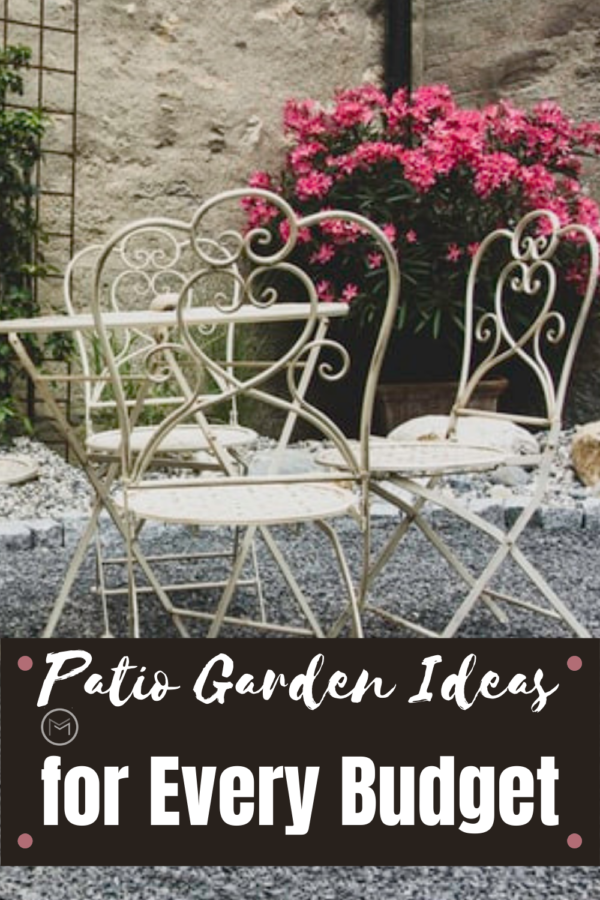
  • Weatherproof Benches and Seating – There will be some areas of the garden that require you to weatherproof it. For example, wooden benches, tables and chairs need to be protected from the weather.  


A large garden is going to take some time to install.  Call for assistance if you get too far behind in maintaining your property.  Solicit family, friends and other gardeners to help install and maintain your property if needed.  

Garden Patio Ideas for Every Budget

Today, I’m sharing gardening tips on garden patio ideas.  If you have been thinking about remodeling your garden,  you may be worried about how much it’s going to cost.  Remodeling your garden patio can make it look fresh and more appealing to you and your guests.

However, remodeling can get expensive if you are not careful. Thankfully, there are a few ways in which you can reduce the cost.  Here is a look at some of the best garden patio ideas for every budget.  


garden patio ideas


Garden Patio Ideas for Every Budget


Renovate Instead of Removing

It can be tempting to remove everything in your current landscape and purchase everything new.  However, this is something that should be avoided if you want to operate within your budget. 

Instead repurpose what you have.  Repurposing what you have will save money and cut down on the cost of your renovationYou’ll be amazed at how you can transform your garden patio with what you have.  


Add Fresh Mulch to Patio Garden Beds

So, get out your spade or half moon edger and give your garden beds a fresh outline.  Work within the natural contours of your garden.

If your soil is eroding, that’s a sign you need to add crushed stone, wood chips or shredded mulch to your beds.  Adding mulch will help stabilize the soil in your garden, and maintain a healthy moisture level for your plants.  Furthermore, it will help keep weeds down and reduce the amount of work you spend weeding.

Check with your local recycling center.  Many centers give away free mulch throughout the summer.  


Refresh Flower Garden Beds   

Consider adding more flowers to your garden to enhance its look.  Adding more flowers with beautiful colors, height and texture will bring your garden to life. 

I recommend that you join a plant or flower swap group.  It’s a great way to meet other gardeners, exchange flowers and plants and get ideas. You may have too much of one flower while another gardener has too much of another. Making an exchange is a great way to revamp your garden beds without spending a penny.  

Furthermore, many share photos of their garden space, which will give you ideas for your patio garden space.  


Build Affordable Pathways

If you want to add stone or brick pavements to your garden, but those materials are out of your budget range don’t give up on your dream make over.  

Check with different landscaping companies to see if you can still carve out the pathway by using another material.  Check out the prices for pea gravel, shell or stepping stones as a placeholder. This is often a good substitute until you can afford to buy stone pavers or bricks to make the pathway look finished. 


garden patio ideas


Mix and Match Patio Garden Furnishings

If you want to create a cozy nook in your garden where you can sit and relax but you don’t have the money to buy new furniture, consider getting second-hand furniture that you can mix and match. 

If you do it right you will end up with something that looks unique and interesting. Be on the lookout for vintage pieces that you can remodel yourself as a DIY project.


Shop Yard Sales and Thrift Stores for Garden Patio Makeovers

Shop yard sales and thrift stores for new planters, a bench, pillows and accessories like candles or glazing balls to display.  Old crates, side tables, bistro sets and bright cushions can really bring your patio to life.  A can of paint and new fabric will make your garden patio area pop. 


Embrace the garden patio ideas above, and get creative.  When you are remodeling your garden on a budget the best thing you can do is to work with what you already have and shop wisely. It’s a great way to make your garden beautiful without breaking the bank.

Repelling Dogs From Your Garden

Today, I’m sharing gardening tips on repelling dogs from your garden.  A pet can make your life easier. They are a part of most families, and they not only provide companionship, but can improve your social life, provide emotional support, and reduce blood pressure, anxiety and depression.

Even so, owning a pet has its fair share of the downside. Taking care of one is time-consuming; some pet foods are pretty expensive, you have to take regular trips to the veterinarian, and it can be dangerous if you have an infant.

If you own a garden, you know how strenuous it can be to protect your seedlings and other plants from your pets. Your dog could be digging up your carrots while the neighbor’s cat is using your flower garden as a litter box. 

Fortunately, there are ways to pet-proof your garden to protect it from domestic animals. Read on.


repelling dogs from your garden


Repelling Dogs From Your Garden


Repelling Dogs From Your Garden Using Animal Decoys

Mounting an animal decoy in your garden can make a visual impact with dogs.  This method is most applicable for night visitors such as racoons and bunnies. But, animal decoys can also stop dogs from entering your garden.

You can invest in various types of animal decoys, but most importantly, consider those that can move. A stationary animal decoy can work for a day or two, but if you want to keep pets and birds away from your garden long term, use a bait that can move.  For example, tying a rope to a plastic owl so that it sways can convince pets that the garden is on guard.


Keep Your Pets Occupied

Another effective way to keep pets away from your garden is to keep them occupied. For instance, if you want to prevent your dog from digging up your carrots, you can create a play area with bare soil for them to dig in.  Give them a few toys that they enjoy, and may bury to keep them busy.

Reward them for good behavior with ginger treats for dogs . They will motivate them to continue digging in that area.  Furthermore, having a digging pit for your dog is a surefire way to prevent them from messing up your garden. Also, ensure to enclose it to keep them from moving to your garden.


repelling dogs from your garden


Use Citrus Peels

Citrus peels from fruits such as oranges are unpleasantly bitter to most animals. And, dogs don’t like anything bitter. To keep your dog away, consider scattering citrus peels around the garden. Furthermore, you can also repel cats from your garden by using citrus peels.  They don’t like the smell of citrus either.  

This tip can be more effective if you mix the peels with coffee grounds. It can create an even more powerful and bitter dog-deterrent solution. Also, make it a habit to replace the peels regularly to ensure the method remains effective.


repelling dogs from your garden


Invest in Motion-Activated Sprinklers

Neither cats or dogs like water.  Therefore, this can be an effective way to pet-proof your garden. It would be best to invest in a sprinkler system that activates when your garden is being approached.  If any domestic animal approaches the garden, the sprinklers will activate, rendering them wet, thus fleeing from the garden.

There are probably tons of ways to handle this battle effectively.  Just determine the most effective way of repelling dogs from your garden and stick to it.  If necessary, experiment with a few of my suggestions until you find one that works. 

How to Eliminate Peony Blight In Your Garden

Today, I’m sharing gardening tips on how to eliminate peony blight.  Have you noticed a whitish gray powdery substance on your peony leaves?  What about brown spots on the leaves?  Sadly, your peony probably has Botrytis Blight. Fortunately, your peonies can recover and continue to give you the beautiful blooms as they did before the blight hit.  

Botrytis Blight is also called Gray Mold, and is the most common disease of peonies.  You will usually find it June through September.  There are others, but today we’re going to focus on the Botrytis Blight since it is the most prevalent.  Most gardeners find their peonies are affected with this blight when their area has had a lot of rain or the weather becomes hot and humid.  After a rainy period and than the weather turned hot with high humidity is when the blight appeared in my garden.  Luckily, only one of my peonies was affected.  However, one is too many.  


how to eliminate peony blight


My peonies actually had the gray mildew, as well as brown spots.  Peony leaf blight is what causes the large, brown spots as shown below.  Fortunately, the mildew and leaf blight can both be controlled.  


how to eliminate peony blight


How to Eliminate Peony Blight:  


  • Mildewed peony leaves can be treated with Neem Oil.  In the fall, the plant can be cut down to the ground as shown below.  
  • If your plant has a few leaves with brown spots, remove the affected leaves from your shrub immediately.  
  • In the fall, cut your peony plant down to the ground (as shown below).  
  • Remove all cuttings and infected leaves after you cut down your plants.  Place the cuttings in  the trash or burn them.
  • Once your cut your plant and remove the infected cuttings, spray your plant thoroughly with Garden Safe Fungicide3.  
  • Clean your shears or loppers thoroughly after cutting the diseased plant.  


eliminating peony blight


Peony Maintenance:  

  • Deadhead your peonies annually.
  • Make sure plants are spaced at least 3 feet apart. 
  • Plant peonies in full sun or part shade. 
  • Cut peonies down to the ground in the fall. 
  • Spray the Garden Safe Fungicide3 as a part of your maintenance program to keep the blight from hitting. (Spray your plants in the fall after cutting them down and in the spring before blooms emerge).  
  • Water peonies early morning at the base.  


eliminating peony blight


Last, taking these steps will eliminate and prevent peony blight from hitting your beautiful plants.  With these steps you peonies will be a good as new.  This is my Sarah Bernhardt peony.  Sadly, it was affected by the blight. However, re-emerged as beautiful as ever this spring. Preventive maintenance is key to healthy plants.  

Best Flowers For Sunny Locations

Today, I’m sharing beginner gardening tips on best flowers for sunny locations.  Knowing your plant’s needs is imperative if you want to be successful growing beautiful flower gardens.  Some garden areas are perfect for full sun flowers, some part sun and shade and some simply shade. To take out the guess work out the plants that you should use for sunny locations.  I’ve put together a list of flowers that love sunny locations.


Know the Requirements for Best Flowers for Sunny Locations

When a plant’s need is full sun, it doesn’t have to be in full sun all day.  However, it must have at least 6 hours of sunshine per day.  If you have part shade in an area near your sun garden, look for and plant flowers that can thrive in full sun or part shade.

Provide mulch for your flowers, it will help them retain moisture.  


Best Flowers for Sunny Locations: 


  • Black-eyed Susans
  • Coreopsis
  • Sunflowers
  • Iris
  • Sage
  • Bee Balm
  • Knock Out Roses
  • Day Lilies
  • Sedum
  • Lavender
  • Shasta Daisy
  • Petunia
  • Moss Ross
  • Geraniums
  • Begonias
  • Salvia
  • Verbena
  • Arnica
  • Roses
  • Lilac
  • Sweet Alyssum
  • Marigolds
  • Zinnia
  • Balloon Flower
  • Salvia
  • Azalea
  • Blanket Flower
  • Crape Myrtle
  • Clematis
  • Hydrangeas
  • Lupines
  • Turtleheads


best flowers for sunny locations


Know Your Gardening Zone for Best Results:  

Know your gardening zone, and look for plants that will thrive in your area.  Furthermore, make sure they can survive the heat and drought you may encounter doing the summer.  You will need to provide water during these stressful times and ensure they still receive the nutrients needed.  Native plants are very good options, they are already accustomed to your area.  


Plant Perennials and Annuals for Best Flowers for Sunny Location:

Additionally, you can plant annuals with your perennials.  They are perfect for containers and pots or filling in gaps in your borders.  Just make sure they are suitable to you gardening zone and have the same sun requirements.

Last, play with colors and height to create interest in your garden.  I love combining purple, pink and white petunias in my containers and window boxes.  The hummingbirds and butterflies love them.  If you’re interested attracting butterflies, hummingbirds and other pollinators, be sure to plant flowers that will do just that.  

You may also like Gardener’s Guide to Sun Expose.  


Hummingbird Flowers and Plants for Backyards

Today, I’m sharing gardening tips on hummingbird flowers and plants. Hummingbirds are the smallest birds in the world.  They are fascinating creatures that eat once every 10 to 15 minutes.  As a result, they visit approximately  1,000 to 2,000 flowers per day.  Hummingbird flowers provide nectar, which they absolutely love.  Are you wondering what flowers to plant to entice them?  I have a hummingbird flowers and plants list, check it out.  


hummingbird flowers and plants


Hummingbird Flowers and Plants:   


  • Yarrow
  • Larkspur
  • Bee Balm
  • Trumpet Vine
  • Day Lilies
  • Petunias
  • Butterfly Bush
  • Honeysuckle
  • Cardinal Flower
  • Red Hot Poker
  • Zinnia
  • Sunflowers
  • Impatiens
  • Foxglove
  • Coneflowers
  • Geraniums
  • Morning Glory
  • Hollyhocks
  • Coral Bells
  • Lantana
  • Rose of Sharon
  • Cardinal Flower
  • Iris


My list gives a good variety of hummingbird flowers to choose from.  Hummingbirds love red and yellow, so choose as many red and yellow flowers as you can.  The petunias in the window boxes on my deck never fail to bring hummingbirds.  So, tubular flowers are excellent choices.    


Hummingbird Flowers and Plants Provide Nectar:  

Also, these flowers provide nectar, which makes up 90% of a hummingbird’s diet.  Furthermore, nectar provides energy.  In additional to planting these flowers, hang a nectar feeder.  They are inexpensive and hummingbirds love them.  Red feeders with yellow ports are just what the hummingbird ordered.  To help hummingbirds find your feeders. tie a red ribbon close to the feeder.  

So, you can purchase nectar food packets at a local store.  However, I suggest that you save your money and use the ingredients that you have on hand.  I try to provide natural products to my backyard birds when possible.  As a result, use the natural nectar recipe below.  


hummingbird flower and plants


Hummingbird Nectar Recipe: 

  • 4 cups of water
  • 1 cup sugar 


  1.  Boil 4 cups of water. 
  2.  Add 1 cup of white granulated sugar.
  3.  Mix the sugar and water until the sugar is dissolved. 
  4.  Once the sugar is dissolved, continue to boil mixture for 2 additional minutes. 
  5.  Allow the mixture to cool thoroughly. 
  6.  Pour nectar into clean hummingbird feeders.


Attracting Hummingbirds to Feeders:    

Change the nectar every 3 – 5 days.  Be sure to clean your feeder too.  This will keep bacteria from invading your feeder.  See my post on how to clean bird feeders.

Set up territories in your yard, and place a feeder in each territory.  This will attract more hummingbirds to your backyard.  

Also, hummingbirds like to perch.  So, leave branches with open tips on them where hummingbirds can preen and rest.  They should be placed near nectar feeders or flowers that they love.  

Last, hummingbirds prefer to bath by flying through water mist.  Place a water mister in your birdbath.  If you can place it near the nectar feeder or among your flowers the hummingbirds will love you for it.    

I hope that you will plant a few hummingbird flowers and plants either in your garden, shrubbery bed or in containers.  Your hummingbirds will love you for them.  You may also like Hummingbirds.  


Health Benefits of Gardening for Beginners

Today, I’m sharing beginner gardening tips on health benefits of gardening. Many people believe that gardening is difficult.  However, if you take small steps, you can become a successful gardener.  Furthermore, you can garden in a small space or in containers.  You don’t need a large tilled plot like our grandparents had to grow your own produce and flowers.    

 You can grow fruit and vegetable or flowers.  However, most gardeners do a little of both.  Trying your hand at growing all is fun and very fulfilling.  Most importantly, gardeners reap health benefits from gardening.  Unfortunately, many beginner gardeners don’t realize the health benefits associated with gardening.  Furthermore, there are many people period who don’t know about the health benefits of gardening.  


Areas of Health Benefit That Benefit from Gardening 

Gardening has been proven to have physical, mental and physiological health benefits.  Personally, I have found that gardening makes me happy.   Endorphins stimulate feelings of self-satisfaction, happiness, positivity, and reduces stress and pain.  


health benefits of gardening


Health Benefits of Gardening: 


Gardening Reduces Stress

There’s nothing more peaceful than spending time in your garden nurturing what you’re growing.  Gardening allows you to focus on caring for your flowers, veggies and fruit so they can produce beautiful bouquets and fresh ingredients for your family meals.  It’s a great way to get away from life’s responsibilities, and focus on other things.  So, many people turn to gardening because it helps reduce stress.  


Gardening Provides Exercise

Gardening is not only great for your mental health, it provide physical benefits too.  Gardening provides your body with at least some level of low impact exercise, which is always a benefit with any activity.  You bend, reach, lift light items, pull and walk.  It gets you using muscles and joints that you may not have used in a while. You may feel stiff the first few days, but afterward you will look forward to the exercise.   


Great Way to Socialize

Furthermore, join a gardening plant exchange group.  There are plenty of gardeners in your local area who are willing to help new gardeners.  They exchange seeds, plants and advice.  It’s a great way to meet people who have a gardening interest. I have made new friends from the groups that I have joined. 


Infographic Design By Trim That Weed


Gardening Get Your Moving

Last, gardening if a great way to get off the couch, out of bed and on your feet too.  It’s the perfect way to get a healthy dose of sunshine.  So, turn off the TV and start listening to your favorite songs on your playlist while you’re pulling weeds, planting veggies or beautiful flowers.  


You will find that at the end of the day, gardening is a fulfilling and peaceful hobby that anyone can get into.  It just requires patience and a desire to learn gardening basics.  Furthermore, it allows you to reach out other gardeners. 

So, get ready to move and reap the health benefits of gardening.  You will be growing you own fresh produce and beautiful flowers in no time.   You may also like Healthy Gardening for Beginners too.  


Easiest Plants to Grow In Your Garden

Today, I’m sharing gardening tips on the easiest plants to grow in your garden.   Growing a flower garden is probably among the most satisfying activities you can do.  But, it can also be a very unpredictable experience too.  For example, you may get amazing results one year and pests and disease catastrophe the next. Also, you’ll quickly learn that some growing conditions are easier to deal with than others.  But, in most cases it comes down to choosing the right plants.

Whatever the challenge, there are always ways to solve these problems.  Experienced gardeners understand this, but it might get tough or frustrating for beginner gardeners. The key is to plant healthy plants that are native to your area.


Benefits of Native Plants

  • Already acclimated to your area
  • Requires less watering
  • No fertilizer needed
  • Not invasive
  • Better for pollinators


easy to grow plants


Easiest Plants to Grow Plants:


Butterfly Bush


The butterfly bush attracts butterflies and pollinators such as hummingbirds and honeybees. However, this bush can become is quite large plant growing up to 8 feet high and 5 feet wide if not contained.  It has strong, woody stalks, and in colder zones it dies back each winter.

However, a little pruning in early spring will have your plants looking good as new. Your bushes should be pruned each spring down to 8 to 12 inches to boost its growth. You can also find dwarf varieties which are more convenient for smaller gardens. The plants come in a number of colors such as yellow, pink, purple, red and white, and love full sun exposure with a medium amount of moisture.


easy to grow plants


Lavender


Lavender comes in many varieties and is quite a short-lived perennial.  But, if you’re looking to add a fragrant element to your garden, this plant is the perfect addition. The color varies from light blue and purple to pale blue and white.  Its perfumed quality make it an attractive addition to any garden. Lavender can also be used in cooking as well as the dried, which is also more potent in smell and flavor. The plant grows to about 20 inches and blooms in late spring/early summer.  It enjoys full sun. Having shallow roots, lavender declines in wetter conditions so it needs less moisture and well-drained soil.


Daisies – Yarrow, Aster, and Tickseed


The daisy family is quite large, offering a great range of plants to choose from. Starting with yarrow, this plant is quite sturdy with lacy leaves and a wide variety of colors. It’s easy to grow in any well-drained soil, loves the sun, and tends to spread heartily, crowding other plants.

You can find it in pastel colors but also in deep red, rust, white and yellow. It grows up to 4 feet and blooms throughout summer and into fall. Prune it following the blooming period and make sure to remove the dead stalks when the season is over.

Aster is another daisy family member that is a late-season bloomer with a color variety ranging from white, blue and lavender. This will bring pops of color to your garden after most other perennials have finished their bloom. Bear in mind that it needs well-drained soil with medium moisture and slightly acidic conditions. It’s a self-sow plant that grows up to 4 feet in height requiring its root groups to be divided every few years.

Similar to most members of the perennial daisy family, tickseed or coreopsis is a durable choice that’s quite easy to grow. It reaches 3 feet in height and blooms much longer than other perennials, over the whole summer into late fall. You can divide the plants into several smaller ones every couple of years. They react well to pruning or shearing by producing new flower buds. These come in varieties of yellow, pink, red, orange, or a combination of the two. They also love the sun and dry to medium moisture.


Cineraria


Cineraria is a warm-weather perennial that prefers shade and is typically grown as an annual. It is a clustering plant that grows up to 12 inches in height. It’s frequently planted in containers and produces beautiful purple, white, or blue daisy-like flowers that combine perfectly with ferns.

This plant reseeds itself, and it can grow in surprisingly shallow, but cool and well-drained soil. It does require moderate moisture as constant wetness causes the roots to rot. On the other hand, underwatering will hinder its bloom as well.


Daylily


The daylily is one of the oldest and best groups of ornamental perennials.  It has countless varieties available. Its upright flower stems grow from 2 to 5 feet producing trumpet-like flowers.  Unfortunately, many blooms only last for one day. Colors range from red, purple, orange, white, and yellow to bi-color combinations. It’s very well-suited for beginner gardeners as they are very resistant to common insects and diseases.

Most daylily types bloom for several weeks during summer.  However, some repeat their blooming cycle giving your garden lively colors throughout all summer. So, daylilies spread in clumps and should be divided every three years.  Overcrowding hinders flowering. Daylilies require sunny to partially sunny conditions with medium wet, well-drained soil.


easy to grow plants


Oriental Lily


The Oriental lilies are a great transitory flower.  They bloom in early summer after the Asiatic lilies have blossomed and before most other lily varieties have begun. Oriental Lilies are planted as bulbs, and gradually spread. Lilies love rich to medium moisture, well-drained, and slightly acidic soil.

They can grow from 1 to 8 feet in height with a wide range of blooming colors such as red, orange, pink yellow, and white. Lilies are quite fragrant and if you remove withered flowers, you’ll boost additional blooming.


 These Plants Are Also Colorful


Gardening can be an excellent way to express your creativity. Furthermore, it’s a great benefit to your health and wellbeing.  Additionally, achieving a lust, beautiful and lovely smelling ideal garden can be incredibly rewarding. Allow yourself to explore different ideas and layouts, mixing different plants and flowers to create a garden that will be fragrant and colorful throughout spring, summer and fall.


Add a few of my suggested easy to grow plants and flowers to your backyard.  You will be enjoying beautiful flowers, butterflies and bouquets of lilies in no time.  

How to Germinate Seeds for Your Garden

Today, I’m sharing gardening tips on how to germinate seeds for your garden.  Getting a jump start on your garden is a great thing, especially if you have a short growing season like me.  So, I’m sharing this valuable information with you today. 

So, starting my seeds early takes away the winter blues for me.  It gets me excited about the upcoming gardening season, and all of the delicious vegetables and beautiful flowers I will be nurturing.

Furthermore, if you want a successful growing season you must prepare.  Preparation starts long before you step into your garden.  So, investing a little time and energy to perform certain tasks will go a long way in making your gardening season a success.  Your first step is germinating your seeds. Lets go.


seed starting tips


How to Germinate Seeds for Your Garden:


Clean and Sterilize Containers – Sterilizing your seed starting containers before planting your seeds is imperative. If you’re using containers other than peat pots, wash them in hot, soapy water.  Rinse well, and take it a step further.  Soak them in bleach water or spray with a peroxide and water solution.  Wipe well and allow to air dry.


Use Seed Starter Mix  – There are a many seed starter mixtures on the market, so choose wisely.  There’s Jiffy, Black Gold, Miracle Gro  or make your own.


Generate Heat for Seedlings Seedlings don’t need light to germinate, but they do need heat.  I highly recommend using heat mats.  I have two mats that I use to help germinate my seeds, and I love them.  You can also set your plants on top of your refrigerator if you need additional space.


Use a Gro-Light System – You will need light to keep your seedlings from getting leggy.  Using a lighting system will help your plants to establish strong, healthy roots.  I have two of the 4 foot grow lights.  Seedlings need at least 12  – 14 hours of light per day and a rest period of 6  – 8 hours, without light.  You can set a timer to regulate your lights.  Furthermore, the lights must be kept close to the plants so they can become established and healthy.


Mark Your Seedlings – Be sure to use planter markers so you will know what you planted.


Cover Seed Starter Pots – Cover your pots with saran wrap to help keep moisture in while your seeds are germinating.  You can remove the saran wrap one the seed germinates.  I simply place a piece of saran wrap over the pot and secure it with a light rubber band.  When I see green, I remove the saran wrap.  You want to see droplets on the plastic.  That’s a sign that your pot contains the right moisture amount.  If you don’t see a mist, gently spray the top of your pot.  Once your seed germinate, remove them the heating mat and get them under the grow lights.


seed starting tips


Pot Up When Needed  – I use peat pots or pots from the nursery to start my seeds indoors.  Sometimes plastic cups.  If my plants outgrow the pots, I will transplant them to a bigger pot.  You can use a 16 ounce cups or bigger pots for this step if you have them in smaller pots.


Hardening Off Plants – Seedlings that are started indoors must be acclimated to outdoor temperatures.  See my post how to harden off your seedlings.


Seed Starter Pots for Gardeners

Today, I’m sharing gardening tips on seed starter pots for gardeners. First, I start the majority of my garden plants from seed.  I’m a frugal gardener, so I try to garden as cheaply as possible. Recycling, seed swapping, build your own is my motto.  Over the years, I have found that my biggest gardening expense were the vegetable and flower plants.  I have cut my expense tremendously, by germinating my seeds and producing my own plants.

Furthermore, it’s rewarding to plant veggies and flowers that you have grown from seed and nourished through the growing season.  For the most part, I have success with the majority of my seeds germinating.  However, there are some that don’t germinate. Gardening is trial and error. 

My attitude is, I’ll just try again next year.  Now, I have to be honest with you.  I do end up purchasing a few plants from the garden center, mostly flowers.  I love shopping the clearance tables and scooping up a few half dead bargains.  Bringing neglected plants back to life can be rewarding too.  I digress, but here’s a few container ideas for starting seeds. 


seed starter pot for gardeners


Ideas for Seed Starter Pots for Gardeners 


Winter Sowing Seed Starting Containers:

  • Milk Jugs – Gallon or half gallon will work.
  • Orange Juice Jugs – Clear orange jugs are perfect for starting seeds.
  • Gatorade Bottles – The 32 oz. bottles are perfect to house tomato seeds. Larger bottles can be used for larger plants like sunflowers.
  • 2 Liter Soda Bottles – I love using these for sunflowers, tomatoes, herbs.  They work great for single seed items.
  • Take out Chinese Containers –  These dish/trays are perfect for starting lettuce.
  • Old plastic containers – If you have storage containers that have cracked or just old and you don’t want to use them anymore, save them for you winter sowing.
  • Plastic fruit containers – These are perfect for starting lettuce, carrots, radishes and more.


seed starter pots for gardeners


Seed Starter Pots for Gardeners

Indoor Seed Starter Ideas:  


  • Eggshells – Rinse out your eggshells thoroughly.  You can store them in a container for egg carton for later use.  They are so adorable with new life in them.
  • Yogurt Cups or Fruit Cups –  I don’t eat much yogurt, but my grandkids do.  I eat lots of fruit cups though.   I’ve used them for the pass few years to start my birdhouse gourds, and they’ve worked great.  I’m sure you can use them to start tomatoes, peppers and more.
  • Sour Cream Containers – These are perfect seed starter containers too.  Tomato plants can grow a nice root ball in these containers without having to be transferred.
  • Toilet Paper Rolls – Biodegradable and perfect for germinating seeds.
  • Clear Fruit Containers – Next, I save the plastic containers that I purchase grapes or strawberries in.  Blueberry containers are good too. I like using these when I need to plant several seeds.  For example, cabbage, beets etc.
  • Newspaper Seedling Containers  – Next, recycle newspaper and make seedling pots. (See my post on making newspaper seedling pots.
  • Cardboard Milk or Juice Containers – Simply cut the top off the containers and you have a great seed starting container.
  • Plastic Cups – I save my disposal drinking cups throughout the year.  The 8 or 16 ounce cups are perfect.
  • Peat Pots – You can purchase these from the Dollar store, Lowes, Big Lots and more.
  • Pots from your local Nursery – Save pots that you purchase plants in from your local nursery.  They are perfect for starting seeds, and fit great into nursery trays.
  • Egg Cartons – Finally, save your egg cartons, they are perfect for starting your seeds and/or housing your eggshells.  A Philips Head screwdriver makes an excellent drainage hole.


Sanitizing Seed Starter Pots

So, you have your containers gathered and you’re ready to go.  Stop, you must sanitize them before use.  I use hot soapy water to remove any remaining food or liquid from the containers.  Rinse each container.  Next, spray and wipe each container with peroxide or spray with bleach. Rinse well and allow to dry.

Last, once the containers are dry you must drill holes in the bottom of each container.  This will allow water to soak into your trays.  You may be able to use a glue gun on some. For example, the plastic cups, clear fruit containers, yogurt and fruit cups.


Best Seed Starting Mix

Also, be sure to use a quality seed starting mix.  I use Miracle Gro Seed Starting Mix. 


Once you follow all of the steps, your containers are ready to be filled and used to germinate your seeds.  Good luck, and let me know if you have questions.  You may also like Starting Seeds in Eggshells