Backyard Garden Tips That Will Make You Look Up

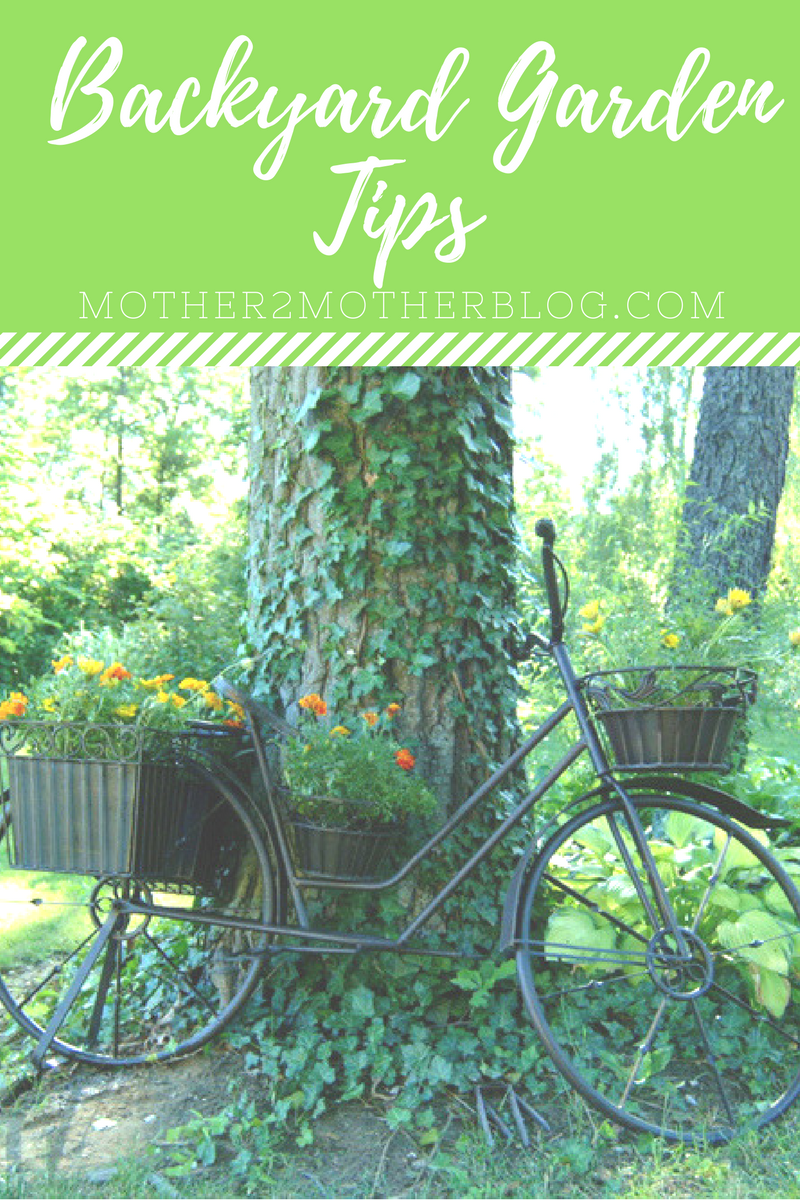
I don’t know about you, but when I am busy in my garden I am usually looking down.  After all, that’s where all the plants and flowers are, right!  But I’ve just realized that it could actually be worth looking up while you are gardening.   Here are a few backyard garden tips on why we need to look up in the garden.  I also have other gardening tips on planting flower container gardens, healthy garden tips, growing indoor plants and more.  Lets get started on why we should look up: 


backyard gardening tips


Check Your Trees

It’s not just the plants and flowers in the ground that are susceptible to various diseases and pests. The trees in your gardens are as well. So, how do you know if you need to contact a tree surgeon such as http://www.arboristusa.com/? Well, the first sign of a fungal tree disease will always be noticeable in the leaves. More often than not, they will be very discolored. Your tree might also start losing leaves at an excessive rate. Next time you are out in your garden, look up to make sure your trees are in good health!

Think About Lights And Lamps

Would you like to spend your summer evenings sitting outside enjoying your garden? If so, you might want to add some lights and lamps to brighten up the outside of your property. Look up to see the best places you could put your lights. Usually, most homeowners like to place outdoor lights on the side of their property and garden shed. Another nice idea is to wrap some fairy lights around the top of your fences and any railings that you have in your garden. Just make sure that they are safe to use outside: http://www.screwfix.com/c/electrical-lighting/weatherproof-switches-sockets/cat830538.

Look Out For Birds

When you look up, you might notice a few birds flying around and nesting in your garden. Don’t notice many? If not, you can always encourage more birds to come to your garden by adding a bird feeder. Make sure it is always filled with bird feed so you can to attract a wide variety of birds. You might want to also include a bird bath in your garden, as this will encourage birds to visit your property for a bath as well!

Hanging Baskets

If you want to add some more dimensions to your garden, it could be worth adding some hanging baskets. You can hang these from the side of your property and wooden fences. These will increase the amount of flowers in your garden, and will give you a chance to add even more bursts of color. You will be able to find a wide variety of hanging baskets in your local garden center. Or you could try making your own from flower pots.  If you don’t find hanging baskets appealing, you could install raised flower beds. This is another great way to add some dimension to your garden!

So, next time you are working in the garden, don’t just focus on the ground below your feet. Look up and see the rest of your garden and the world!  We hope that you enjoyed our backyard garden tips.


5 Things Beginner Gardeners Overlook

Today’s gardening tips are going to focus on things beginner gardeners overlook.  Gardening is becoming an increasingly popular activity.  And it’s not hard to see why. It offers a great source of light exercise, provides fresh air, and adds a new dimension to your property. Frankly, what’s not to love?

So,  this time of year many inexperienced gardeners embrace their growing love of using their outdoor spaces.  However, many of them will limit their success due to basic errors.


beginner gardeners


Here are things beginner gardeners overlook:


Wasting money   Let’s face it, your list of potential garden upgrades is as long as your arm. With this in mind, cost-efficiency should be at the top of the agenda. Remove the middleman by doing some of the work yourself. For example, investing in chainsaws and other garden tools.  Having your own tools will enable you to complete most jobs without the need of an expert.

Furthermore, it’s imperative to remember the right safety gear too. Some challenges may still require a professional touch.  However, keeping those to a minimum can be good for your finances. In return, make additional improvements with the savings.

Being short-sighted –  When completing any garden overhaul, it’s easy to get carried away. Yet, it’s equally important to consider the long-term benefits. Reducing the maintenance with artificial lawns and other time-saving gestures will aid the cause. After all, keeping the space in great health is probably the hardest challenge.  Besides, it’ll leave you with more time to enjoy the gardening tasks that are actually fun and rewarding.

Ignoring the potential –   First and foremost, we want our gardens to look nice. However, the outdoor space is also a great resource for making life a little more comfortable. Growing fruit and vegetables is a fantastic way to actively encourage your love of gardening while gaining huge rewards. Meanwhile, you shouldn’t overlook the benefits of having a BBQ.  Comfortable garden furniture is good too.  After all, the more time spent in this area the better. If nothing else, it will provide another incentive to keep up the good work.


Growing indoor plants


Overlooking personal needs –   No two gardeners are identical.  So, dealing with your unique situation is key. Not everyone has the mobility to bend down to flower beds.  Also, hanging baskets and raised flower beds can be very beneficial. Unfortunately, if your gardening tasks are causing pain you may give up.  Find ways to add comfort to your tasks.  Your passion will remain far more enjoyable.

Focusing solely on the garden –  Your love of nature doesn’t have to be limited to the backyard. The front garden is often a great place to add a little natural beauty. Moreover, indoor houseplants can inject a new sense of energy to the property. You could even grow herbs in the kitchen to further enhance your bid for practicality.


Grow Your Own: 13 Money Saving Fruits and Vegetables

A must for my backyard vegetable gardening are vegetables that I can preserve for meals and herbs for seasoning sauces and other dishes. Each season I select the top money saving fruits and vegetables that I need to plant in my kitchen gardening. Budgeting and doing things in the most efficient and frugal way is my motto.  Additionally, I also plant a few fruits that I can enjoy in the summer.   They taste so much better when they are in season.  Because I grow my own, I don’t have to purchase from the grocery store.  Which saves me money.

garden tips, gardening, money saving tips


Here’s my top 13 money saving fruits and vegetables:


  1. Tomatoes – I plant and harvest enough to preserve whole or quartered for soup.  I also make sauces for spaghetti and other pasta dishes, chili, and salsa. I also grow cherry tomatoes for salads and snacking.
  2. Peppers – I pickle and freeze them. Great in dishes, on sandwiches and on top of nachos and cheese.
  3. Zucchini – I make fresh muffins and zucchini bread.
  4. Green Beans – I freeze green beans for soup and for other side dishes during the winter.
  5. Onions – A majority of my dishes call for onions, so I preserve these for using during the winter.
  6. Garlic – Fresh garlic is great in salsa and sauces.
  7. Herbs – I dry my herbs for winter use.
  8. Potatoes – Red and Yukon Gold potatoes get plenty of use in my house.
  9. Cucumbers – Great for salads and homemade pickles.
  10. Lettuce – I grow leaf lettuce for sandwiches and salads during the summer.
  11. Strawberries – Great for jam.
  12. Watermelon – I love fresh watermelon on a hot summer day. I grow Sugar Babies.
  13. Cantaloupe –  Great breakfast fruit.


Backyard Garden Tips


So, this is a picture of one my Sugar Baby watermelons from my backyard vegetable garden.  I picked it at the peak of ripeness and chilled it for a few hours.  It was sweet and delicious.  It’s great being able to walk to your garden and pick a watermelon or cantaloupe on a hot summer day.  What does your family eat most from your kitchen garden or containers?  These are the veggies that you should plant. You will save money on your grocery store bill and they will taste much better.
 You may also like:  Kitchen Garden Sowing Schedule                         15 Ways To Save Money

DIY Newspaper Seedling Pots

DIY Newspaper Seedling Pots are fun to make and great for the environment. Furthermore, newspaper seedling pots are biodegradable.  And, you can plant them directly into your garden or container.  Most importantly, they will decompose and help nourish the soil.

So, to help cut down on my gardening expense I make newspaper seedling pots.  I can get newspaper from family and friends or from the recycling center. They are all too happy to get rid of it, and I’m happy to recycle it.  These frugal containers have become a big part of my gardening season.  As a result, I thought I would show you how to make these pots.  If you have children that can handle making the newspaper seedling pots, let them spend the afternoon making them for you.   Making newspaper seedling pots is a great gardening with kids project.


newspaper seedling pots


DIY Newspaper Seedling Pots:

What you will need:


Easy Steps:


Step 1 – First, as shown in the picture below use 1 single sheet of newspaper folded in half.  Do not use the glossy or colored sections of the newspaper. The ink is not environmentally friendly. 

Step 2  – Second, fold the sheet of newspaper in half not length wise.

Step 3 –  I used a pint size canning jar.  Also, leave about a 1/4 inch of the mouth of the jar out of the newspaper as shown below.

Step 4 – Roll the jar until all of the newspaper is used. Make sure the newspaper is rolled tightly and evenly.

Step 5 Next, tape the ends of the newspaper together.  Kraft Paper Tape is biodegradable, so you can leave it on your pots when planting them directly in the garden or pot. 


Step 6 – Additionally, turn the jar upside down. The opening of the jar should be face down, and why you should leave about 1/4 inch of the jar out of the newspaper.

Step 7 – Next, fold the bottom of the newspaper as if you’re wrapping Christmas gift.  Tape the folds down with the Kraft Paper Tape. 

Step 8Remove the jar from the newspaper.  


newspaper seedling pots


Step 9 – Last, fold the top of the pot down about a 1/2  – 1 inch to make the pot smaller.


newspaper seedling pots


Fortunately, these seedling pots are ready to start your herbs, tomatoes, peppers, squash, zucchini, melons etc. Simply, fill the pot with seed starter mix (I use Miracle Gro), and you’re ready to plant your seeds according to the package. 

Most importantly, when you start your seeds you will want to water from the bottom up so you won’t displace your seeds.  What do I mean by watering from the bottom?  Place your seedling pots in a tray.  Pour water into the bottom of the tray, and allow your pots to soak up the water instead of watering the seedling from the top.  Watering from the top can dislodge you seed.  Also, add more water if necessary.  You can use tin roasting pan from the dollar store, plastic storage containers, your oven roasting pan, and anything you can find to house your seedling pots. 


DIY newspaper seedling pots


Also, I recommend planting 2 or 3 seeds in your pot.  You have better odds of germination using 2 or 3 seeds. Once the plant(s) has grown 2 – 3 inches, you can leave the strongest seedling and discard the other plants. It’s simple, just pinch off those you don’t want and discard them.  

Finally, now start making those newspaper seedling pots so you will be ready to sow your seeds and remain on schedule with your kitchen garden. Also, it’s best to make the pots in advance so you will be ready to go.
You May Also Like:  Kitchen Garden Sowing Schedule