How to Grow Radishes for Beginner Gardeners

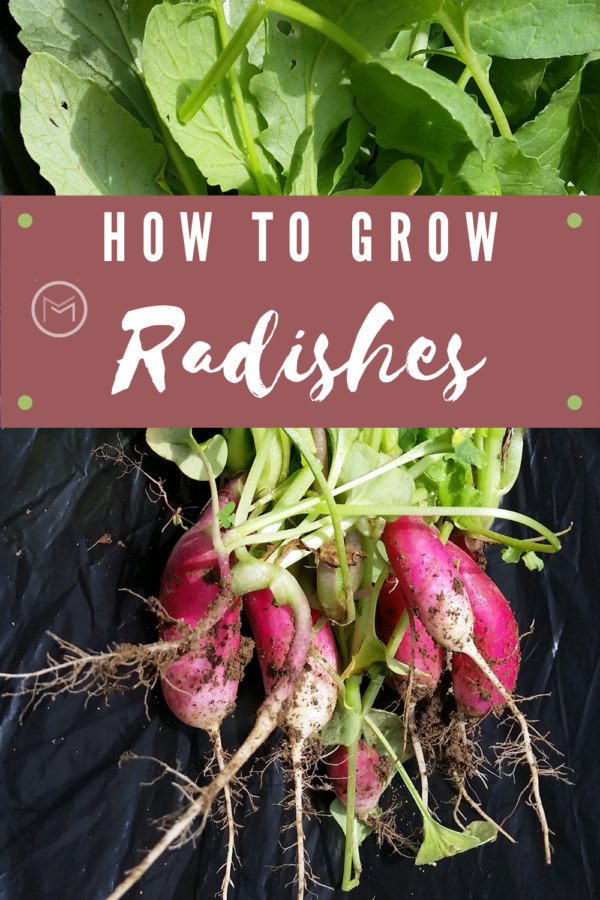
Today, I’m sharing gardening tips on how to grow radishes. Radishes are the perfect vegetable for beginner gardeners.  Actually, they are one of the easiest vegetables to grow.  I love radishes on vegetable trays, in salad or just to snack on.  Spicy radishes are what I crave.  However, there are 35 varieties of radishes for you to choose from to satisfy your taste buds.  

Besides being delicious, another reason to grow radishes is you can reap the benefits from two sowings.  One in the spring and one in the fall.  

Radishes provide great health benefits like antioxidants, calcium and potassium.  Furthermore, they can also help lower blood pressure.  


how to grow radishes


So, radishes are root vegetables and belong to the Brassicaceae family.  The Brassicaceae family includes cabbage, cauliflowers, collard greens, turnips, and beets to name a few.  Radishes originated in Egypt.  It gets it’s name from the Latin word root.  Radishes are loved by many, Americans eat approximately 400 million pounds of radishes each year.  


Varieties of Radishes:  


  • Cherry Belle
  • French Breakfast
  • Gourmet Blend
  • Fire and Ice
  • Pink Beauty
  • Black Spanish
  • White Icicle
  • Easter Egg
  • Purple Plum
  • Daikon


how to grow radishes


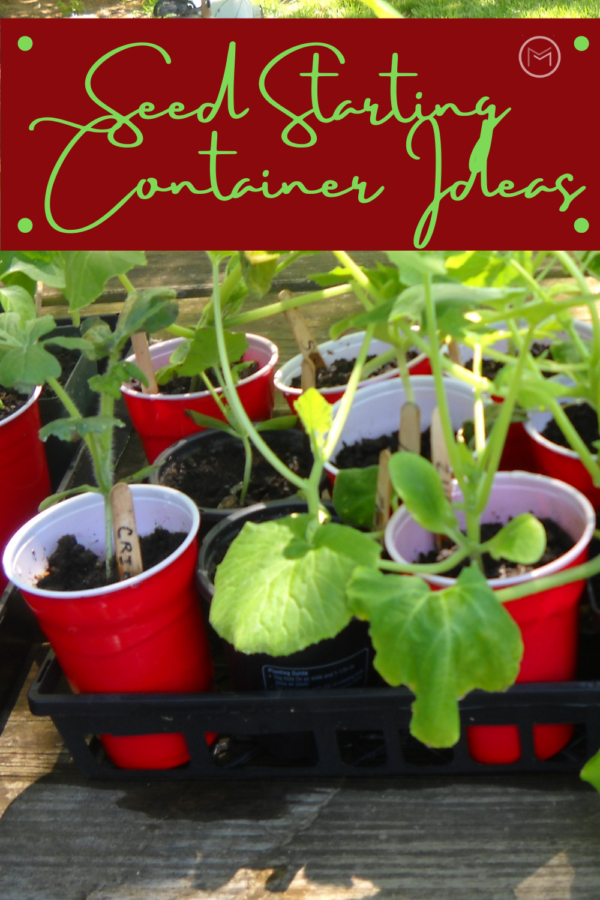
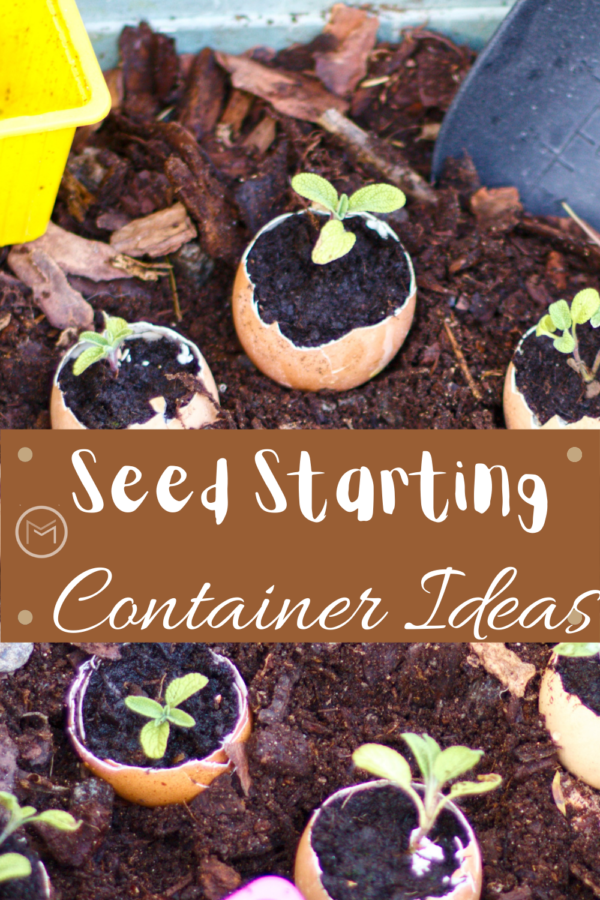
These radishes can be grown in a variety of containers.  They can be grown in raised beds, flower pots, baskets, colanders, galvanized tubs or buckets.  Personally, I plant them in rows in my garden.  

If you decide to grow radishes in a container, make sure it is a least 6 inches deep.  


How to Grow Radishes:  


  • Spring and fall are the best time to grow radishes.  Radishes prefer cool weather, so planting in April and or September is the perfect time to sow radish seeds.  
  • Add compost to your soil before you sow your seeds.  
  • Radishes are difficult to transplant; however, some gardeners have good luck transplanting them.  Because they are very easy to grow, I recommend direct sowing your seed as a beginner gardener.   
  • Grow radishes in full sun or partial shade. (They should be get at least 6 hours of sun a day).  
  • Avoid growing radishes next to potatoes, turnips or broccoli  and the herb hyssop.  
  • Not thinning radishes can stunt their growth. So, be sure to thin the radishes so they are an inch apart. You can simply pull or clip the radish seedlings you want to remove.  
  • Hot weather will cause radishes to bolt.  Once radishes bolt, they become bitter, woody and not at all tasty.  How do you know when you plant has bolted?  It will start flowering and attempting to set seed.  You can continue to let the plant bolt and go to seed if your radishes are heirloom plants.  Simply let the plant grow and produce seed pods.  When the pods turn brown and hard harvest the seed and plant them later.  
  • Water regularly.  Make sure your radishes receive at least an inch of water weekly.  When your radishes don’t receive enough water, they tend to crack or split.  You can use a soaker hose to water deeply when you’re pressed for time. 
  • Harvest your radishes timely.  Otherwise, they will become tough because they’ve been left in the ground too long. 
  • Harvest radishes within 30 to 45 days.  Be sure to read the package to ensure they are harvested timely. 
  • If radishes are about an inch out of the ground, they are ready to harvest.
  • When warmer weather hits in June, you should have already harvested your radishes. 


I hope that you enjoyed my post on on how to grow radishes.  Last, if you missed your chance to plant in the spring, plan a fall harvest.  Home grown radishes are so much tastier than store brought varieties.  You may also like: Spring Vegetables for Zone 6B.    Check out the Health Benefits of Radishes too.  


Health Benefits of Gardening for Beginners

Today, I’m sharing beginner gardening tips on health benefits of gardening. Many people believe that gardening is difficult.  However, if you take small steps, you can become a successful gardener.  Furthermore, you can garden in a small space or in containers.  You don’t need a large tilled plot like our grandparents had to grow your own produce and flowers.    

 You can grow fruit and vegetable or flowers.  However, most gardeners do a little of both.  Trying your hand at growing all is fun and very fulfilling.  Most importantly, gardeners reap health benefits from gardening.  Unfortunately, many beginner gardeners don’t realize the health benefits associated with gardening.  Furthermore, there are many people period who don’t know about the health benefits of gardening.  


Areas of Health Benefit That Benefit from Gardening 

Gardening has been proven to have physical, mental and physiological health benefits.  Personally, I have found that gardening makes me happy.   Endorphins stimulate feelings of self-satisfaction, happiness, positivity, and reduces stress and pain.  


health benefits of gardening


Health Benefits of Gardening: 


Gardening Reduces Stress

There’s nothing more peaceful than spending time in your garden nurturing what you’re growing.  Gardening allows you to focus on caring for your flowers, veggies and fruit so they can produce beautiful bouquets and fresh ingredients for your family meals.  It’s a great way to get away from life’s responsibilities, and focus on other things.  So, many people turn to gardening because it helps reduce stress.  


Gardening Provides Exercise

Gardening is not only great for your mental health, it provide physical benefits too.  Gardening provides your body with at least some level of low impact exercise, which is always a benefit with any activity.  You bend, reach, lift light items, pull and walk.  It gets you using muscles and joints that you may not have used in a while. You may feel stiff the first few days, but afterward you will look forward to the exercise.   


Great Way to Socialize

Furthermore, join a gardening plant exchange group.  There are plenty of gardeners in your local area who are willing to help new gardeners.  They exchange seeds, plants and advice.  It’s a great way to meet people who have a gardening interest. I have made new friends from the groups that I have joined. 


Infographic Design By Trim That Weed


Gardening Get Your Moving

Last, gardening if a great way to get off the couch, out of bed and on your feet too.  It’s the perfect way to get a healthy dose of sunshine.  So, turn off the TV and start listening to your favorite songs on your playlist while you’re pulling weeds, planting veggies or beautiful flowers.  


You will find that at the end of the day, gardening is a fulfilling and peaceful hobby that anyone can get into.  It just requires patience and a desire to learn gardening basics.  Furthermore, it allows you to reach out other gardeners. 

So, get ready to move and reap the health benefits of gardening.  You will be growing you own fresh produce and beautiful flowers in no time.   You may also like Healthy Gardening for Beginners too.  


Seed Starter Pots for Gardeners

Today, I’m sharing gardening tips on seed starter pots for gardeners. First, I start the majority of my garden plants from seed.  I’m a frugal gardener, so I try to garden as cheaply as possible. Recycling, seed swapping, build your own is my motto.  Over the years, I have found that my biggest gardening expense were the vegetable and flower plants.  I have cut my expense tremendously, by germinating my seeds and producing my own plants.

Furthermore, it’s rewarding to plant veggies and flowers that you have grown from seed and nourished through the growing season.  For the most part, I have success with the majority of my seeds germinating.  However, there are some that don’t germinate. Gardening is trial and error. 

My attitude is, I’ll just try again next year.  Now, I have to be honest with you.  I do end up purchasing a few plants from the garden center, mostly flowers.  I love shopping the clearance tables and scooping up a few half dead bargains.  Bringing neglected plants back to life can be rewarding too.  I digress, but here’s a few container ideas for starting seeds. 


seed starter pot for gardeners


Ideas for Seed Starter Pots for Gardeners 


Winter Sowing Seed Starting Containers:

  • Milk Jugs – Gallon or half gallon will work.
  • Orange Juice Jugs – Clear orange jugs are perfect for starting seeds.
  • Gatorade Bottles – The 32 oz. bottles are perfect to house tomato seeds. Larger bottles can be used for larger plants like sunflowers.
  • 2 Liter Soda Bottles – I love using these for sunflowers, tomatoes, herbs.  They work great for single seed items.
  • Take out Chinese Containers –  These dish/trays are perfect for starting lettuce.
  • Old plastic containers – If you have storage containers that have cracked or just old and you don’t want to use them anymore, save them for you winter sowing.
  • Plastic fruit containers – These are perfect for starting lettuce, carrots, radishes and more.


seed starter pots for gardeners


Seed Starter Pots for Gardeners

Indoor Seed Starter Ideas:  


  • Eggshells – Rinse out your eggshells thoroughly.  You can store them in a container for egg carton for later use.  They are so adorable with new life in them.
  • Yogurt Cups or Fruit Cups –  I don’t eat much yogurt, but my grandkids do.  I eat lots of fruit cups though.   I’ve used them for the pass few years to start my birdhouse gourds, and they’ve worked great.  I’m sure you can use them to start tomatoes, peppers and more.
  • Sour Cream Containers – These are perfect seed starter containers too.  Tomato plants can grow a nice root ball in these containers without having to be transferred.
  • Toilet Paper Rolls – Biodegradable and perfect for germinating seeds.
  • Clear Fruit Containers – Next, I save the plastic containers that I purchase grapes or strawberries in.  Blueberry containers are good too. I like using these when I need to plant several seeds.  For example, cabbage, beets etc.
  • Newspaper Seedling Containers  – Next, recycle newspaper and make seedling pots. (See my post on making newspaper seedling pots.
  • Cardboard Milk or Juice Containers – Simply cut the top off the containers and you have a great seed starting container.
  • Plastic Cups – I save my disposal drinking cups throughout the year.  The 8 or 16 ounce cups are perfect.
  • Peat Pots – You can purchase these from the Dollar store, Lowes, Big Lots and more.
  • Pots from your local Nursery – Save pots that you purchase plants in from your local nursery.  They are perfect for starting seeds, and fit great into nursery trays.
  • Egg Cartons – Finally, save your egg cartons, they are perfect for starting your seeds and/or housing your eggshells.  A Philips Head screwdriver makes an excellent drainage hole.


Sanitizing Seed Starter Pots

So, you have your containers gathered and you’re ready to go.  Stop, you must sanitize them before use.  I use hot soapy water to remove any remaining food or liquid from the containers.  Rinse each container.  Next, spray and wipe each container with peroxide or spray with bleach. Rinse well and allow to dry.

Last, once the containers are dry you must drill holes in the bottom of each container.  This will allow water to soak into your trays.  You may be able to use a glue gun on some. For example, the plastic cups, clear fruit containers, yogurt and fruit cups.


Best Seed Starting Mix

Also, be sure to use a quality seed starting mix.  I use Miracle Gro Seed Starting Mix. 


Once you follow all of the steps, your containers are ready to be filled and used to germinate your seeds.  Good luck, and let me know if you have questions.  You may also like Starting Seeds in Eggshells


6 Ideas for Garden Makeovers

Today, I’m sharing gardening advice on ideas for garden makeovers.  If you don’t have a green thumb, keeping your garden looking beautiful can feel impossible. However, getting and maintaining a gorgeous garden doesn’t have to be a struggle.

There are a few simple things that you can do to give your garden a new lease on life, without having to put in hours of work.


home garden makeover tips


 Ideas for Garden Makeovers:


  • Paint some flower pots –  This is an great way to add a pop of color to the garden.  Remove any dirt and residue from the pots.  Having a clean base is imperative for the paint to stick.  Paint your pots any color that you like.  Here’s a suggestion, how about painting the pots in one color and using a stencil with another color to add fun designs? Ask your children to help you.  Here’s a kid-friendly garden project. To make your design last, cover them with an acrylic sealant. 
  • Trim back any trees – If you have trees in your garden that are getting out of control, call in a professional. They will be able to safely trim any trees without risk for you.  A good trim will make the trees look better and get rid of any loose branches that might fall and cause damage. 


home garden makeover tips


  • Refresh the shed – If your shed is looking worn out and tired, you can simply correct this with a coat of exterior paint or stain. Add  another color hit by choosing a treatment in a bright or pastel hue.  You could also stencil on fun designs, like plants or birds. 
  • Refresh your garden furniture –  While you’re painting your shed, give your wood garden furniture a coat as paint well. Choose a color that makes you smile and goes with the rest of your garden. 


home garden makeover tips


  • Repair your fencing – If you’ve had bad weather over the winter, some of your fence panels may have gotten damage or fallen over.  If so, hire a fence contractor to repair or replace broken or fallen panels. You may also need to reinforce your fence posts. If there’s not much rot, you can reinforce the post with a concrete spur. If there is a lot of rot, you might need a new post. When the weather is dry, give the fence a fresh coat of paint or wood stain.


Additionally, you can make garden decorations. This is another place for kids to get involved with the garden. Even during winter, there are things you can do to cheer up the garden.  Paint rocks in different and fun shades for the rock or flower beds. If you have stepping stones in a path, paint those. Buy a pretty bird or insect house, and give it to the kids to decorate.  The goal is to garden together.  A fairy garden, is a great idea.  We could all use a little magic in the garden. 

Heirloom Tomato Plants and My Lessons Learned

Today, I’m sharing my gardening tips on my 2020 successes and failures with my heirloom tomato plants. My heirloom tomato plants are my specialty, and they were quite productive this year.  The taste of heirloom tomatoes is unmatched, so I grow a variety. So, they won a place in my heart years ago.  My kitchen garden is always filled with  heirloom tomatoes.  However, I did plant a few Early Girl tomatoes.  It takes longer for heirlooms to produce fruit, and my BLT simply can’t wait that long.


growing heirloom tomatoes


Heirloom Tomato Plants for 2020 included:

  • Paul Robeson
  • Cherokee Purple
  • Brandywine Pink
  • Orange Beefsteak
  • West Virginia Hillbilly
  • Brandywine Red
  • San Marzano


What Worked

First, this year I amended my soil with aged chicken manure.  I tilled in a scoop throughout the garden, added crushed eggshells, a chopped banana peel to each tomato hole before planting the tomato plant deep.  I than used a top dress of composted leaves.  My plants thrived.  They produced an abundance of delicious, healthy fruit.

An abundance of healthy fruit also means lots of seeds from the tomatoes.  I save them from season to season, and use them to start seedlings for next years garden.  Growing heirlooms tomatoes produces seeds that will produce fruit exactly as the parent from one season to the next.  Heirlooms are pollinated by the birds, bees and the wind. There’s no human intervention.  What you see is exactly what you get from year to year.  Sadly, that is not true for hybrid tomatoes.


growing heirloom tomatoes


What Failed

Next, I was careless staking my tomato cages this year.  My heirloom tomato plants get very heavy.  The are an indeterminate plants, which means they continue to grow throughout the season.  They produce lots of flowers, which turn into tons of tomatoes.  I use sturdy tomato cages for my heirlooms, but to ensure they remain upright during high winds and storms.  To help secure the cages, I use t-posts to hold the cages down.

Unfortunately, this year I didn’t push the stakes in the ground deep enough or tie the cages to the t-post as securely as I normally do.  As a result, I had a few cages tumble over during a wind storm.  Have you ever tried pulling up a topple tomato plant loaded with tomatoes?  It is quite an endeavor. Especially, when you’re trying to save your fruit.  With the help of a friend, I did manage to get the cages up and re-stake them properly.

So, it’s best to take the time and do it right when you first transplant your seedlings into the garden. I still learn lessons even as a master gardener. This is a lesson that I learned long ago, but had to re-learn this gardening season.  Also, you may like:  Bon Appetit  – Heirloom Tomatoes.


Simple Garden Wow Factor Tips

Today, I’m sharing gardening advice on simple garden wow factor tips.  Our gardens have become more important than ever as we battle the Covid-19 crisis. A worldwide pandemic wasn’t anything that anyone expected. Just a few short months ago, you were probably planning your summer vacation.  Or, looking forward to getting a new car or upgrading your kitchen.  However, these plans have now had to be placed on hold as the world enters uncertain economic times. 

garden wow factor


With lockdowns being enforced, our gardens have become the only outdoor spaces that we have had to enjoy. They have allowed us to reconnect with nature.  Furthermore, they soothe us and allow us to relinquish our anxieties. Our gardens have had a positive impact on our mental health during these unprecedented times. Being one with nature  lowers our blood pressure and can help our bodies release our happy hormone, dopamine. Mix this a little Vitamin D  and we can feel healthier, more alert, and less stressed.

Every garden needs to be maintained, even during a pandemic.  So, why not head out to the garden, get some Vitamin D and get your happy hormones dancing.  Unfortunately, purse strings have tighten as a result of the pandemic.  But, you can still achieve and maintain a beautiful garden.


Garden Wow Factor Tips:


Water Feature 

If you adore water, implementing a water feature could be perfect. Many people yearn to hear the sound of trickling water.  Personally, I find it soothing and relaxing. The large orb fountains are very on-trend, but can be costly. Instead, consider installing a pond into your back garden. With a pond liner, some hard graft to dig a hole, and a hose to fill up your pond space with water, you can create a habitat for wildlife. Place some water lilies into your pond and some algae to help oxygenate.  And, you can create a healthy home for toads, frogs, and insects. You could install some underwater solar lights to help give your water feature the wow factor in the evening. Install a central fountain that you can pick up cheaply from a DIY store and enjoy listening to the sound of soothing water in your garden.


Borders

If you have borders that have seen better days, it’s time to clear the jungle of weeds and take it back to the bare soil. Till the area to break up the soil and add oxygen. Mix in some organic compost to give it nutrients before planting.  Think about what you want to plant in your borders. You have a blank canvas now.  If you are keen on creating a colorful landscape, think about the sorts of hues you want. For purple and blues, opt for a some bluebells, some deep purple dahlias, and some classic hydrangeas. These different floral patterns and bright colors will give your borders the wow factor for sure. 

If you are after a more sculptural display of fauna, think about some exotic palms. These are ideal if you have a south facing back garden and enjoy plenty of sun throughout the day. They relish the heat and light that full sun brings. Also, there’s nothing better than laying some shingle or gravel and putting in the windswept bonsais, cacti, and the hardy winter leafy plants. These need very little maintenance and can survive through droughts.

Furthermore, think about your watering regime. Many people create watering channels for their garden, with one of the many water tank pumps available to power their irrigation. You are much better watering your garden every two or three days and giving them a good drink of water rather than a little drink every twenty four hours.


Vegetables

Another one of my garden wow factor tips is to grew fresh vegetables. Set aside a specific section of your garden for vegetables and crops.  This way your flowers and other plants won’t have to compete for the same nutrients. Raised vegetable beds are ideal and very cheap to create. Use any wood that you have lying around to create a frame of any shape. The only requirement is that you can fill this frame with about eight inches of compost. This way, any seeds you sow will have enough space to put down some strong roots. 

Make sure your your vegetable bed is level on your soil or patio. Fill your raised bed with good soil and compost. Sow your seeds  according to the instructions on your seed packets. Keep it simple to begin with.  Especially, if you’ve never grown vegetables before. Potatoes are super easy to grow and the results are almost instant. The same goes for carrots and pak choi. This is also a great way to get the kids involved and away from their computer screens and tablets. As your simple vegetable plots begin to produce, you can begin to experiment with more exotic fruits and vegetables.


garden wow factor tips


Dining

If you really want to give your garden the wow factor, consider making your patio the ideal space for dining. With the sunlight hours reaching their peak, there is nothing nicer than eating a family meal outdoors. Your kids will love spending some quality time together as a family and enjoying some good food outside. Clear your patio of weeds and consider installing an awning that attaches to your house.  It can provide shelter from the sun or rain. No matter how fierce the elements are, you can remain cool and dry.

If the nights are getting a little chilly, think about installing a fire pit or chimnea. These are a lot of fun as well as heat-producing models on the market. Rather than shivering the evening away under a blanket, you can keep warm next to a patio heater. Fire pits are also great to toast marshmallows and have a very rustic style barbecue.


Your garden has become an added living space to your home, so it is time that you start treating it with some respect. Implement a few of these garden wow factor tips.  You can be enjoying a beautiful garden space without breaking the bank too.

12 Best Slicing Tomatoes for Backyard Gardens

Today, I’m sharing gardening tips on the best slicing tomatoes for backyard gardens.  First, when I’m planning my garden, I think about the tomatoes that I want to plant.  Do I want them for my BLTs, to make sauce or to can for my soup and chili later in the winter.

Slicing tomatoes are great for sandwiches, covering burgers, using on hoagies and subs or smeared with may and salt and pepper. 

For the record, I have planted numerous varieties of tomatoes over the years.  Some have become a staple in my garden, and some I have vowed to never plant again.  So, lets not waste any time.  Lets check out the list.


best slicing tomatoes


Best slicing tomatoes:  


Cherokee Purple – First, my favorite tomato is the Cherokee Purple.   It has a smoky flavor and pairs perfectly on my BLT.  Additionally, I love it sliced with a little mayo, salt and pepper.  You will find them in my garden every year.  The Cherokee Purple is similar to a beefsteak and is a heirloom tomato.

Mortgage Lifter The Mortgage Lifter can weigh as much as 2 lbs. with the right conditions.  So, make you have it staked well.  The plants grow heavy enough to lift a flimsy cage out of the ground.  This tomato originated in West Virginia in 1922.

Paul Robeson – Next, the Paul Robeson tomato is a deep purple color that almost looks black.  It is second on my list of favorite heirlooms.  The Paul Robeson was named after the famous opera singer and civil rights activist, Paul Robeson.  I love these tomatoes on BLTs and sliced with mayo.


best slicing tomatoes


Brandywine Red – The Brandywine Red is one of the most popular heirloom garden tomatoes.  It has a wonderful taste.  Additionally, it’s a beefsteak.  So, it’s great for slicing.  One of my favorites.

Brandywine Pink– Next, the Brandywine Pink is an heirloom tomato like its counterpart, the Brandywine Red.  I love the color of this tomato.  This tomato is a rosy-pink and has a little bit of a tang.

Celebrity  The Celebrity tomato produces large fruit.  So, it’s actually considered an all purpose tomato.  They are large and can be used for slicing, canning and sauce.  Additionally, you can also plant these in large container. So, you can grow them on your patio or balcony if they get enough sunlight.  I like the flavor, and use them on my BLTs.


Black Krim –  The Black Krim has a very rich flavor.  It is high on my list of garden tomatoes.  This tomato is a dark burgundy color similar to the Cherokee Purple, Black Krim, and Paul Robeson.  They are a beefsteak, which makes them perfect for sandwiches.  They originated in Crimea.

HillbillyUnfortunately, the Hillbilly tomato is too sweet to me. So, I really don’t like it on my sandwiches.  However, other family members love them.  I share my garden harvest, so I continue to plant them so they can enjoy them.  The Hillbilly is an heirloom, which originated in West Virginia in the 1800s.  It’s a beautiful color, yellow and orange. It displays beautifully on the BBQ table for burgers.  

Delicious – Also, The Delicious tomato holds the record for the largest tomato ever grown, a whooping 7 pounds.  They find a place in my garden every year. The Delicious is an heirloom, and all purpose tomato.  It’s perfect for slicing, making tomato juice and canning.

HomesteadThe Homestead is an all purpose tomato.  It can be used for slicing, canning, and  salads.  This tomato is sweet.

German Johnson – Another West Virginia tomato that is an excellent slicing tomato.  Additionally, the German Johnson is thought to a parent of the Mortgage Lifter and Radiator Charlie tomatoes.  The German Johnson tomato is popular at Farmer’s Markets, and it is an heirloom.  It has an excellent flavor, and the color is more pink than red.

Better Boy – Last, the Better Boy tomato is great for slicing.  It has been around for about 50 years, and produces a lot fruit.  So, stake this plant heavily.  The flavor is excellent, and it will always find a place on my BLT


It’s nice to have a variety of tomatoes on the dinner or BBQ table in the summer.  They make a great conversation piece too.  Your fellow gardeners will want to know about them.

Finally, check out my list of best slicing tomatoes and purchase a few for your backyard garden.  You won’t be disappointed.


Tips on Landscaping Small Yards

Flower gardening can be therapeutic.   Today, I’m sharing tips on landscaping small yards.  The idea of hiring a professional designer for your garden can be daunting for the typical household.  Especially, if you only have a small front yard.  We assume that gardening talents are best suited for large areas.  Furthermore, if you don’t live in a Beverly Hills mansion you probably don’t need a professional gardener.  It is a common belief that garden designs need spacious areas.  Not true!


landscaping small yards


We are probably influenced by the pictures of parks, castles and celebrities’ homes.  They include garden designs with luxurious water features.  There are live fish, creative hedge cuttings, and magnificent flower displays.  However, there is more to gardening and outdoor scenes than meets the eye.  Small yards could benefit from the know-how and style of a professional too. Here’s a few tips on landscaping small yards:


Eliminate Landscaping Mistakes 

When you work with a small space  you need to be creative.  It’s important to maximize what you have.   It’s precisely what landscaping a small yard is about.  For small yards, landscapers ensure that they maximize the space without compromising on style, diversity, and vegetation. Too many home gardeners are worried about creating an outdoor garden that is inviting and relaxing.  Professionals can help you understand what your soil needs in terms of nutrients.  Furthermore, they understand what plants will thrive in your tiny space.  Adding unnecessary features or plants that won’t survive is not beneficial.  Everything needs to have its place.


landscaping small yards


Learn to Preserve Wildlife 

Your yard may be small, but it can still play a significant role in the conservation of wildlife.  With the help of a professional, you can create a bee-friendly path.  For example, using flowers that naturally attract these active pollinators should be incorporated.  A lavender bush would be the perfect addition to a small garden.  It injects both color and scent.  Additionally, lavender is also ideal for small gardens as it grows in the roughest conditions.  As a result, you don’t have to worry about prepping your soil.  Furthermore, your garden contractor can be a precious ally when it comes to developing eco-friendly maintenance habits.  They will utilize natural repellents rather than pesticides and insecticides.

Maximize Your Money  

Last but not least, your small yard could save you a ton of money.  As a result, you can work on a vegetable bed.  A specialist will advise you on the most suitable vegetables for your soil, your climate, and your lifestyle.  Many veggies come in dwarf sizes, which makes space less of a worry. Ideally, you should opt for vertical growers, such as beans, beets, or cucumbers.  In a small area, you need to rely on crops that grow quickly.  Growing vegetables can soon reduce your need for grocery shopping.  Additionally, you can follow the tips of a professional to create a compost bin that will nourish your vegetable bed while repurposing all your kitchen and yard waste and paper.


Every garden can benefit from the knowledge and expertise of a certified landscaper.  Homeowners who are struggling to bring their small yard to life could create a wildlife paradise with the help of professionals who can ensure a cost  and space saving design.


Planting and Harvesting Garlic

Are you wondering how to plant garlic in your backyard gardenPlanting garlic in your backyard vegetable garden will give you a reward for sauce, salsa and more.  Today, I’m sharing gardening tips on how to plant garlic in your backyard garden.  You see I planted garlic last year and had no success.  So, I decided to try again in the fall. Look at the nice healthy garlic plants that I harvested from my backyard kitchen garden below. 


planting and harvesting garlic

I planted onions in this space last year and they did great. So, I decided to amend the soil with my homemade organic compost.  My compost is leaves and kitchen scraps.  The garlic cloves loved it.


growing home grown garlic


Harvesting garlic was at the top of my list this week.  The size of the bulbs were glorious!  However, harvesting garlic requires muscle.  The roots at the end of a garlic bulb run deep.  As a result, you can’t pull the bulbs out as you would an onion.  Since this was my first year planting and harvesting garlic, I didn’t realize how much muscle would be required.

To avoid damaging the bulbs, you must remove the dirt until the entire bulb until it is exposed.  Once the bulb is exposed, it is easier to get to the bottom of the bulb.  First, I used my garden shovel and my hands to remove the dirt around the bulb. Please wear a good pair of gardening gloves to protect your hands and nails.  You will be digging!


Next, I place the shovel under the bulb and worked it until the garlic bulb became loose and I was able to pull it out.  Nice way to get an upper body work-out, trust me.  I recommend lifting weights during the winter so you can be prepared for this job in the summer!


harvesting garlic

     
It’s amazing what can happen in 2 – 3 weeks in the garden.  Take a look at the picture directly above.  I harvested the bulb on the bottom 3 weeks before I harvested the other plants.  You can see how much smaller it is than the other cloves, but it cured beautifully.  It is actually ready to use.

Some people braid their harvest, but I’m just going to store mine in a garlic bag in a corner on the counter since it’s a small batch.  It won’t take me long to use it when I make tomato sauce.


harvesting garlic


The newly harvested bulbs will cure for 3 – 4 weeks.  Once they turn white and achieve a covering like paper on the garlic bulb, I’ll shake off the dirt.  I cut off the roots and stem with gardening shears and they’re ready to go.  Some gardeners leave their harvest in the garden to cure.  But, I brought mine in the house and allowed them to cure in the kitchen. Stay tuned for a post on what it looks like after it has cured.  Do you plant garlic? How do you allow your plants to cure?

You may also like What You Should Know Before Growing Garlic.

Tips on Renovating Your Backyard

renovating your backyard


Now might not seem like the best time of year to get busy in the garden.  However, it is if you’re planning on a complete renovation.  Because it’s a big job, it’s likely to take a number of weeks or even months to complete.  So, if  you start now you should be ready by the spring to start enjoying your garden.  Here are a few tips on renovating your back yard:

Tear Out The Old

First, clear out the old to make way for the new. This could mean ripping up old decking slabs, getting rid of shrubs, or trees and hedges.  Additionally, knocking down walls that you no longer want. You will need to remove the grass and top layer of soil if you’re going to lay a new lawn.  Removing the old grass is going to be the hardest part. Considering hiring a professional company like https://www.fastskipbinsbrisbane.com.au/.  Additionally, be prepared to put in a whole lot of work. If you can, round up family and friends to help you.

Create a New Plan

Once everything has been cleared from the yard, you can evaluate the space and decide what you’re going to do next. For example, you can draw out scale plans of where you want everything to go.  This includes the lawns, flower beds, a pond and everything else.  This will give you an idea of how big individual components will be and how you want it to look.

Lay The Patio

Every garden will benefit from a patio. It’s space where you can put a table and chairs and sit outside. You can enjoy family meals outside when it’s warm.  Also, you can BBQ or enjoy a glass of wine while you enjoy the nice weather. Furthermore, you could lay some slabs or go with decking. Decking looks smart and works well for both large and small gardens.  Most importantly, it can add significant value to your property.  If you are a DIYer, consider doing the work yourself.  Installing composite decking will make your life even easier. This is because the wood fibers are blended with .  As a result, it’s naturally weather .  Furthermore, you won’t need to sand, stain or oil like wood decking.  It save time and money.

Build Ponds, Walls or Water Features

Before installing any grass or plants, you will want to build any of the structures you have planned for your garden. There are lots of Youtube videos and articles,  as well as design ideas on Pinterest.  Check them out for DIY ideas.


renovating your backyard

Put Down The Lawn

Lawns are a good choice in gardens.  They bring color to the garden in the winter and are nice to sit on during the summer. Over time lawns can start to wear.  So, every few years reinvigorating it is worthwhile. The trick to a great lawn is prepping the soil underneath.  It should be properly levelled, aerated and nourished before laying down your turf or grass seed. Get your edges dead straight for the best finish.  It leave you with nice neat flowerbeds around the perimeter. From there, you can fill your beds with shrubs, trees and flowers- choose varieties that flower at different times of year for the best effect.