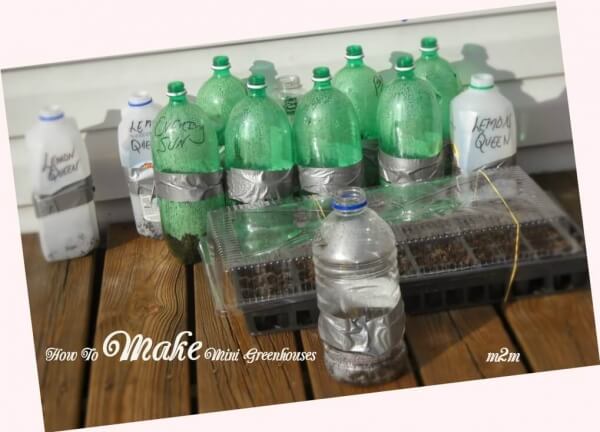
My American Goldfinch and Cardinals picked every sunflower seed off the flower heads last year. They’re such beautiful birds, I couldn’t get mad. So, I decided to plant sunflowers for them and some for me. Marigolds and Blue Buttons are planted in the tray above.
Here’s my list of sunflowers that I plant each year:
- Lemon Queen Sunflower (My fav)
- Autumn Beauty Sunflower
- Evening Sun Sunflower
- Mammoth Sunflowers
- Mexican Sunflowers
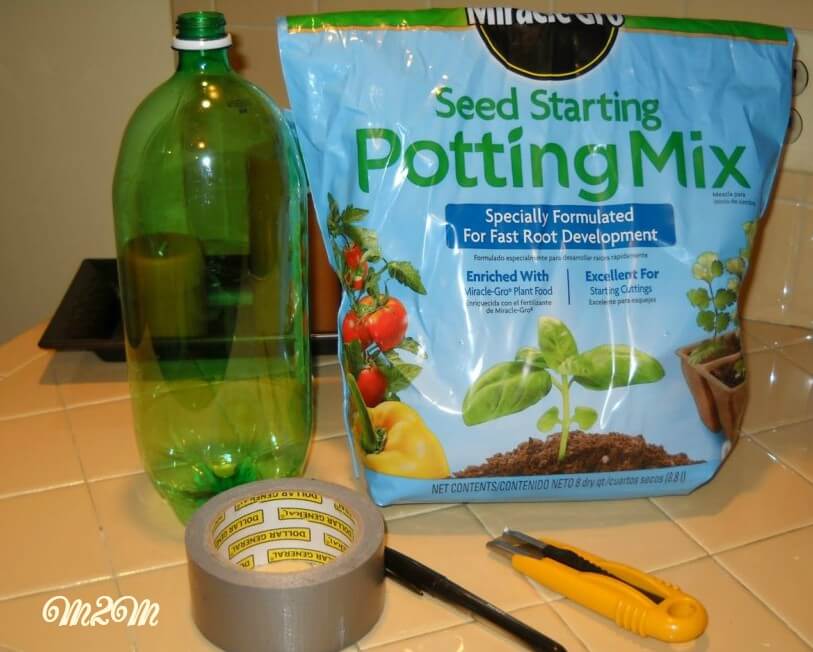
This is what you will need to make soda bottle greenhouses:
- 2 liter or other large bottles that are clear
- a box cutter
- seed starting mix ( I use Miracle Gro, just make sure it’s quality)
- selection of sunflower seeds
- duct tape
- permanent marker
- Bleach your bottle greenhouses to ensure all liquid has been removed and the bottle is sanitized. Rinse thoroughly and allow to air dry.
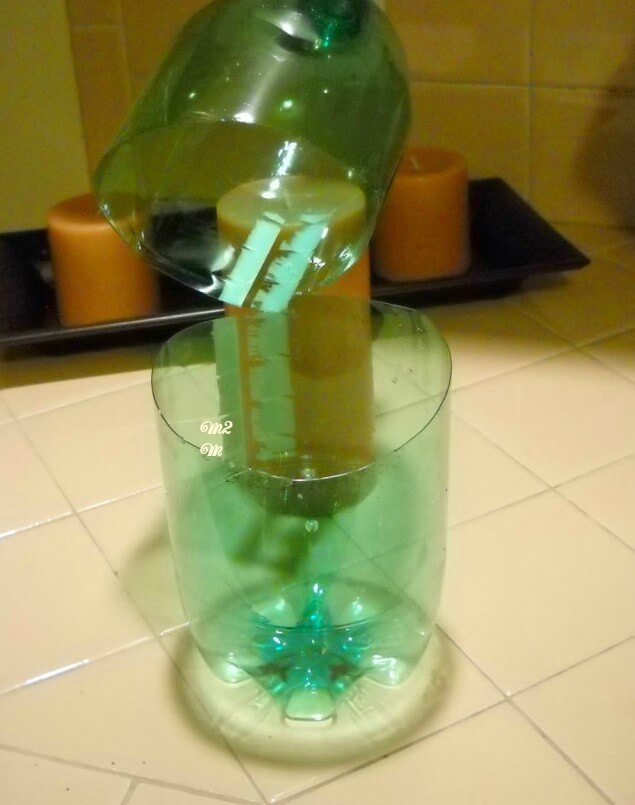
- Next, cut the bottle at the half way point all the way around with the box cutter leaving a small hinge. Leaving the hinge will make it easier to tape the bottle closed.
- Once you have your seed starter mix ready, place a few inches of the seed starter in the bottom of the bottle and plant the seed to the depth recommended on the package.
- Once you complete this task, use the duct tape to close the bottle. And you will want to mark the bottle with the name of the sunflower with the permanent marker.
- Place the bottle in a location where it will receive sun, rain and close to your house to help shield from wind gust. You may have to gently water the seeds if you don’t receive enough rain.
- Last, once the seeds germinate and reach the height of the cut, remove the duct tape and top from the bottle by cutting the hinge.
- You may need to add potting soil to the bottle once the plants takes off to ensure that the roots are covered. Just remove the tape and add the soil to the bottle.
Finally, make sure the last frost has passed before removing the top of the soda bottle greenhouses permanently. The tops serve as protection from those cold, frosty nights. I’m in Zone 6B, so the last frost date is usually at the end of April in my area. I hope that you have been inspired by my soda bottle greenhouses. Save your bottles throughout the year, and start your seeds in them next growing season.
You may also like How to Build a Bottle Greenhouse.