Golden Rules of Organic Gardening

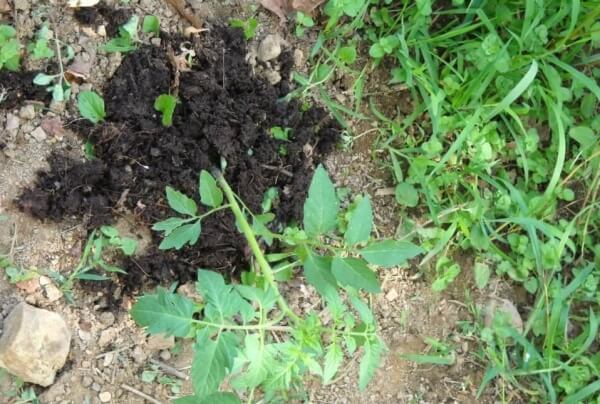
Organic gardening has been becoming more and more popular and for a good reason. Whether we are aware of it or not, many gardeners are already working on some form of organic backyard vegetable gardening. Organic gardening is the actual practice of growing lawns, vegetables, fruits, shrubs and more without manmade chemicals. It’s also about feeding the soil by tilling compost or manure into the soil.  


gardening, vegetable gardens


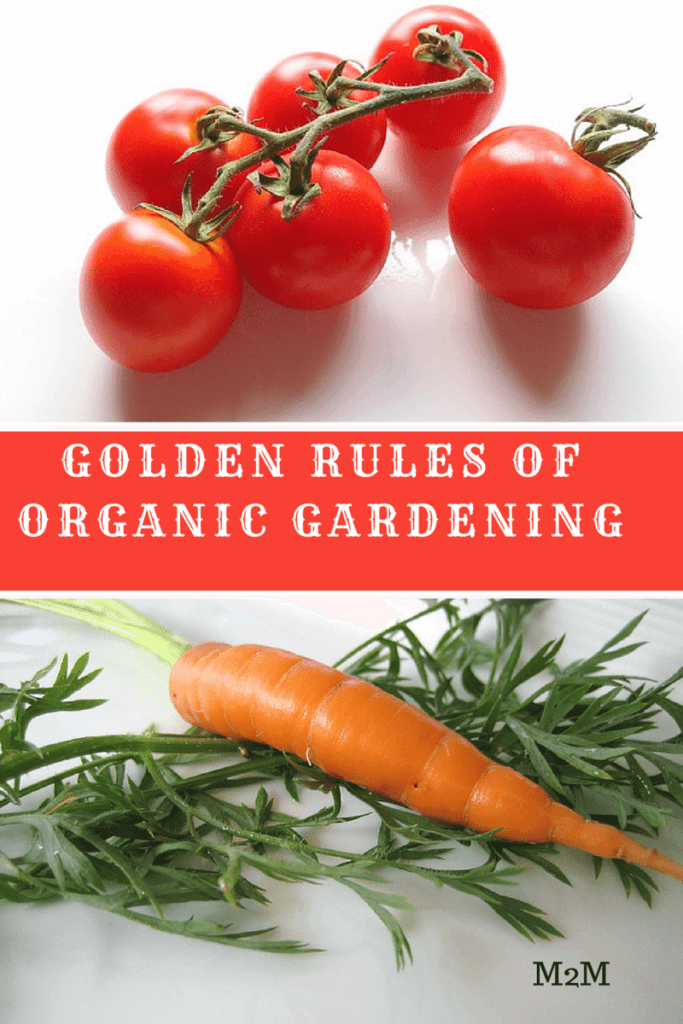
Organic Gardening Rules:  


It is getting harder and harder to do organic gardening since there are many toxins that get in the way. However, if you follow these golden rules below you will be able to start a really good organic garden for you and your family:

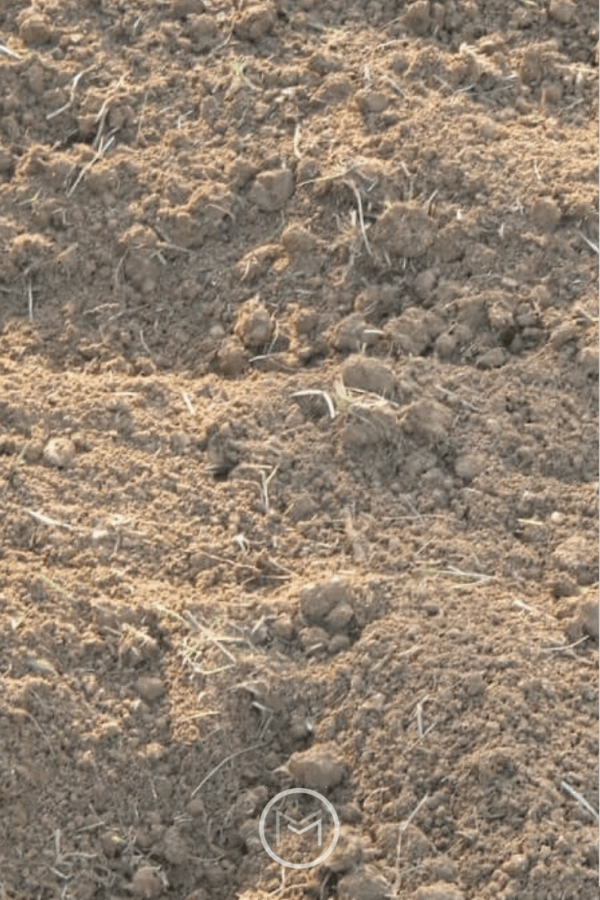
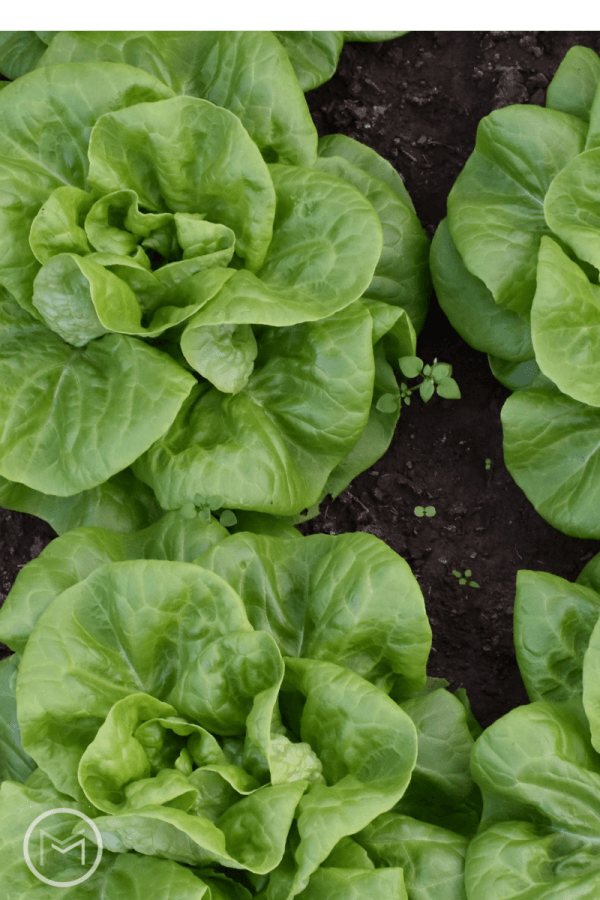
  • Invest some time and energy to build up your soil with a nice, high amount of organic matter that would be able to support a better quantity of beneficial soil microbes and fungi. Healthy soil will help grow healthy plants.


organic gardening tips


  • Ensure you have properly placed plants in a location where they will thrive. Planting plants in location where they don’t get enough sunlight or shade will cause them to die or not thrive. This is one very important part of expert gardening and landscaping that will help make your plants vigorous and healthy.  Healthy plants will be harder to succumb to disease and pests and they will be less stressed by bad weather if planted correctly. 
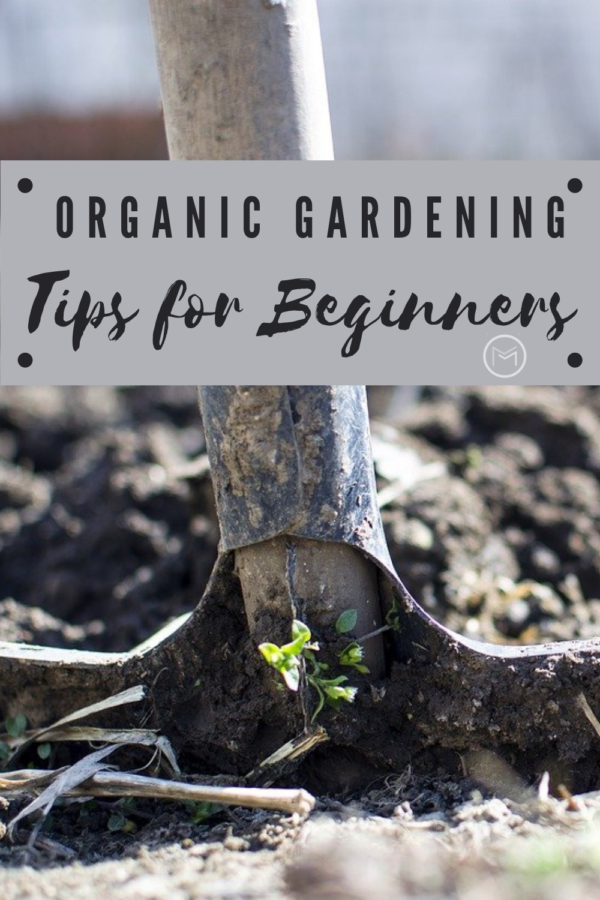
  • Take care of any disease and pest problem when first noticed.  You will need to take action right away. This will be a lot easier to work with during the early stages of an infestation, so avoid delays when you work on garden maintenance and landscaping.


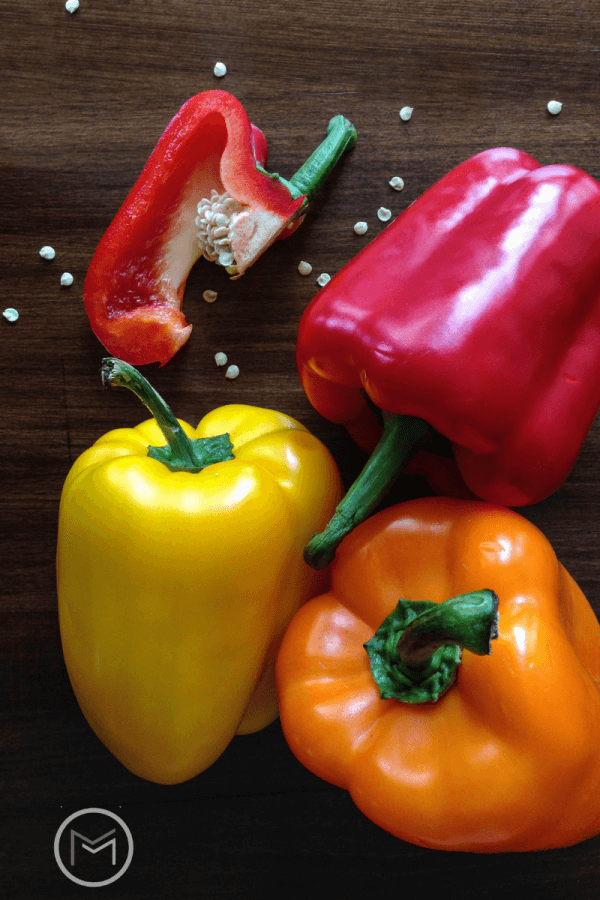
  • There are many benefits of organic gardening you can enjoy.  For example, the lack of harmful chemicals in your homegrown food is a major benefit of organic gardening.  Less overall harm to the land around you, preservation of wetland areas and groundwater and more.
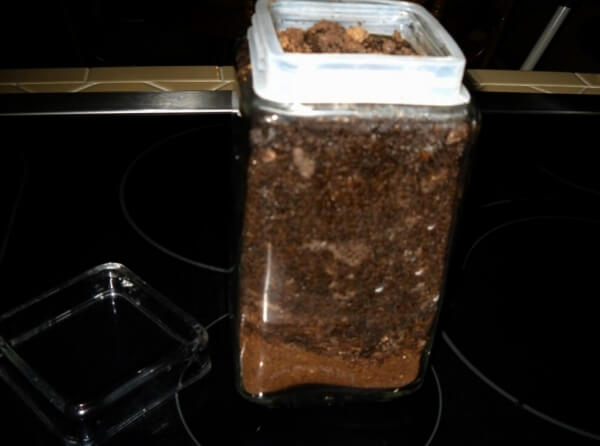
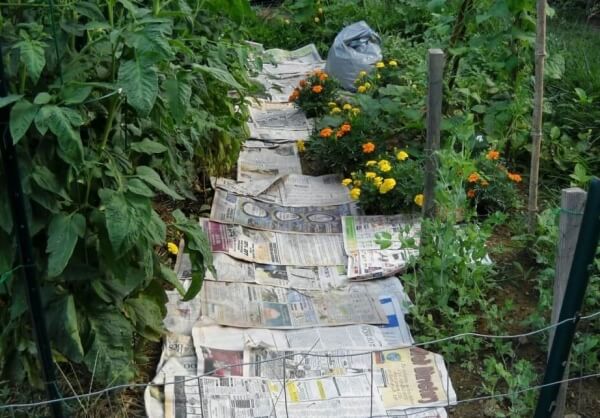
  • You can feel a lot better knowing you are actually doing something to change things. We can use compost or composted manure for fertilizer and mulch, not to mention we can use it in a really safe way. Leaves and straw as well as tree bark would make for excellent mulching choices when you need it.  Natural-based and organic fertilizers instead of chemically derived ones will also be a major part of your gardening efforts.
  • You can learn to apply the right techniques to make growing healthy plants an easier job, avoiding diseases and pests in the process. A healthy plant will be much more resistant to stress and more, so make sure you keep it that way.


organic gardening tips


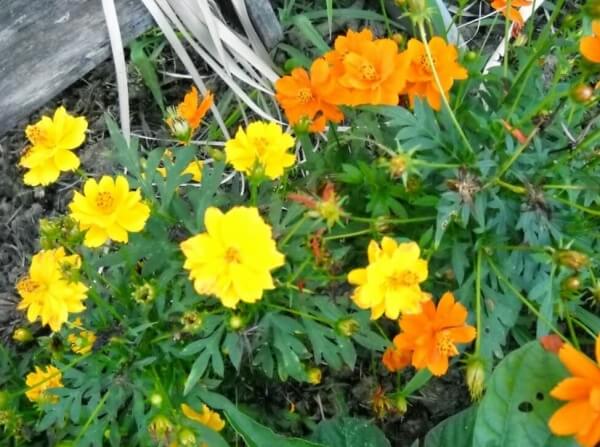
  • You can use beneficial enemies for the pest insect species in your garden.  Such as how ladybugs are enemies of nematodes and aphids.  Additionally, as other species combinations that would be a good solution.

Use natural deterrents and insecticides for bug problems.  For example, use insecticidal soap sprays, copper, sulfur, neem oil and more to solve your disease issues. Use the chance to remove any weeds that are too big for weed killer or work by hand.  It will be harder, but it will be worth the efforts.


Contributor:  Ella Andrews is a content writer. She has a passion for home maintenance, healthy living and gardening  projects. She is presently focused on writing and enjoying every opportunity to share tips and advice with her readers.  Check out these other  gardening tips too.


Tips To Help Save The Planet

Do you celebrate Earth Day?  Many people think it’s the big sweeping changes that will make an impact on the environment.  However, it’s really the little things that matter. When millions of people participate, they add up fast.  You can start recycling and upcycling in your backyard vegetable garden.  We have easy tips from landscaping experts, Rubber Mulch, to help you get started.   Every small action is part of the engine of positive environmental change!  Lets get started.  


earth day


Collect rainwater to help keep the garden green, even during a drought

A rain barrel will collect excess rainwater.  Something that can both protect and enhance your garden. It will help prevent flooding in low lying parts of the garden.  Additionally,  it will allow you to water your plants and flowers, guilt free, and with no impact to your water bill. Even during a drought, you can maintain your garden’s fresh and beautiful look. Tip –  Install a screen on the top of the barrel to keep pests and bugs out!

Bring on the Good Bugs!

There are several varieties of insects that are good for your garden.  You can encourage them to pay your plants and flowers a visit.  For example, ladybugs and lacewing flies love two things brightly colored flowers.  They also like sunflowers, marigolds  and plant destroying aphids. The former attracts the ladybugs and flies and the latter becomes their lunch!

So, how do you encourage the good bugs to visit your garden? Plant colorful flowers. They’ll see them like a botanical drive-thru window.


Do you like a little Irish Spring in the shower?

Buy two bars of Irish Spring soap. When you’re in the garden, shave a little of the first bar around your perennial plants and flowers.  Small, furry critters don’t care for it. It’s an inexpensive deterrent that smells a whole lot better than many of the products sold at the garden center.

When you’re done all your gardening efforts for the put it to good use on yourself. Its win-win!


Cornbread anyone?

If you’re partial to using corn meal gluten in your kitchen, you might want to use some in your garden. To keep weed  from germinating and growing into full fledged plants, sprinkle some corn meal around your flowers. The gluten will prevent any seed from germinating.  However, avoid it in your vegetable patch or nary a tomato will you grow.

Do you already have some weeds growing? A pinch of salt at the base of weed will kill it naturally.  Also, snails and slugs are slimy but oddly, they don’t care for man made slime!  As a result, spread some petroleum jelly on the edges of your pots and planters.  It will save your plants from becoming an all-a-snail-can-eat buffet.

Reuse milk jugs and plastic bottles

We all have too many of them in the house.  However, most can be recycled.   But you can also put a few of them to good use in the garden. You can keep your early spring seedlings safe from sudden frosts or other harsh weather.  Cut  the bottom from the jug or bottles and placing them over top of the seedling. This will protect them from threats of spring frost or hail. Just don’t forget to remove them when the good weather arrives.  The plants can benefit from the full and healthful effects of sun and rain!


Mulch much?

Mulching is so important for your garden! It protects plants from pests and weeds.  And it helps the plants retain moisture and the necessary minerals from the earth. Mulch helps cut down on the time and energy you spend maintaining the garden and plant beds. Take it to another level by using a sustainable and long lasting Rubber Mulch. They are made from recycled rubber tires. You can’t get more friendly to your garden and the earth than that!


Epsom salts for the garden?

So, did you know that Epsom salt is a perfect natural fertilizer? They will help keep your garden plants green, your flowers grow in abundance and balance the levels of magnesium in your soil.  An important mineral for your garden’s happiness. And then you can put some in your hot bath and relax those tired muscles after a day of tending to your beautiful garden!


Coffee grounds and eggshells are compost gold!

Who knew being addicted to coffee could end up being good for the garden? Coffee grounds that are placed in the earth or the compost, to a depth of 6 to 8 inches, can do a lot of good. The grounds provide phosphorus, potassium, magnesium and copper, all of which your soil needs.  They will release nitrogen into the soil.  Nitrogen is another essential compound for a healthy garden.  Sprinkle some as mulch at the base of your hydrangea plants and your pink flowers will turn blue as the grounds alter the PH levels of the soil!


Eggshells are good for your garden too:

1.     Eggshells are composed of 96% calcium carbonate so they can give your compost that hit of calcium it needs. Pepper and tomato plants love calcium!

2.     Crushed eggshells are sharp! Sprinkle some around your plants to deter pests like slugs and snails from munching on your growing garden.

These tips are things that we can all do to help our gardens grow and our earth to sustain itself.


RubberMulch.com is the original and environmentally responsible mulch made from 100% recycled rubber used in gardens, playgrounds and sustainable landscaping. Rubber Mulch is weather resistant, durable, and the most cost effective mulch around.  It protects children from falls on the playground. Rubber Mulch helps homeowners increase the curb appeal of their house and create the home and garden they have always dreamed of.

Soft Versus Hard Kitchen Garden Herbs

First, backyard vegetables gardening must include kitchen garden herbs.  They enhance the flavor of sauces, salads and other dishes.  But, before you plant or purchase your herbs, learn the difference between soft and hard herbs.  Also know their uses.  For example, soft herbs are leafy, tender and best used fresh.  Fresh herbs enhance the flavor and appearance of dishes.  Soft herbs can be used in sauces, salads, potatoes, and greatly enhances the taste, appearance and nutritional value of the food.


Here’s a list of soft herbs:

  • Basil (Sweet, Spicy, Genovese, Lemon, Lime, Cinnamon, Dark Opal and Thai to name a few).
  • Parsley – (Curly or Flat)
  • Cilantro
  • Tarragon
  • Fennel
  • Chives
  • Mint


kitchen garden herbs


Hard herbs are considered more flavorful than soft herbs.  Additionally, these herbs are added to dishes that require long, slow cooking, such as soups, stews, casseroles and roasts.  Hard herbs are removed before serving the dish.  Here are a few herbs that fall into this category:

  • Rosemary 
  • Thyme
  • Marjoram
  • Oregano
  • Dill
  • Bay Leaves
  • Sage
  • Mint (Chocolate, Orange, Strawberry,  Julep)


kitchen garden herbs

Most importantly, if you are planting mint remember that it is invasive.  So, I recommend that you plant this herb in a container to keep it from spreading. You should know, dill is know to reseed year after year.  So, be selective on where you plant it as well.  Additionally, you can plant various herbs in mason jars or small containers for use during the winter.  Find a few small pots, and place them in your window sill.

Another idea, use fresh basil, oregano, sage and rosemary in the winter from your window sill plants.  As a result, use them when cooking soups, stews, casseroles and roasts.  Also, herbs are perfect in these dishes.  I freeze and dry my basil and parsley.

Last, if you have limited space decide which herbs you will most likely use.  In conclusion, plant plenty and preserve them for later use. What herbs do you use most?  These are the herbs you should grow.


My Winter Sow Seed List

Are you wondering what vegetable seeds you can winter sow?  You’ve come to the right place. So, stay awhile and check out my list of best seeds to winter sow.  I started my winter sowing my seeds last week.  I can now check that off my backyard vegetable gardening to do list.  

My bottle greenhouses are sitting on my deck waiting for the perfect opportunity to germinate.  My list is not all inclusive, I’m sure there are many others that can be added to the winter sow list.  I live in zone 6B.  So, I select plants that will grow in my zoneSome plants do well in some zones, but not in others.  So be selective of the plants that you choose to grow.


winter sowing


Because I have a short growing season, it’s important that I give my plants a head start in the garden.  As a result, I start my seeds early so I plant out by Mother’s Day at the earliest and Memorial Day at the latest.  By mid-June my garden is fully planted.  I water and nurture the plants so they can establish a good root system.

I’ve been successful with some seeds and not so much with others.  I love the thrill of seeing what emerges each year and watching the plants produce.  Here’s my winter sow list:

  • Spicy Globe Basil
  • Genovese Basil
  • Greek Oregano
  • Italian Oregano
  • Sage
  • Thyme
  • Rosemary
  • Cilantro
  • Zucchini
  • Squash
  • Collard Greens
  • Lettuce – Salad Bowl, Romaine,  Butter Crunch, Black Seeded Simpson
  • Spinach – Noble
  • Cabbage
  • Cauliflower


Also, the following tomatoes found a place on my list to germinate inside this year:  Roma, Amish Paste, San Marzano, Cherokee Purple, Black Krim, Hillbilly, Yellow and Pink Brandywine, Tiffin Mennonite, Mortgage Lifter, German Johnson, Paul Robeson, Early Girl, and White Wonder tomatoes inside.


winter seed sowing


Unfortunately, not all of them will germinate successfully.  As a result, germinate enough seeds to ensure you produce enough plants for the garden. There have been times when I have attempted to sow a variety a second time if it doesn’t germinate.  So, allow enough time for this step if you want a certain variety.  Additionally, I sowed belle, cayenne, and jalapeno peppers.  Stay tuned, I’ll be posting updates on the germination journey.


Finally, I hope my winter sow seed list has helped you decide what seeds you will be winter sowing or sowing inside.  Again, it is not all inclusive and you will need to check your zone to ensure your seeds are compatible.  In conclusion, I suggest that you order a few catalogues to browse through the winter and make a decision based on your research.  I love looking at the catalogues and checking out the new varieties of tomatoes, peppers, lettuce and more.  Stay tuned for future gardening posts.


Why You Should Winter Sow Seeds

Today, I’m sharing tips on winter sowing seeds. Starting plants indoors is at the top of my backyard vegetable gardening list.  As a matter of fact, I started about 25 heirloom tomato plants under grow lights.  I’m hoping to get my garden in early this year and possibly get some plants in the garden twice.  My stash of canned tomatoes, sauce, corn, green beans, peppers and herbs is getting low.  


winter sow seeds


Did I mention that my tomato sauce is kid approved?  My grandchildren and son-in-law love it.  My daughter uses it in recipes that call for red sauce, and trust me there isn’t a morsel left on the plate.  One of my brothers requests it for his deer baloney during hunting season.  After taking inventory, I realized that I needed to replenish my stock if I plan to share it.  So, I’m going to winter sow seeds and grow others under the grow lights for my summer garden.


Here’s a few good reasons why you should at least try winter sowing: 


1. Cost Effective –  Winter sowing can be done cheaply.  For example, plastic containers, duct tape, a utility knife, seed starting mix and outdoor space is basically all you need.  A single plant at a garden center will cost $2.00  –  $4.00Things can get expensive if you’re trying to plant a garden to feed a family over the winter at that price.  

2.  Saves Indoor Space Indoor germination requires space.  Once the seedlings germinate they require a warm space with proper lighting.  Many gardeners don’t have space inside their homes for this endeavor.  As a result, they resort to direct sowing in the garden or purchasing expensive plants at the garden center.  Furthermore, you can use your deck, shrubbery beds, backyard tables, backyard benches, your garden, the options are limitless.  I don’t recommend concrete areas unless you have a bedding of straw.  Your plants won’t appreciate a cold bottom from the concrete.

3.  Nature Does The Work Once you place your containers outdoors, you let nature take its course.  The rain, snow, light and moderation of the temperature will help germinate the seed and cause the plant to grow at the right time.  Once spring arrives, you will have to take the top off the plants and give them water, separate or thin them and prepare them for spring/summer planting. How easy is that!

4.  Doesn’t Require A Light System Nature will provide all the light that your plants will need when you use the winter sowing method.  Indoor sowing requires grow lights or some type of fluorescent lighting system.  I have an indoor system and it works great; however, if you have to spend money to set up a system why not go the free route.

5. Doesn’t Require Hardening Off The rigid, mild, and warm temperatures prepare seedlings for movement to the garden.  When you sow seeds indoors you will have to get your plants adjusted to being outside. This requires you to harden off your plants.  Gradually expose your plants to shade, sun and nights before transplanting them in the garden will be necessary.

Once I complete my winter sowing seeds list, I will be posting a list of seeds you can outdoor sow successfully too.  Start gathering your jugs and containers, you will have plenty of time to start your winter sowing too.  You may also like My Winter Sow Seed List.


Heirloom Tomatoes & Their Characteristics

Today, I’m sharing gardening tips on heirloom tomatoes and characteristics.  First, I have my tomato plants under the grow lights, and hopefully I will be tilling the garden in a few weeks.  I believe the last frost date in Zone 6B is around May 15.  When I think of backyard vegetable gardening, heirloom tomatoes on a BLT is the first thing to come to mind.  They take up much of the space in my backyard vegetable garden. 
heirloom tomatoes


Why?  Because they have a totally different taste from store brought tomatoes and hybrid tomatoes. It’s hard to describe the flavor of a tomato, it must be experienced. I’m a visual person, so I thought you would like to see the end result of what is being planted in my garden.  Additionally, learn a few characteristics of my favorite tomatoes.  Also, I hope this information will help you make a decision on what tomatoes you want to purchase before you buy from your local garden center.

Before you select your tomato plants, decide how you want to use your tomatoes.  Do you want to use them for sandwiches slices, make sauce, paste or salsa.  Or do you want to use them in salads?  Will you canning them?  I love slicing tomatoes in the summer and just eating them with a little mayo and pepper. Yum! I also make salsa, sauce, freeze them and can my harvest, so I need a variety in my garden.


Heirloom Tomatoes and Characteristics:  


1. Brandywine Pink (HeirloomFirst, I like this tomato for its color and taste. How often do you see a pink tomato? The Brandywine Pink has a sweet taste, so I use it on sandwiches and as my go to when I want my sliced tomatoes with mayo. I also cut these in cubes for salads and tacos. I grow the Brandywine Red and Brandywine Yellow as well.

2. Hillybilly (Heirloom) –  Next, the Hillbilly originated in my home state West Virginia. The color is a mix of yellow and red. It is delicious and has a sweet taste. It slices beautifully. I also add it to fresh salsa or salads.

3. Yellow Beefsteak (Hybrid) –  So, I like the size of this tomato. It’s great for slicing.  The tomato is large and it’s great for thick slices.  Also, I add it to salads and salsa. I have a mixture of beefsteak seeds, so I don’t know if I’m going to get red, yellow, orange or green. It’s always nice to see what the end result is in the garden.

4. Brandywine Yellow (Heirloom) –  This tomato has a better taste that the
Brandywine Pink, but it doesn’t produce as many tomatoes and it’s the last tomato plant in the garden to produce fruit. If you find that you like this tomato, you may want to double the amount of plants in your garden and stalk them well. They produce fruit up to 2 pounds each. Very pretty in salads or slices.

5. Cherokee Purple (Heirloom)  – This tomato has beautiful deep burgundy color. The flavor is bold. This tomato is what home gardening is about, and no home kitchen garden is complete without at least one plant.


6.  Amish Paste (Heirloom)This is the tomato that I use for sauce. It’s a plum tomato that is meaty. I also use for salsa. Be warned, this plant grows hardy amounts of fruit that will topple your cage if not heavily stalked.


7. Better Boy (Hybrid) One of the most popular if not the most popular tomato in the garden. This is the slicer of all slicers and great on burgers. Nice medium size tomato that you can’t go wrong planting.


8.  Early Girl (Hybrid)Another kitchen garden favorite.  As result, I plant Early Girl because it produces early and it’s a great slicer.  Early Girl is perfect on burgers as well as my go to for tomatoes and mayo.


9. Paul Robeson (Heirloom) Last, this tomato is called the luxury tomato. It is named for Paul Robeson who was considered elegant, renowned, and charismatic. I think this is my favorite tomato.  I remember the first time I tasted this tomato, I fell in love.  Because the taste is indescribably delicious, it will have a place in my garden if no other makes it way in.
Heirloom tomatoes are not know for their beauty, but their taste.  The crack and have other blemishes, but the taste remains superior.  I hope that you found my list of favorite heirloom tomatoes beneficial.  You may also like:  10 Benefits of Vegetable Gardening.


How To Grow Bigger Tomatoes

Today I’m going to share with you the steps on how to grow bigger tomatoes.  Large, beefy, juicy tomatoes. You know the kind that makes you say, now this is what summer is all about.  Some of my heirloom tomatoes weigh up to 1 – 2 pounds each.  Let’s find out how you can grow them too!
Over the years, I’ve gardened by trial and error. I’ve become successful with growing tomatoes, garlic, onions, beans, peppers, cucumbers, squash, zucchini, cantaloupe, and watermelon over the years.  These items are the staple of my backyard vegetable gardening experience. 
how to grow bigger tomatoes


1.  Healthy Garden Soil –  Growing bigger tomatoes it starts with your soil.  I row garden on a 20 x 40 plot, so I till my garden and I till deeply.  Many gardeners use the lasagna method, turned soil method or raised beds because they don’t require tilling.  I proudly garden as my grandfather did.  Before the garden is tilled,  I recommend having your soil analyzed by your local County Extension Office, Agricultural Center.  They determine what nutrients are needed before planting my garden.  You can also purchase your own kit and analysis the soil yourself.  Different vegetables deplete the soil of nutrients like calcium or iron during the growing season.  Having the soil analyzed will help determine what you need to add to ensure you have a healthy garden.  Also, have the soil analyzed before adding fertilizer.      


Backyard Gardening


2Organic compost – I use organic material to grow bigger tomatoes in my garden.  Many gardeners call it Black Gold I mix the compost into the soil before placing my tomato or peppers in the hole and side dress the plant with a nice helping of the same compost.  If you don’t have organic compost,  use dried crushed eggshells, crushed calcium pills and/or Epsom Salt in the hole before planting along with a dose of manure. The eggshells, calcium pills and Epsom Salt provide calcium to your plants.

gardening


3.  Plant deeply
– Another key to growing bigger tomatoes is to remove the bottom leaves from the tomato plant. Only the top leaves should be exposed as shown above.  You want your plant to have deep roots, so the deeper you plant the better.


Natural Garden Fertilizer


4.  Provide natural fertilizer Coffee grounds are an excellent natural fertilizer for growing tomato and pepper plants. I mix a few tablespoons in with my organic compost, above, and side dress around the entire base of the plant. Coffee grounds attract earthworms.  Earthworms are great for aerating the soil, and keeps away snails and slugs which are detrimental to your plants. If you don’t have organic fertilizer, purchase Miracle Grow tomato fertilizer and spread around the base of your plants.


gardening, tomato gardening


5.  Weed Control – I use straw or leaves as a mulch.  I collect leaves in the fall to keep weeds down and to retain moisture. Keeping the weeds under control is important.  Weeds take energy away from your plant.
backyard garden paths


6.  Companion Plant – I use marigolds between my tomatoes and pepper plants. Marigolds are great for pollination, which your plant needs to produce healthy fruit.
 
backyared vegetable garden tips
7.  Proper Spacing – You will need to reach around your plants for care and harvest.  So, make sure you give each plant adequate space. I create paths between my rows by layering newspaper or flatten cardboard boxes.  There’s a Dollar General near me, and they’re happy to share their boxes.  Once I have the paths made, I cover the newspaper or cardboard boxes with leaves or straw. This also reduces the amount of time that I spend weeding too. The paths should be at least 2 – 3 feet wide.
8.  Water and fertilize regularly – Add 2 teaspoons of Epsom Salt to a gallon of water and give your plants a good drink when you initially plant and regularly thereafter.  Be sure to water at the base of your plant only, you don’t want garden soil splashing on it. You can use a spray bottle to spritz the foliage of your plants with the Epsom Salt mixture too. Also works with peppers.  I found CVS Epsom Salt on sale last season for half price, so I purchased several cartons.  It will make enough spray to last through several growing season.
I hope you find my tips on growing bigger tomatoes helpful. Try them, and you will grow bigger and juicier tomatoes too. Be sure to subscribe to my blog for additional gardening tips and posts and follow me on social media.
 
You may also like:  How To Stake and Cage Tomatoes
                                         Planting and Harvesting Garlic

How To Stake Tomato Cages

Today,  I’m going to sharing backyard gardening tips on how to stake tomato cages. The majority of the tomatoes that I grow are heirlooms.  Heirloom tomatoes grow tall and become heavy because of the weight of the tomatoes.  You can’t use a flimsy tomato cage for heirloom tomatoes.  Why, because the weight of the heirloom tomato plant will lift a cheap, flimsy tomato cage right out of the ground.  I learned that lesson the hard way.


backyard vegetable gardens


Some of my heirloom tomato plants have grown 6 – 7 feet tall, and have gotten heavy enough to topple my tomato cages. Once this happens, it’s hard to pull the vines up without damaging them.  My tallest cage is 5 foot, so they need some help in keeping them steady and strong enough to support the weight of the tomatoes on the vines.  My best and most sturdy tomato cages were purchased from Tractor Supply.  I went back to purchase more the next season, but they no longer carried them.  As sturdy as they are, they still need to be staked.

Here’s how to stake tomato cages:

  • I purchased 6 foot fence stakes from Lowes to stake my tomato cages.
  • After planting the tomato plant and placing the tomato cage over it, push 2 stakes deep into the ground directly beside the cage.
  • Tie the cage to the garden stakes with garden ties. You can purchase the ties from your local garden center. I buy the rolls.  You will need them to tie up your tomato vines once they start growing.
  • For the heavier cages I used two stakes, but for the lighter and smaller tomato cages I use 1 stake.  Heirloom tomatoes will go in the heavier cages and hybrids in the smaller cages.
  • It’s important that you stake the cages when you first plant your tomatoes; otherwise, you risk damaging the roots of your plants.


staking tomato cages


The cages in the picture below, blue, red, light green and yellow, were purchased from Lowes. Pretty colors, but not the same quality as the ones from Tractor Supply even though they were the same price. Again, the smaller cages were used for my hybrid tomatoes. Hybrids don’t get as tall or as heavy as heirloom tomatoes.  However, a strong wind can topple these cages and more than likely will damage your plant.  So take precautions.


The picture below is one of my heirloom tomato plants. You can see how thick the vines are on this plant. You can also see why it’s important to support the plant early. If you don’t want to spend money on garden ties, cut up old stockings or tee-shirts into strips. Any soft material will work.  You can see the stakes on the side of the cage.


stalking tomato cages


I planted 10 tomato plants last season, and found 3 volunteers. This is one of my volunteer tomato plants below.  I removed the weeds around before I staked and caged the plant.  This one needed support to keep it from leaning too.  I leave my volunteers in the garden.  If they produce, I take the tomatoes to the local food bank.  They appreciate fresh garden vegetables in the summer. This year I made a pledge with Ample Harvest to take tomatoes, cucumbers, squash and zucchini to the food bank.

The dressing around this volunteer is from my homemade garden compost. It is so dark and rich it is unbelievable. This is why they call it Black Gold. Decomposed leaves make this compost Black Gold.  You can follow the link below if you would like to learn more about my Black Gold.


Backyard Tomato Plants


Finally, if you’re using containers for your tomatoes, I would recommend that you use a 4 – 5 foot garden stake to support your plant.  Local garden centers have them for a few bucks.  If you’re lucky enough to have bamboo around, cut a bamboo pole and use it in your container for support.

Stay tuned for my post on How To Grow Bigger Tomatoes next week. What are you planning to grow in your garden or containers this season?

If you like this post you may also like:  How To Make Garden Compost

Heirloom Tomatoes Versus Hybrid Tomatoes

Today, I’m sharing gardening tips on heirloom tomatoes versus hybrid tomatoes.  First, there’s nothing better than home grown tomatoes. Although my preference is  heirloom tomatoes, I also grow hybrid tomatoes.  Are you wondering what the difference is between heirloom tomatoes versus hybrid tomatoes?  Personally, I prefer heirlooms because they have a larger selection, they are more flavorful and are great for seed saving.


Heirloom tomatoes


Since gardening season is around the corner, it’s time to decide what tomatoes you want to grow.  You can grow them them on your patio or in your home garden.  I’ve put together a list of heirloom tomatoes that I’ve grown over the years.  But, do your homework and than choose a few varieties that interest you to grow in your garden.  Some tomatoes are great for slicing, some for salads, some for sauces and some for paste.  What do you want to do with your homegrown tomatoes?  Ask yourself this question before you choose.

Next, here’s a list of my favorite heirloom tomatoes:

  • Paul Robeson
  • Brandywine – Pink and Red
  • Cherokee Purple
  • Paul Robeson
  • German Johnson
  • Beefsteak
  • Black Krim
  • Hillbilly
  • Mortgage Lifter
  • Amish Paste – Meaty and great for sauce and salsa.
  • Boxcar Willie
  • Kellogg’s Breakfast
  • Delicious
  • Homestead
  • Roma
Fortunately, there are hundreds of heirloom tomatoes to choose from.  So, the above list are just a few that you can find in my backyard garden.  I try a new variety each season so my list will continue to grow.


garden tomatoes


My favorite hybrid tomatoes are:

  • Celebrity
  • Early Girl
  • Better Boy
  • Sweet 100 – My favorite in salads.
  • Big Boy


Additionally, the difference between a hybrid and heirloom tomatoes is that hybrids are a cross between two genetically different tomato varieties.  The plant produced next season could be from one or the other parent.  Heirlooms will produce the same result year after year.  As a result, I don’t save hybrid seeds.  I like to know exactly what I will be growing in my backyard vegetable garden.


There are a few disadvantages to growing heirloom tomatoes:

  • They must be heavily staked and/or caged.  The vines are vigorous and will grow wildly if not contained.
  • They are also known to crack easy and they are tender.
  • They are also not the prettiest in shape, but the colors are beautiful.
  • It takes longer to produce fruit.
  • You don’t find them on grocery store shelves.


Last, although there are disadvantages, heirloom tomatoes still win out in my backyard.

You may also like  Growing Heirloom Tomatoes

10 Vegetables For Container Gardening

Backyard vegetable gardening can be done in containers.  So, if you’re short on space but big on fresh vegetables in the summer containers can be a solution.  Today, we’re going to discuss vegetable container gardening and the best vegetables that can be grown in containers.  There’s nothing better than fresh veggies during the hot summer months.  Most people think that they must use large plots of land to create a kitchen garden.  However, that is simply not true.  
Vegetable container gardening has become popular over the years.  It’s a great way to grow fresh vegetables when you have limited space. I have listed 10 vegetables that I plant in my garden each year, but are also excellent choices for containers.  You containers can be regular flower pots, crates, 5 gallon buckets, or plastic tubs from the dollar store.  So, get creative and use your imagination.  Here’s 10 vegetables for container gardening: 
container vegetable gardens


1.  Cherry Tomatoes – First, cherry tomatoes are a great choice for hanging baskets on patios or balconies.  Don’t you love the idea of reaching up and grabbing a few tomatoes for a salad or snack. My favorite cherry tomato is the Sweet 100. It’s hard for me to make it out of my garden with devouring my harvest.

2.  Eggplant – Great for growing in pots. A 4 foot garden stake can be used to support the plant. Black Beauty is an excellent plant for containers. The blooms alone are worth finding a spot in the garden for eggplant.

3.  Bell Peppers –  Second, green, red, yellow, white or orange peppers can be grown in pots.  Five gallon bucks make excellent pots for container gardening. You will need a 4 foot stake to hold the plant.

4.  Herbs – Small clay pots are excellent for growing herbs in windows or on a patio.  Basil, oregano, sage, mint or Rosemary can be grown as shown.

5.  Chili or Jalapeno peppers  – Depending on your pot size, you will need a 2-4 foot stake to support your plant.

6.  Salad Bowl – Next, I have 2 wash tubs that I use.  For example, I grow Butter Crunch, Black Seeded Simpson and Salad Bowl lettuce so that I have a good mix of salad greens. If you use metal containers, place bubble wrap or newspaper at the bottom to keep the roots of the plants from burning. Lettuce likes cooler weather so if you use metal containers remember they hold heat. Place your container in a shady spot so the lettuce doesn’t bolt.


container gardening


7.  Lettuce – If you’re lucky enough to have wine crates, they’ve excellent for growing lettuce and herbs too.


vegetable container gardening

8.  Tomatoes  Five gallon buckets, rectangle, square or round pots can be used.  Depending on the variety you will need to stake or cage them. A 5 foot stake or cage should suffice, but be sure to stake or cage early. Look for varieties that can be grown easily in containers like Early Girl, Patio Princess or Tiny Tim to name a few.

9.  Cucumbers  – You will need a trellis so they an climb. Nothing fancy, find 2 sticks in your yard and wrap twine around them as shown.

10. Radishes or Carrots – Last, grow a pot of rainbow carrots with your children or grandchildren. The rainbow carrots are yellow, orange, purple and red.  Great idea to introduce kids to gardening while having fun.

Finally, make sure your containers have adequate drainage.  For example, use a quality, organic potting mix. Don’t limit yourself to the 10 suggestions above.  You can also grow peas, beets, squash, and zucchini in containers too.  Now that you know space is no longer an issue, you can enjoy fresh vegetables too.

 Additionally, you may also like: How To Grow Bigger Tomatoes or How To Stake and Cage Tomatoe