Homemade Fertilizer for Tomatoes and More

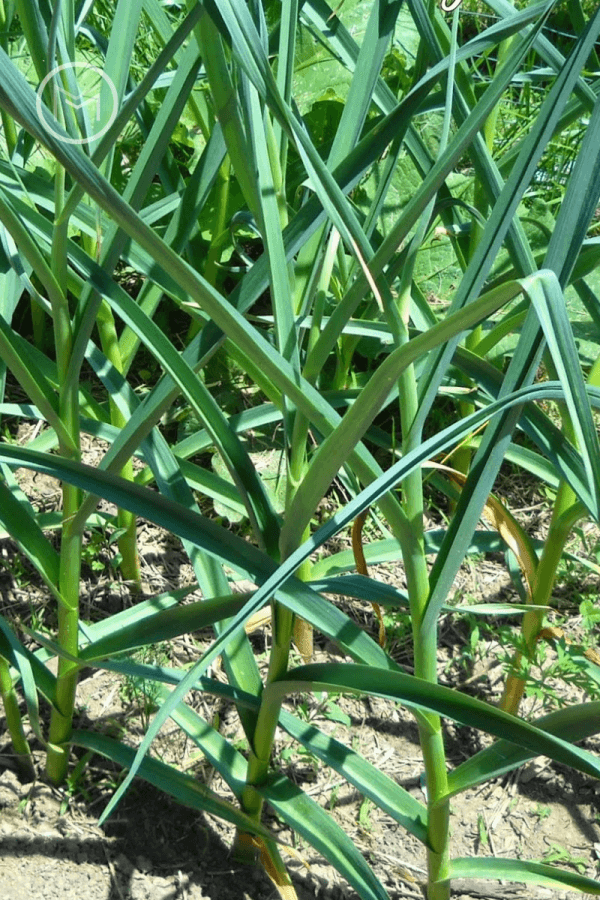
Today, I’m sharing gardening tips on using homemade fertilizer for tomatoes. Using these household items will help you grow bigger, juicy, disease free tomatoes this season.  First, I’ve been using these household items in my backyard vegetable garden for years.  I’ve had success with all of them.  So, I’m thrilled to be sharing these gardening tips with you.

Homemade fertilizers will give your plants the boost they need to grow and produce delicious fruit.  Most importantly, homemade fertilizers can be made organically.  You can add in products that will boost calcium, iron, potassium, sulfur, magnesium etc.  


homemade fertilizer for tomatoes


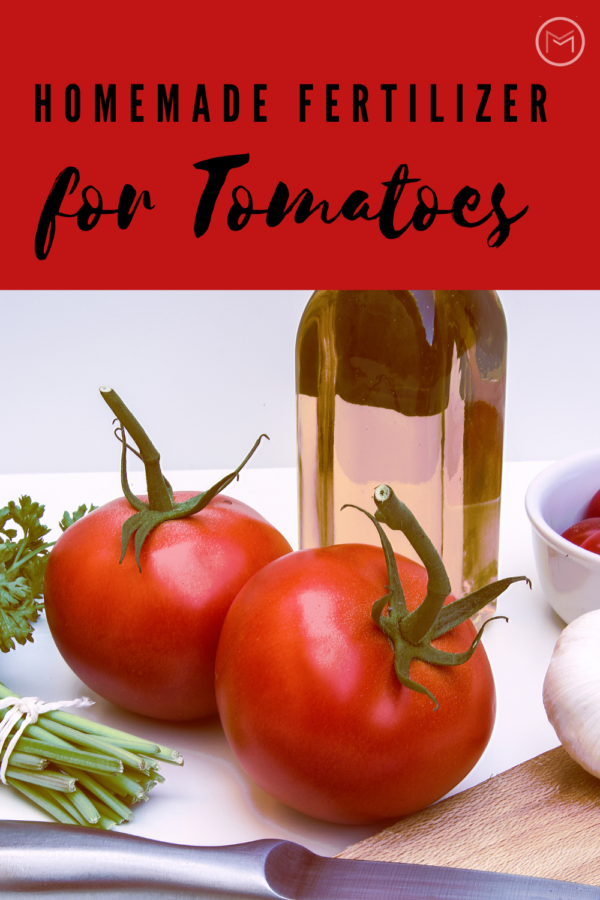
Homemade Fertilizer for Tomatoes:


Eggshells – I save eggshells throughout the year so I can use in my garden.  I wash them, dry them thoroughly and crush them to plant with my tomatoes.  Check out my post Using Eggshells in the GardenEggshells provide calcium for tomato plants.  Tomato plants need calcium need to produce large fruit.

Aspirin – Furthermore, you can use expired aspirins if you have them or purchase a cheap bottles from your local pharmacy to make a spray for your plants.  One bottle can go a long way.  Add 1 – 2 aspirins to a gallon of water.  Spray on your tomato plant throughout the growing season.


homemade tomato fertiizer


Coffee – Next, I brew coffee every morning, so I have plenty of coffee grounds to use in my garden. I simply put a scoop of coffee grounds in the hole with your plant and sprinkle a scoop of coffee grounds around each of your tomato plants.  Coffee grounds provide nitrogen to plants.  

Epsom Salt – You can also add 2 tablespoons of Epsom Salt to a gallon of water.  Spray your tomatoes plants with the Epsom Salt mixture once a month. Epsom Salt has Magnesium, which helps plants to absorb nitrogen and phosphorus.

Banana Peels – So, there’s lots of bananas in my kitchen.  I love them in my smoothies, and they’re great to take on the go.  So, rather than throw the peels in the trash, I recycle them.  I dry banana peels to use in the garden, a banana peel tea or use the peels directly in the planting hole.  Banana peels provide minerals to plants.  


Freeze Banana Peels


  • Begin my cutting your peels into strips.
  • Place them in a freezer bag and than freeze them.  Once you have 15 – 20 peels, it is time to  dry them.


Dry Your Banana Peels


  • Turn your oven on the lowest setting
  • Place your banana peels on a cookie sheet.  Be sure they are not touching.  You need the air to circulate.
  • Leave your oven door ajar.
  • Allow the peels to dry.  They are ready when they become brittle.
  • Use your chopper to cut up the peels.
  • Place them in an airtight container until they are ready to be used.


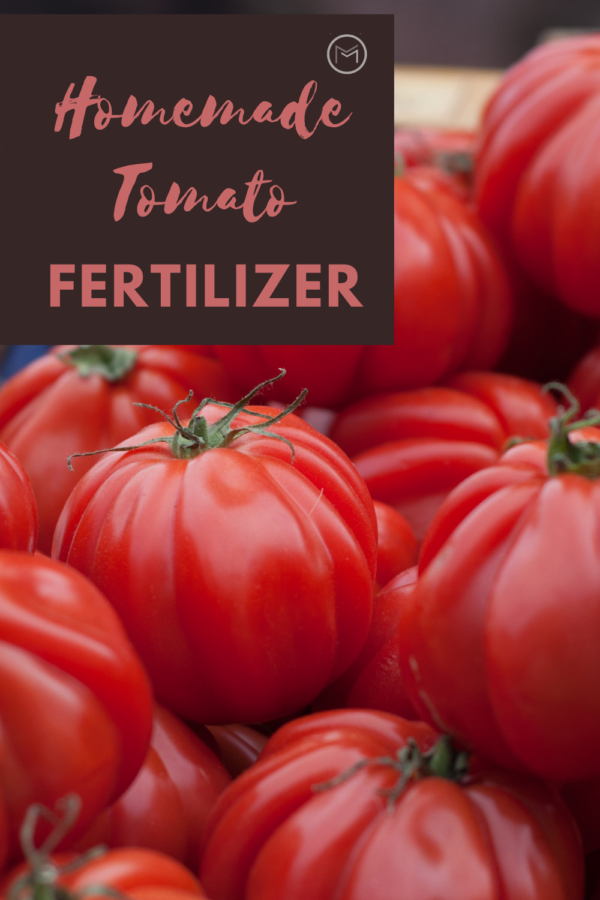
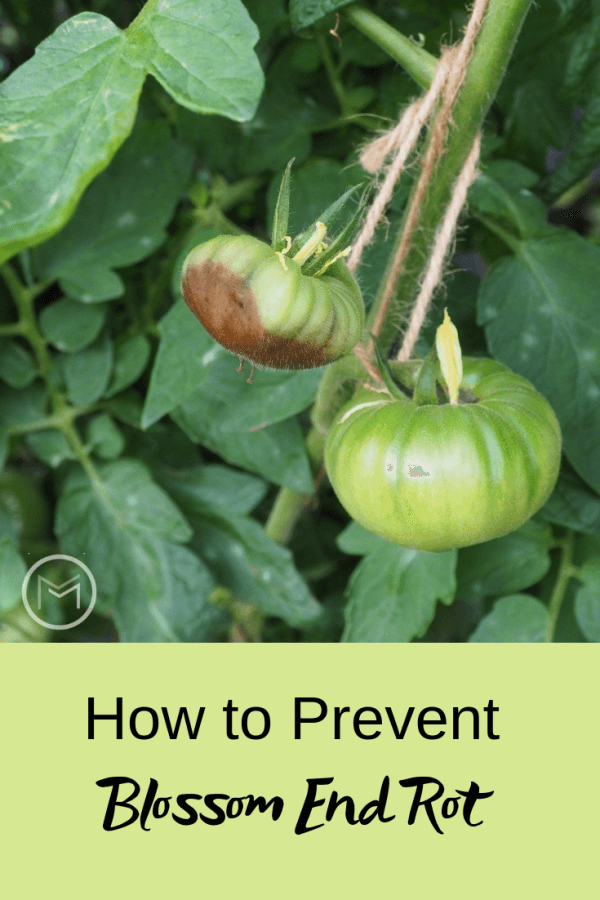
Finally, if growing bigger and healthier tomatoes is your goal; I hope you will make a mixture of homemade fertilizer for tomatoes.  Your tomatoes will love you for the added boost.  And, you will love your big, juicy, delicious tomatoes all summer.  Also, providing one of these fertilizers will help with preventing blossom end rot.  

You can also use the fertilizers:

  • Peppers
  • Carrots
  • Broccoli
  • Lettuce
  • Spinach
  • Celery
  • Asparagus   


You may also like homemade garden fertilizers.


45 Compost Items for Hot Compost Bins

Today, I’m sharing garden tips on household items you can compost.  If you’re a backyard gardener, you should be composting.  What is compost you ask?  Compost is organic material from kitchen scraps, yard clippings, and water that breaks down to fertilizer.  It’s a great way to recycle your kitchen scraps, yard and garden waste, and weeds.  Furthermore, it saves you money on buying garden center products and chemicals.


items for compost bins


First, there are 3 methods of compostinghot, cold and trench methods.   Today we’re going to discuss items that you can put into your hot compost bin.  If you decide to start a hot compost bin, you must remember to turn it.  Furthermore, a hot compost bin requires that you add items in layers.  This will help heat the pile to approximately 160 – 180 degrees and start the decomposition process.  Add a layer of green and than a layer of brown in your compost bin.

Next, be sure to place your compost bin on level ground and near your garden area.  It will help when turning the pile and placing content back into the bin.  Here is a list of items that you can and can’t use in your hot compost bins:


(Green) Items

  • banana peels
  • melon rinds
  • carrot peelings
  • pizza crust, taco shells etc.
  • apple skins and cores
  • coffee grounds
  • tea grounds
  • peanut and sunflower seed shells
  • weeds
  • fresh grass
  • plant clippings
  • cereal
  • toast
  • crushed egg shells
  • tomato skins
  • squash/zucchini peels
  • stale bread and biscuits
  • grapes
  • blueberries
  • strawberries
  • waffles
  • crackers
  • dead house plants
  • horse manure
  • chicken manure
  • pig manure
    *no dog or cat feces
    *no meats, fats or oils


(Brown) Items

  • leaves
  • shipping boxes
  • cereal boxes
  • egg cartons
  • paper towel rolls
  • toilet paper rolls
  • shredded mail and paper
  • coffee filters
  • wood ash
  • straw
  • paper towels
  • dried grass
  • wood shavings
  • newspaper
  • sawdust
  • corn stalks
  • lint
  • dryer sheets
  • feather dusters


items used in compost bins


Researchers have suggested that home owners have an average of 200 pounds of kitchen scraps/waste per year.  Add that to your yard waste and you can start creating your own organic black gold for your garden.  Instead of sending your scraps to the landfill, recycle it.  The landfills will be happy and so will your garden.

You will need a good compost bin and kitchen compost pail.  Your compost bin can be handmade or you can purchase one.  Be sure that is made of quality and you can turn your pile.

C0mposting requires patience, your pile won’t break down overnight.  Unfortunately, it will take months to produce organic matter for your garden and flower beds.  But, once it breaks down you will be thrilled.  You may also like:  How to Prepare Soil for Next Year’s Garden.


Preventing Blossom End Rot In Your Garden

Today, I’m sharing tips on preventing blossom end rot.   Backyard vegetable gardening can be fun and beneficial to your health.  And, there’s nothing better than a backyard garden home grown tomato.  Gardeners drool just thinking about the first vine ripen tomato for the BLT, salad or other recipe.

Unfortunately, growing a successful backyard vegetable gardens requires love, care and skill.  When we see those black spots on the bottom of our tomatoes, squash, and peppers, it can be devastating.


backyard gardening


Preventing Blossom End Rot:


In order to prevent blossom end rot, a gardener needs to understand the problem.  Blossom end rot is a result of a calcium deficiency.  Fortunately, gardeners can take care of the problem before it occurs.   Here are few tips that will help you avoid a ruined backyard garden crop:

Prepare your soil before you plant  –  Test your soil before you plant your garden.  Doing a soil test will let you know about any deficiencies.  You can purchase a kit or take samples to you local county Extension Office.

Add calcium to your plant – I add eggshells to the bottom of the transplant holes when I plant my tomatoes and peppers.  I save eggshells throughout the yard, wash and dry them thoroughly, and crush them to use in the garden.  I also use the eggshells to provide calcium for my backyard birds during the spring when they’re laying eggs too.

You can also add Epsom Salt to the tomato and pepper hole before adding your plants too.  Once you add the Epsom Salt, cover it with a layer of salt before adding your plants.  You don’t want to burn the roots of your plants.

Make sure you don’t over or under water plantsUsing a mulch will help maintain an even water level.  I use straw to mulch my plants.  Dried grass or leaves can also be used.

Stake plants early – When I plant my tomatoes and peppers, I place the cage around them or stake them immediately.  This avoids damaging the roots of the plants later.

Avoid damaging your plant’s roots – Avoid using a hoe around your plants once they are planted.  Simply removing weeds by hand will suffice.

Work eggshells into the soil around the plants – Work eggshells into the soil around your plant after you transplant it to add a top dressing.


Remember, prevention is the best medicine for a backyard garden.  However, checking for early signs on your fruit is key too.  If you spot the disease early follow these steps:

Remove the affected vegetables from the plant – Clip the diseased fruit from the plant with a pair of sharp scissors or clippers.

Make a calcium spray  – Spray your plants with an organic calcium spray.  Mix 2 tablespoons of Epsom Salt to a gallon of water.  Use a spray bottle to spray your plants.


I hope you grow a bumper crop of tomatoes this season.  You may also like:  Favorite Heirloom Tomatoes and Characteristics 


Understanding Gardening Basics For Beginners

Today, I’m sharing gardening tips on understanding gardening basics.  Your vegetable and flower gardens should be just as cozy and relaxing as your indoor space.  Sometimes a little know how, flower pots, a can of paint and a little creativity is all that is needed to bring your garden to life.

If you’ve left your garden space to the elements and it has been become battered, bruised, and weather worn all is not lost.  Check out my tips on backyard gardening basics and you will be on your way to creating beautiful outdoor spaces.


backyard gardening


Understanding Gardening Basics for Beginners:


Look at your weaknesses

If you want to maximize your space, you’ve got to put in the effort. So, even if you don’t have the time to look after a garden space, that doesn’t mean that you should let it go.  The best place to start is with the grass. Restart this by layering, which involves smothering the grass.  This this is a common method used when people want to start a garden. Killing the grass that remains by layering or polarization, gives you that blank canvas in which to start again. Take note, this can result in a lot of hard work.  But, you can always hire a professional to do this for you. But if you want to do-it-yourself, you’re off to a good start as a gardener.


Preventing the enemies from rising up

Weeds constantly sprout up.  However, if you want to ensure that your gardening area looks pristine use landscape fabrics.  It’s a synthetic textile that can be placed on planting areas to block weeds from coming up. This works by blocking the sunlight, which is the way weeds germinate. You can speak to a landscaping company to help you with the selection of fabric and installation.  Or, you can purchase the material yourself.  The fabric is porous, but you can cut holes into it so your plants can be placed and the water can drain into the ground.


understanding gardening basics


Understanding garden soil

It’s important that you have a basic understanding of backyard gardening so you can properly maintain your garden. The soil is the foundation of your garden.  So, the numerous problems that affect soil can result in various issues with your plants. Soil can suffer from three common issues:

  • The soil pH: If your soil is too alkaline or too acidic, plants won’t thrive. Be sure that you test the soil so you know the garden’s pH level and you can make the necessary alterations.
  • The type of soil: The composition of the soil and its texture can cause problems with drainage. If the soil contains too much clay, this will stop the water draining properly.  Sandy soil won’t retain water.  It drains through before the plants can absorb it.
  • Nutritional issues: This is something that can be remedied with a soil test. Because, much like us, we need specific nutrients, the soil requires specific resources in which to grow plants and vegetables. A soil test will let you know of any deficiencies before you start planting.  Fix any problems before you continue your garden.  Remember, the soil is the foundation.


understanding gardening basics


Using the right spots for the right plants

A garden is a blank canvas, but you have to be aware of certain limitations. While you may want certain plants in the garden, you’ve got to be aware of the specific limitations for each planet.  Plants need to be in the right conditions in order to thrive.  First, find out what your planting zone is.  For example, I live and garden in zone 6B.  Furthermore, you also need to know how much sun and shade you get in your garden area.  Choose the type of plants that will survive in your garden area.

Once you understand the basics, you can turn your garden into an area that suits your lifestyle. You can turn your battered, bruised, and weather worn garden space into a space that will thrive.  A garden is a lovely thing, but if we want it to flourish we have to be aware of it’s limitations and yours.  Having an understanding of gardening basics, doing a little planning and putting in some effort will have your garden area a beautiful space that you desire and deserve.


10 Garden Herbs That You Should Grow

I love cooking with fresh herbs.  Today, I’m sharing tips on backyard garden herbs that will enhance the flavor of foods and salads.   I love growing basil for my homemade tomato and pizza sauce.  Dill is another garden herb that is great for dips and sauces.  I can find plenty of recipes to use my fresh garden herbs.  So, I recommend that you use them too.  The flavor they give dishes is amazing.  So, herbs are always on my backyard vegetable gardening list of things to plant.  


garden herbs


I love cooking with fresh herbs.  Especially, basil when I’m making tomato sauce.  Dill is another favorite for dips and sauces.  Fresh herbs enhance the flavor of salads too.  I can find plenty of recipes to use my fresh herbs, and I recommend that you use them too.  The flavor that they give dishes is amazing, and yummy!


Here’s my list of garden herbs that you should grown:


Basil – My all around favorite herb.  You can never have too much basil, and it’s comes in approximately 50 varieties.  So, start planting what variety you want to add your garden or window cell.  My favorites are the Sweet, Thai, Spicy and Genovese basil.  I use it in my tomato sauce, and my water diffuser along with cucumbers and lemon.  It’s a refreshing drink, especially on hot summer days.  It’s great in salads and pesto too.


how to grow basil


Cilantro – Chop, chop, chop and add to your Mexican dishes. It’s a must in my salsa recipes.  Also, it’s delicious chopped and added to salads, omelets, mixed with sour cream and added to a bagel, and stir-fry.

Chives – I love chives, and have two plants in my garden.  They return year after year and more flavorful.  So, I visit the garden regularly in the summer to grab a bunch.  I use my kitchen scissors to snip them rather than chop them.  I love using them in my macaroni and lettuce salads,  on potatoes and in omelets.  Although they are edible, I’ve never used the purple flowers from my chive plant in any of my dishes.  However, I do use them as a garnish.

Oregano – Another must have garden herb for me.  I dry this one, and use it in in my spaghetti sauce, on top of pizza and in chili.  Dried oregano is stronger than fresh oregano.  So, I add it to my dishes in the early stages of cooking to my dishes to ensure it has an opportunity to blend with the other ingredients.


Rosemary – Rosemary is excellent with potatoes, on top of fish or in soups.

Parsley – To be honest, I don’t cook with parsley.  So, it doesn’t have a place in my garden or on my window cell.  However, I love using it for garnish.  Especially, on my turkey and chicken platters.  I just grab a bunch in the grocery store when needed.

Sage – A favorite in my turkey dressing. I also use it in my water diffuser with blackberries and lemon.   It’s so refreshing in the summer.

Mint – This is an invasive plant, so it is recommended that you plant it in a container not directly in the garden.  The leaves are great in tea, hot or cold.  They’re also great as a breath mint and dog treat recipes.

Thyme – I love using thyme in my crockpot stew and marinades.  You can use the whole stem when cooking meats too.


how to grow dill


Dill – Another favorite herb that grows in my garden yearly.  It returns again and again.  I have a dip recipe that calls for dill.  There’s never any leftovers.  I also use it on my salmon cakes.  Yum!

So, decide what backyard garden herbs you would like to use in your kitchen, medicinally, or beauty products and start planning your herb garden.  You can also plant your garden herbs in pots or mason jars in your kitchen if you don’t have a kitchen garden.  You may also like How to Dry Kitchen Garden Herbs.


Types of Garlic for Home Gardens

Today, I’m sharing gardening tips on the types of garlic for home gardensFall is the perfect time for planting garlic in my home gardens.  I have planted garlic in the spring, but I didn’t get the big bulbs that I had hoped for.  So, planting garlic cloves in the fall for harvest the following summer works best for me.  When I take this step, I harvest huge, flavorful garlic bulbs.    


types of garlic


When I first started gardening I was amazed at the different types of garlic available.  I was used to the garlic in the grocery store.  However, I had no idea what type of garlic I was purchasing.  It came in a pack of 4, and that was good enough for me.

I was visiting a farmer’s market one Saturday, and picked up a few cloves of garlic.  I used the garlic in a dish shortly thereafter, and it was than that I realized the flavor was unmatched.  It was hot and spicy, just the way I liked my food.  I visited the market again to have a chat with the vendor, and we ended up in an hour discussion about planting and growing garlic.

At that point I decided to start growing my own and I haven’t looked back.  I love checking out the catalogues and websites, and deciding what I want to plant each season.  If you want to grow garlic, there’s few things to consider before purchasing.  For example, do you like mild or spicy garlic?  Do you plan to store the garlic through the winter?  Do you want large cloves etc.?  Making selections for home gardens can be confusing. So, here’s a few tips.


Types of Garlic for Home Gardens:


Subspecies of Garlic:


Hardneck  –  Most of the garlic that I plant is hardneck.  The neck is the stalk that grows from the clove of garlic. Hard neck garlic produces a scape or flower stalk.  It is recommended that the scape be removed in the summer to avoid robbing the cloves of energy.  If the scrapes rob the cloves of energy, the plant will produce smaller bulbs. Some gardeners remove the scrapes to make garlic pesto, add the scrapes to a salad or use it in stir fry.

  • Hardneck garlic grows best in colder zones.  I live in Zone 6B, so hard neck garlic is perfect for me.
  • Easier to peel
  • More flavorful
  • Cloves are larger


Soft Neck –  Next, I do plant a few varieties of soft neck garlic, but not many.

  • Local grocery stores usually carry the soft neck variety.
  • Grows best in warmer climates.
  • Perfect for storing over the winter.
  • Usually lasts 9 – 12 months after harvest.
  • Great for braiding too.  Unfortunately, the cloves are not uniform.  Some are large and some are small if that matters.
  • Softneck garlic is not as flavorful or spicy as the hardneck varieties.


Elephant – Last, I have never planted Elephant garlic in my home garden.  But, if you like mild varieties elephant garlic should be at the top of your list.

  • Elephant garlic cloves are huge compared to the hard neck and soft neck varieties.
  • Doesn’t have the health benefits of regular garlic or the flavor.
  • Elephant garlic is more in the family of leeks and onions.
  • Rather than having several cloves, it is one bulb like an onion.
  • If you love roasted garlic, elephant garlic is perfect.


There are approximately 100 varieties of garlic under the subspecies of hard and soft neck varieties.  Since I like spicy garlic, I purchase from the hard neck categories. My favorite garlic is Spanish Rojo.  However other spicy varieties include:   Tibetan,  Korean Mountain,  Shantung Purple, and Chet’s Italian Red.

If you like mild, but flavorful garlic try these varieties:  Transylvanian, Early Italian, or Texas Rose.

Check out the different varieties of garlic that you can grow.  There are just too many to name here.  Most importantly, you want to purchase garlic that suits your individual taste and your growing zone.  Before you leave, check out my article on 13 Ways to Use Garlic for Health and Food Uses and Planting and Harvesting Garlic.


Planting and Harvesting Garlic

Are you wondering how to plant garlic in your backyard gardenPlanting garlic in your backyard vegetable garden will give you a reward for sauce, salsa and more.  Today, I’m sharing gardening tips on how to plant garlic in your backyard garden.  You see I planted garlic last year and had no success.  So, I decided to try again in the fall. Look at the nice healthy garlic plants that I harvested from my backyard kitchen garden below. 


planting and harvesting garlic

I planted onions in this space last year and they did great. So, I decided to amend the soil with my homemade organic compost.  My compost is leaves and kitchen scraps.  The garlic cloves loved it.


growing home grown garlic


Harvesting garlic was at the top of my list this week.  The size of the bulbs were glorious!  However, harvesting garlic requires muscle.  The roots at the end of a garlic bulb run deep.  As a result, you can’t pull the bulbs out as you would an onion.  Since this was my first year planting and harvesting garlic, I didn’t realize how much muscle would be required.

To avoid damaging the bulbs, you must remove the dirt until the entire bulb until it is exposed.  Once the bulb is exposed, it is easier to get to the bottom of the bulb.  First, I used my garden shovel and my hands to remove the dirt around the bulb. Please wear a good pair of gardening gloves to protect your hands and nails.  You will be digging!


Next, I place the shovel under the bulb and worked it until the garlic bulb became loose and I was able to pull it out.  Nice way to get an upper body work-out, trust me.  I recommend lifting weights during the winter so you can be prepared for this job in the summer!


harvesting garlic

     
It’s amazing what can happen in 2 – 3 weeks in the garden.  Take a look at the picture directly above.  I harvested the bulb on the bottom 3 weeks before I harvested the other plants.  You can see how much smaller it is than the other cloves, but it cured beautifully.  It is actually ready to use.

Some people braid their harvest, but I’m just going to store mine in a garlic bag in a corner on the counter since it’s a small batch.  It won’t take me long to use it when I make tomato sauce.


harvesting garlic


The newly harvested bulbs will cure for 3 – 4 weeks.  Once they turn white and achieve a covering like paper on the garlic bulb, I’ll shake off the dirt.  I cut off the roots and stem with gardening shears and they’re ready to go.  Some gardeners leave their harvest in the garden to cure.  But, I brought mine in the house and allowed them to cure in the kitchen. Stay tuned for a post on what it looks like after it has cured.  Do you plant garlic? How do you allow your plants to cure?

You may also like What You Should Know Before Growing Garlic.

13 Ways To Use Garlic: Health and Food Uses

gardening, garlic uses,


I harvest around 30 cloves of garlic in the spring from my fall planting.  I’ve been growing my own garlic for about 3 years now, and I love it.  It tastes so much better than the garlic purchased from the local grocery store.  It’s more flavorful, and you get to choose what you grow.  Last year I planted Georgia Fire and Red Toch.  The Georgia Fire is hot and great for making salsa.   Red Toch is great eaten raw or in cooked dishes.  Both do well in cold climates.  I live in Zone 6B, which has a short growing season.  Unfortunately, we experience very cold winters so , we must make everyday count during the growing season.


Image-Home-Grown-Garlic


Here are 13 ways to use garlic, and some of favorites:

Pesto – Toss pasta with garlic pesto or use it on toasted bread.  Either way using Genovese basil will give the pesto the flavor needed for delicious Italian dishes.  So, add pesto to your ways to use garlic list.

Garlic Butter – Also, butter like garlic is one of my loves when it comes to food and cooking.   So, it should come as no surprise that I make garlic butter.  I use it on bread, potatoes and as a dip for my crab legs.  However you decide to use it, use plenty of garlic when  you make it.

Garlic Knots –  Pair Garlic Knots with a salad, Baked Ziti, Lasagna, Spaghetti and many other dishes.

Roasted –  Furthermore, roasted garlic can added to your ways to use garlic list too.  Roasted garlic can be used in mashed potatoes, to make hummus, or as a spread on bread.  There are other uses, but these are a few of my favorites.

Stir Fry –  I love chicken and garlic stir fry.  When I’m preparing my chicken, I add lots of chopped garlic.


Use in Pickles – I use garlic gloves in my homemade dill pickle recipes.  You can a jar of refrigerator dills when you just can’t wait to indulge or can a few jars to eat over the winter.

Mashed Potatoes –  I love creamy mashed potatoes.  They go with beef, chicken, turkey and pork.  I make my mashed potatoes several ways, but adding chopped/pureed garlic is my favorite.  So, add garlic mashed potatoes to your list of ways to use garlic.

Chimichurri Sauce – I love a good chimichurri sauce over steak or other beef dishes.  You can also use chimichurri sauce as a dip for meats.

Hummus –  My grandson is a fan of hummus with celery.  Unfortunately, his vegetable palate is limited.

Salsa – There’s nothing better than fresh salsa with loads of garlic.  Check out my fresh salsa recipe here.


benefits of growing garlic


Tomato Sauce –  What’s tomato sauce without garlic.  Not to brag, but my homemade tomato sauce is delicious and kid approved.  Get the recipe here.

Source of Iron –  For many years I had an iron deficiency, which lead to me being anemic.  As a result, I included leafy greens and garlic into my diet.  I struggle to include with the leafy greens at times, but my love for garlic has never wavered.

Heart Healthy –  High blood pressure, hardening of the arteries, and high cholesterol runs in my family.  Unfortunately, I have high blood pressure.  As  a result, ways to use garlic has been added to my list of health regimes.  It helps to keep my blood pressure in a normal range.  I use it chopped in salads as well as cooked dishes and I eat tons of it.


So, we hope that you add a few of my suggestions to your list of ways to use garlic!  Use a fresh lemon to remove the smell of garlic from your hands.  Mouth wash, milk and or a good brushing will remove the garlic smell from your mouth


Best Vegetable Plants for Fall Gardens

Today, I’m sharing backyard vegetable garden tips on the best fall vegetable plants. There are plants that grow better in the fall than in the summer.  Furthermore, there are plants that should be planted in the fall so they can harvested in the spring or early summer. Planning is important when it comes to your backyard garden. 


fall gardens


Best fall vegetables plants:


Garlic – I plant garlic in the fall for harvest in early summer.  The garlic bulbs are huge and the garlic is flavorful.  I use garlic to make homemade tomato sauce in the fall.  I usually have a few cloves left to use through the winter.  These garlic plants are just about ready to be harvested.  They were planted in the fall for summer harvest.


backyard gareden fall vegetables


Brussel Sprouts – Brussel Sprouts are called little cabbages in my house.  They are loved by my granddaughter, my daughter and me.   Brussel Sprouts are rich in antioxidants and Vitamin K.  Vitamin K helps to prevent blood clotting and bone health.  I love my Brussel Sprouts either sautéed with garlic and butter or roasted with olive oil and garlic.

Turnips – Personally, I’ve never eaten a turnip.  My grandfather used to grow them when I was growing up, but for the life of me I can’t remember anyone eating them.  He bartered, so turnips may have been one of his bargaining chips, lol.  My mother said that you prepare them by peeling and than boiling them as you would potatoes until tender.  Season as desired.

Collard Greens – My son-in-law is from the south, so Collard Greens are big in my house.  My daughter fixes the best greens ever.  I saw a pot disappear at a family gathering in 15 minutes.  It was truly incredible.  She doubles the amount of greens that she fixes now for large dinners.  In my opinion, collard greens become more flavorful after the frost hits them.  As a result, fall is a great time to plant collards, turnip and mustard greens.  Furthermore, they are high in Vitamin A.  This makes them great for the hair and skin.

Green Onions – I love green onions in my beef and broccoli recipe.  They give a dish an extra kick, and great flavor.

Radishes –  I love adding radishes to vegetable trays.  I think home grown radishes are a little spicier and have better flavor.  They are great with dip, and in salads.  Also, radishes have great water content.  They are great for hydration.

Peas –   Peas like cooler weather.  So a fall planting is perfect.  My grandchildren love shelling them, but not eating them.  I freeze them for soup.  Both of my grandchildren love soup, but the peas get left in the bowls.  Personally, I love them.  They’re always a winner in the garden.

Green Beans – I plant both bush and pole green beans.  I prefer bush beans because I can harvest them at once, while pole beans produce throughout the season.  Green beans are expected at family gatherings.  I freeze them so I can use them for Thanksgiving, Christmas and New Years dinners.


Carrots –  Planting carrots is a good project to do with the kids.  You can plant the regular orange or go bold and plant bold colored carrots.  You can freeze them for soup or casseroles over the winter.

Broccoli –  Next, my granddaughter loves broccoli.  My grandson not so much.  She loves broccoli steamed with a little butter and seasonings.  It’s my go to when I have my grandchildren.  No matter, the broccoli will be devoured.  You can also freeze fresh broccoli.  So, add broccoli to your list of best vegetable plants for fall gardens.

Cauliflower –  I love cauliflower raw.  I eat it with dip or in a salad.  However, a friend of mine fixes it with a cheese sauce.  I love that too.

Cabbage Another vegetable to add to your list of best vegetable plants for fall gardens is cabbage.  My granddaughter loves it.  Simmer a head of cabbage with a little bacon or a ham bone.  Peel and quarter Yukon Gold potatoes and add to them to the pot.   Simmer until tender.  If you love slaw and sour kraut, add cabbage to your backyard garden.  It definitely goes on my list of best vegetable plants for fall gardens.

Kale –  I love kale with apple cider vinegar.  Cook Kale the same way you cook collard greens.  They are in the same family as the cabbage, broccoli and cauliflower.

So, here are my suggestions for best fall vegetable plants for fall gardens.  Plant according to the packet to direct sow or get a head start and start seedlings under grow lights about 6 weeks before planting outside.


Turn Your Garage Into an Indoor Vegetable Garden for Winter

garage space


You recently discovered your love for gardening. You were influenced by your friends.  As a result, you spend most of your time tending to your vegetable garden. You also consider gardening an excellent way to relax.  Especially, when you have a stressful day at work.  Winter is approaching, and you dread all of your vegetables dying. You know that these plants don’t do well in weather that’s too cold.  But, all is not lost. You can grow your vegetables during winter.  Simply use your garage space as an indoor garden.  Sounds exciting, right? Here’s a few things you will need before you turn your garage space into an indoor vegetable garden:

indoor gardening


  1. What will you use as containers?

Your vegetables were originally planted in the ground.   Since, you’ll be growing them inside your garage, you will need to transfer seedlings into containers. Depending on the size of your plants, you can use pots or recyclables for this one.  If you have a container garden on your deck or patio, you can move the pots into your heated garage area. Remember, the temperature must be hot enough to continue the plants growth.

  1. How’s the space inside?

Space is the most important things you should think about when planning your indoor garage.  You should consider how large or tall your vegetables will get. You don’t want to cramp them and prevent them from growing. For example, if you have tomatoes you must allocate space so they can grow up.  Furthermore, you can organize your area based on the kind of vegetables you have.

indoor gardens


  1. How about the lights?

Just as important, vegetables need a good source of light and heat to grow.  Unfortunately, you won’t get enough light during the winter even if you’re using garage doors with windows like Costco Garage Doors.   So, you should come up with an artificial lighting and heating system.  Fortunately, you can purchase artificial lighting from a variety of stores.

Next, consider how you want to set up your lighting system.  Do you want the lights low or high?  For example, if you’re starting seedlings you will want the  light within inches of the plants.  They need the light and heat to germinate.  If your plants are established, keep the light at least a foot from the plant. You will have to adjust the lighting as the plants grow.

 And the water?  

In addition to heat and lights, water is a necessity for your vegetables. And since your garage can’t “naturally” produce water for your plants you will need to manually water your plants. In watering your vegetables, be wary of the amount of water you put in each of the containers.  It’s important to not overwater them.


Indoor gardening


In Conclusion

Finally, indoor gardening might be new to you.  But, there are several benefits you can get from turning your garage space into an indoor garden.  You can have fresh vegetables year round regardless of the weather.   So, turning your garage space into an indoor garden is an excellent way of  using the space.   However, you must consistently put in time and attention to maintain them.  Your vegetables still need TLC even if it’s sunny, raining or cold outside!


Garage Space    About the Author: George Anderson 

George is a specialist when it comes to garage doors. Working in the industry for over 20+ years he takes pride on helping his clients fulfill their needs when it comes to garage construction. He currently writes on behalf of Shop Garage Door. In his spare time, he loves spending time with his family.