Understanding Gardening Basics For Beginners

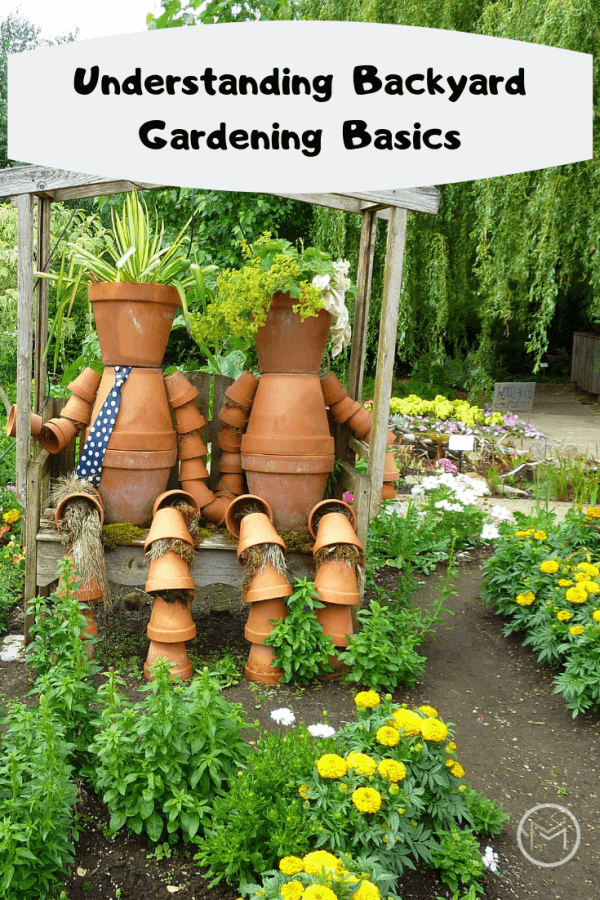
Today, I’m sharing gardening tips on understanding gardening basics.  Your vegetable and flower gardens should be just as cozy and relaxing as your indoor space.  Sometimes a little know how, flower pots, a can of paint and a little creativity is all that is needed to bring your garden to life.

If you’ve left your garden space to the elements and it has been become battered, bruised, and weather worn all is not lost.  Check out my tips on backyard gardening basics and you will be on your way to creating beautiful outdoor spaces.


backyard gardening


Understanding Gardening Basics for Beginners:


Look at your weaknesses

If you want to maximize your space, you’ve got to put in the effort. So, even if you don’t have the time to look after a garden space, that doesn’t mean that you should let it go.  The best place to start is with the grass. Restart this by layering, which involves smothering the grass.  This this is a common method used when people want to start a garden. Killing the grass that remains by layering or polarization, gives you that blank canvas in which to start again. Take note, this can result in a lot of hard work.  But, you can always hire a professional to do this for you. But if you want to do-it-yourself, you’re off to a good start as a gardener.


Preventing the enemies from rising up

Weeds constantly sprout up.  However, if you want to ensure that your gardening area looks pristine use landscape fabrics.  It’s a synthetic textile that can be placed on planting areas to block weeds from coming up. This works by blocking the sunlight, which is the way weeds germinate. You can speak to a landscaping company to help you with the selection of fabric and installation.  Or, you can purchase the material yourself.  The fabric is porous, but you can cut holes into it so your plants can be placed and the water can drain into the ground.


understanding gardening basics


Understanding garden soil

It’s important that you have a basic understanding of backyard gardening so you can properly maintain your garden. The soil is the foundation of your garden.  So, the numerous problems that affect soil can result in various issues with your plants. Soil can suffer from three common issues:

  • The soil pH: If your soil is too alkaline or too acidic, plants won’t thrive. Be sure that you test the soil so you know the garden’s pH level and you can make the necessary alterations.
  • The type of soil: The composition of the soil and its texture can cause problems with drainage. If the soil contains too much clay, this will stop the water draining properly.  Sandy soil won’t retain water.  It drains through before the plants can absorb it.
  • Nutritional issues: This is something that can be remedied with a soil test. Because, much like us, we need specific nutrients, the soil requires specific resources in which to grow plants and vegetables. A soil test will let you know of any deficiencies before you start planting.  Fix any problems before you continue your garden.  Remember, the soil is the foundation.


understanding gardening basics


Using the right spots for the right plants

A garden is a blank canvas, but you have to be aware of certain limitations. While you may want certain plants in the garden, you’ve got to be aware of the specific limitations for each planet.  Plants need to be in the right conditions in order to thrive.  First, find out what your planting zone is.  For example, I live and garden in zone 6B.  Furthermore, you also need to know how much sun and shade you get in your garden area.  Choose the type of plants that will survive in your garden area.

Once you understand the basics, you can turn your garden into an area that suits your lifestyle. You can turn your battered, bruised, and weather worn garden space into a space that will thrive.  A garden is a lovely thing, but if we want it to flourish we have to be aware of it’s limitations and yours.  Having an understanding of gardening basics, doing a little planning and putting in some effort will have your garden area a beautiful space that you desire and deserve.


Types of Garlic for Home Gardens

Today, I’m sharing gardening tips on the types of garlic for home gardensFall is the perfect time for planting garlic in my home gardens.  I have planted garlic in the spring, but I didn’t get the big bulbs that I had hoped for.  So, planting garlic cloves in the fall for harvest the following summer works best for me.  When I take this step, I harvest huge, flavorful garlic bulbs.    


types of garlic


When I first started gardening I was amazed at the different types of garlic available.  I was used to the garlic in the grocery store.  However, I had no idea what type of garlic I was purchasing.  It came in a pack of 4, and that was good enough for me.

I was visiting a farmer’s market one Saturday, and picked up a few cloves of garlic.  I used the garlic in a dish shortly thereafter, and it was than that I realized the flavor was unmatched.  It was hot and spicy, just the way I liked my food.  I visited the market again to have a chat with the vendor, and we ended up in an hour discussion about planting and growing garlic.

At that point I decided to start growing my own and I haven’t looked back.  I love checking out the catalogues and websites, and deciding what I want to plant each season.  If you want to grow garlic, there’s few things to consider before purchasing.  For example, do you like mild or spicy garlic?  Do you plan to store the garlic through the winter?  Do you want large cloves etc.?  Making selections for home gardens can be confusing. So, here’s a few tips.


Types of Garlic for Home Gardens:


Subspecies of Garlic:


Hardneck  –  Most of the garlic that I plant is hardneck.  The neck is the stalk that grows from the clove of garlic. Hard neck garlic produces a scape or flower stalk.  It is recommended that the scape be removed in the summer to avoid robbing the cloves of energy.  If the scrapes rob the cloves of energy, the plant will produce smaller bulbs. Some gardeners remove the scrapes to make garlic pesto, add the scrapes to a salad or use it in stir fry.

  • Hardneck garlic grows best in colder zones.  I live in Zone 6B, so hard neck garlic is perfect for me.
  • Easier to peel
  • More flavorful
  • Cloves are larger


Soft Neck –  Next, I do plant a few varieties of soft neck garlic, but not many.

  • Local grocery stores usually carry the soft neck variety.
  • Grows best in warmer climates.
  • Perfect for storing over the winter.
  • Usually lasts 9 – 12 months after harvest.
  • Great for braiding too.  Unfortunately, the cloves are not uniform.  Some are large and some are small if that matters.
  • Softneck garlic is not as flavorful or spicy as the hardneck varieties.


Elephant – Last, I have never planted Elephant garlic in my home garden.  But, if you like mild varieties elephant garlic should be at the top of your list.

  • Elephant garlic cloves are huge compared to the hard neck and soft neck varieties.
  • Doesn’t have the health benefits of regular garlic or the flavor.
  • Elephant garlic is more in the family of leeks and onions.
  • Rather than having several cloves, it is one bulb like an onion.
  • If you love roasted garlic, elephant garlic is perfect.


There are approximately 100 varieties of garlic under the subspecies of hard and soft neck varieties.  Since I like spicy garlic, I purchase from the hard neck categories. My favorite garlic is Spanish Rojo.  However other spicy varieties include:   Tibetan,  Korean Mountain,  Shantung Purple, and Chet’s Italian Red.

If you like mild, but flavorful garlic try these varieties:  Transylvanian, Early Italian, or Texas Rose.

Check out the different varieties of garlic that you can grow.  There are just too many to name here.  Most importantly, you want to purchase garlic that suits your individual taste and your growing zone.  Before you leave, check out my article on 13 Ways to Use Garlic for Health and Food Uses and Planting and Harvesting Garlic.


Planting and Harvesting Garlic

Are you wondering how to plant garlic in your backyard gardenPlanting garlic in your backyard vegetable garden will give you a reward for sauce, salsa and more.  Today, I’m sharing gardening tips on how to plant garlic in your backyard garden.  You see I planted garlic last year and had no success.  So, I decided to try again in the fall. Look at the nice healthy garlic plants that I harvested from my backyard kitchen garden below. 


planting and harvesting garlic

I planted onions in this space last year and they did great. So, I decided to amend the soil with my homemade organic compost.  My compost is leaves and kitchen scraps.  The garlic cloves loved it.


growing home grown garlic


Harvesting garlic was at the top of my list this week.  The size of the bulbs were glorious!  However, harvesting garlic requires muscle.  The roots at the end of a garlic bulb run deep.  As a result, you can’t pull the bulbs out as you would an onion.  Since this was my first year planting and harvesting garlic, I didn’t realize how much muscle would be required.

To avoid damaging the bulbs, you must remove the dirt until the entire bulb until it is exposed.  Once the bulb is exposed, it is easier to get to the bottom of the bulb.  First, I used my garden shovel and my hands to remove the dirt around the bulb. Please wear a good pair of gardening gloves to protect your hands and nails.  You will be digging!


Next, I place the shovel under the bulb and worked it until the garlic bulb became loose and I was able to pull it out.  Nice way to get an upper body work-out, trust me.  I recommend lifting weights during the winter so you can be prepared for this job in the summer!


harvesting garlic

     
It’s amazing what can happen in 2 – 3 weeks in the garden.  Take a look at the picture directly above.  I harvested the bulb on the bottom 3 weeks before I harvested the other plants.  You can see how much smaller it is than the other cloves, but it cured beautifully.  It is actually ready to use.

Some people braid their harvest, but I’m just going to store mine in a garlic bag in a corner on the counter since it’s a small batch.  It won’t take me long to use it when I make tomato sauce.


harvesting garlic


The newly harvested bulbs will cure for 3 – 4 weeks.  Once they turn white and achieve a covering like paper on the garlic bulb, I’ll shake off the dirt.  I cut off the roots and stem with gardening shears and they’re ready to go.  Some gardeners leave their harvest in the garden to cure.  But, I brought mine in the house and allowed them to cure in the kitchen. Stay tuned for a post on what it looks like after it has cured.  Do you plant garlic? How do you allow your plants to cure?

You may also like What You Should Know Before Growing Garlic.

13 Ways To Use Garlic: Health and Food Uses

gardening, garlic uses,


I harvest around 30 cloves of garlic in the spring from my fall planting.  I’ve been growing my own garlic for about 3 years now, and I love it.  It tastes so much better than the garlic purchased from the local grocery store.  It’s more flavorful, and you get to choose what you grow.  Last year I planted Georgia Fire and Red Toch.  The Georgia Fire is hot and great for making salsa.   Red Toch is great eaten raw or in cooked dishes.  Both do well in cold climates.  I live in Zone 6B, which has a short growing season.  Unfortunately, we experience very cold winters so , we must make everyday count during the growing season.


Image-Home-Grown-Garlic


Here are 13 ways to use garlic, and some of favorites:

Pesto – Toss pasta with garlic pesto or use it on toasted bread.  Either way using Genovese basil will give the pesto the flavor needed for delicious Italian dishes.  So, add pesto to your ways to use garlic list.

Garlic Butter – Also, butter like garlic is one of my loves when it comes to food and cooking.   So, it should come as no surprise that I make garlic butter.  I use it on bread, potatoes and as a dip for my crab legs.  However you decide to use it, use plenty of garlic when  you make it.

Garlic Knots –  Pair Garlic Knots with a salad, Baked Ziti, Lasagna, Spaghetti and many other dishes.

Roasted –  Furthermore, roasted garlic can added to your ways to use garlic list too.  Roasted garlic can be used in mashed potatoes, to make hummus, or as a spread on bread.  There are other uses, but these are a few of my favorites.

Stir Fry –  I love chicken and garlic stir fry.  When I’m preparing my chicken, I add lots of chopped garlic.


Use in Pickles – I use garlic gloves in my homemade dill pickle recipes.  You can a jar of refrigerator dills when you just can’t wait to indulge or can a few jars to eat over the winter.

Mashed Potatoes –  I love creamy mashed potatoes.  They go with beef, chicken, turkey and pork.  I make my mashed potatoes several ways, but adding chopped/pureed garlic is my favorite.  So, add garlic mashed potatoes to your list of ways to use garlic.

Chimichurri Sauce – I love a good chimichurri sauce over steak or other beef dishes.  You can also use chimichurri sauce as a dip for meats.

Hummus –  My grandson is a fan of hummus with celery.  Unfortunately, his vegetable palate is limited.

Salsa – There’s nothing better than fresh salsa with loads of garlic.  Check out my fresh salsa recipe here.


benefits of growing garlic


Tomato Sauce –  What’s tomato sauce without garlic.  Not to brag, but my homemade tomato sauce is delicious and kid approved.  Get the recipe here.

Source of Iron –  For many years I had an iron deficiency, which lead to me being anemic.  As a result, I included leafy greens and garlic into my diet.  I struggle to include with the leafy greens at times, but my love for garlic has never wavered.

Heart Healthy –  High blood pressure, hardening of the arteries, and high cholesterol runs in my family.  Unfortunately, I have high blood pressure.  As  a result, ways to use garlic has been added to my list of health regimes.  It helps to keep my blood pressure in a normal range.  I use it chopped in salads as well as cooked dishes and I eat tons of it.


So, we hope that you add a few of my suggestions to your list of ways to use garlic!  Use a fresh lemon to remove the smell of garlic from your hands.  Mouth wash, milk and or a good brushing will remove the garlic smell from your mouth


Best Vegetable Plants for Fall Gardens

Today, I’m sharing backyard vegetable garden tips on the best fall vegetable plants. There are plants that grow better in the fall than in the summer.  Furthermore, there are plants that should be planted in the fall so they can harvested in the spring or early summer. Planning is important when it comes to your backyard garden. 


fall gardens


Best fall vegetables plants:


Garlic – I plant garlic in the fall for harvest in early summer.  The garlic bulbs are huge and the garlic is flavorful.  I use garlic to make homemade tomato sauce in the fall.  I usually have a few cloves left to use through the winter.  These garlic plants are just about ready to be harvested.  They were planted in the fall for summer harvest.


backyard gareden fall vegetables


Brussel Sprouts – Brussel Sprouts are called little cabbages in my house.  They are loved by my granddaughter, my daughter and me.   Brussel Sprouts are rich in antioxidants and Vitamin K.  Vitamin K helps to prevent blood clotting and bone health.  I love my Brussel Sprouts either sautéed with garlic and butter or roasted with olive oil and garlic.

Turnips – Personally, I’ve never eaten a turnip.  My grandfather used to grow them when I was growing up, but for the life of me I can’t remember anyone eating them.  He bartered, so turnips may have been one of his bargaining chips, lol.  My mother said that you prepare them by peeling and than boiling them as you would potatoes until tender.  Season as desired.

Collard Greens – My son-in-law is from the south, so Collard Greens are big in my house.  My daughter fixes the best greens ever.  I saw a pot disappear at a family gathering in 15 minutes.  It was truly incredible.  She doubles the amount of greens that she fixes now for large dinners.  In my opinion, collard greens become more flavorful after the frost hits them.  As a result, fall is a great time to plant collards, turnip and mustard greens.  Furthermore, they are high in Vitamin A.  This makes them great for the hair and skin.

Green Onions – I love green onions in my beef and broccoli recipe.  They give a dish an extra kick, and great flavor.

Radishes –  I love adding radishes to vegetable trays.  I think home grown radishes are a little spicier and have better flavor.  They are great with dip, and in salads.  Also, radishes have great water content.  They are great for hydration.

Peas –   Peas like cooler weather.  So a fall planting is perfect.  My grandchildren love shelling them, but not eating them.  I freeze them for soup.  Both of my grandchildren love soup, but the peas get left in the bowls.  Personally, I love them.  They’re always a winner in the garden.

Green Beans – I plant both bush and pole green beans.  I prefer bush beans because I can harvest them at once, while pole beans produce throughout the season.  Green beans are expected at family gatherings.  I freeze them so I can use them for Thanksgiving, Christmas and New Years dinners.


Carrots –  Planting carrots is a good project to do with the kids.  You can plant the regular orange or go bold and plant bold colored carrots.  You can freeze them for soup or casseroles over the winter.

Broccoli –  Next, my granddaughter loves broccoli.  My grandson not so much.  She loves broccoli steamed with a little butter and seasonings.  It’s my go to when I have my grandchildren.  No matter, the broccoli will be devoured.  You can also freeze fresh broccoli.  So, add broccoli to your list of best vegetable plants for fall gardens.

Cauliflower –  I love cauliflower raw.  I eat it with dip or in a salad.  However, a friend of mine fixes it with a cheese sauce.  I love that too.

Cabbage Another vegetable to add to your list of best vegetable plants for fall gardens is cabbage.  My granddaughter loves it.  Simmer a head of cabbage with a little bacon or a ham bone.  Peel and quarter Yukon Gold potatoes and add to them to the pot.   Simmer until tender.  If you love slaw and sour kraut, add cabbage to your backyard garden.  It definitely goes on my list of best vegetable plants for fall gardens.

Kale –  I love kale with apple cider vinegar.  Cook Kale the same way you cook collard greens.  They are in the same family as the cabbage, broccoli and cauliflower.

So, here are my suggestions for best fall vegetable plants for fall gardens.  Plant according to the packet to direct sow or get a head start and start seedlings under grow lights about 6 weeks before planting outside.


How to Grow Carrots in Your Garden

Today, I’m sharing tips on how to grow carrots in your backyard garden.  A backyard vegetable garden is the perfect place for you and the kids to grow yummy carrots.  They are a great snack and wonderful in soups, stews and other dishes. Carrots  are a root vegetable, which are a rich source of vitamins and a favorite food of many people.  However, growing carrots is not simple.   

Growing carrots requires more of a challenge than you might think.  It would be a pity if your achievements turn out small in size or their taste is not appealing.  So. if you intend to plant carrots, you need to know some useful tips to make sure that they will grow steadily.


gardening tips

Here’s how to grow carrots:


When and Where Should You Grow Carrots?

You can sow the carrot seeds from March to August because it’s a good time to receive enough sunlight and moisture from rain water. In case you want to grow carrots in the winter, you can plant them in the greenhouse.  Carrots can develop ideally in the fertile soil and a sunny location.  If the soil in your garden is stony or clay, you may need to plant short root carrot varieties such as Carson or Parmex.


How to Grow Carrots in Your Garden

If you carry out the following steps, you can harvest your carrots as you expect.

  1. Remove any weeds from the soil before you sow the seeds.
  2. Use a stick to make rows of 1 cm in depth and leave 30 cm for each row.
  3. Sow your carrot seeds thinly along the row to make sure that every single seed can receive enough nutrients, light, and moisture.
  4. Pull the soil at the edges of the row back to cover your carrot seeds.
  5. Water the area.


how to grow carrots


How to Take Care of Carrots

  • Water at least once a week
  • Make sure the soil is draining well.
  • If plants are taller than 3 inches, cut the top.
  • After 1.5 months, fertilize the carrots
  • Always eliminate weeds around the area where the carrot is growing


How to get rid of pest from carrots

  • Carrot rust fly and carrot weevils: The eggs of these insects can impede the growth of your carrots. They also take nutrients from your plants. One effective way to eliminate these eggs is to change the locations of your plants each year.  Or, you can grow them under row covers.
  • Footed Pests: Lots of animals want to eat the leaves of carrots, while the others tend to dig deeper to try the roots. The thumb rule to get rid of the pests is to keep them away from the growing area.  In this case, building a fence surrounding your plants is the best way.
  • Diseases: Some bacteria cause carrots to yellow, soft rot, leaf blight, and so on. You need to remove all the diseased carrots or change to a new location the next season.


Harvest carrots

Once you learn how to grow carrots, you can harvest them within 50-75 days.  However, read the harvest guide on the seed package.  Remember that carrots will get their full sweetness when they are mature.


How to Grow Carrots


You can dig the carrots before the first frost by softening the soil. Simply water the growing area.  Afterwards, you can pull the carrots up.  Enjoy the great feeling of eating your carrots with tomatoes as a salsa or cook them in your favorite recipes.

We hope you have found our tips on how to grow carrots useful. So, purchase a pack of carrots and start planting.  You will be excited about watching your carrots grow and you will enjoy eating fresh and cooked carrots.  If you have questions or just want to share your tips, please leave a comment.

——————

Author Bio

Richard Clayton

Richard Clayton of My Greenery Life.  It’s a place, where we can discuss everything about lawn care, DIY gardening and critter control topics.

Backyard Gardening With Kids Tips

Today, I’m sharing parenting tips on gardening with kids and why it is important.  Gardening is a great way to introduce them to nature.  It’s also a great way to give them a life skill; growing their own food.  Gardening can be done in small spaces, vertical, in raised bed, containers and on plots.  I suggest containers/pots for the kids, especially if you’re just starting to garden with them. 


gardening with kids


Gardening With Kids Tips:  


Start with simple tasks with your kids or grandkids.  When kids are excited about something, they look forward to the event or activity.  First, get them excited about gardening:  

Garden Boots – I purchased a pair of Lighting McQueen rain boots for my grandson and he loved to wear them when he was watering my vegetable garden.
Purchase a Watering Can – They make adorable watering cans specifically for children.  They’re easy for them to grip and pour the water.
Gardening Gloves – Covering their hands while digging in dirt is a good idea.  I’m a Master Gardener, and I wear them regularly.
Small Pots/Containers – Give them pots and containers that they can relate to.  Giving a child a 10 gallon flower pot can be overwhelming.  This can apply to raised beds and garden plots too.  


I think it’s important for children to understand the land and how to grow your own food.  We never know where the economy will take us, so we need to teach our children how to survive.  Furthermore, we need to teach them how to save where they can.


gardening with kids


So, here’s additional tips on how gardening with kids provides benefits:


  • They learn how to plant flowers and vegetables.
  • Children learn about nature when gardening.
  • Children learn how food is grown.
  • They learn how to nurture the food that their family will eat.
  • Harvesting vegetables for the family gives them a feeling of importance.
  • The learn about flowers and their beauty as well as purpose.
  • Gardening allows them to watch the birds, rabbits, squirrels and more.


gardening with kids


Another fun activity with kids is picking berries.  If you don’t have a patch in your backyard, plant one.  Until than check out your local farmer’s market.  I suggest an early morning trip to the strawberry fields, it can get hot quickly in the wide open fields.  My grandson loved picking strawberries.  He knew that I was going to turn those red berries into strawberry jam.  Besides jam, we also used the berries for ice cream and funnel cake toppings.  Fresh berries are so good!


I hope my tips on gardening with kids has motivated you to spend some time in the backyard with you kids or grandchildren during a small garden project this summer.  Planting carrots, flowers or a pizza garden are great ways to get your children involved.  


Tips for Implementing a Zen Garden

Have you ever looked at your garden and thought oh no it’s getting out of hand again!  Gardening can be a pleasure, but it can also be so time-consuming.  But there is one particular style of gardening that looks amazing.  And,  it fairly easy to keep in check.  The solution is a Zen Garden.  A Zen garden is designed to be a calming retreat from the hustle and bustle of everyday life.  Are you wondering how can you create a Zen garden in your back yard?  Check out our gardening tips  below on how you can create a Backyard Zen Garden.  


zen garden tips


Design and Aims

First,  you need to consider the design of your garden before you implement our Zen garden tips.  Ensure that it fits into a Zen theme.  Check out the designs at  architectureartdesigns.com.  Straight lines work well as they are easy to maintain, and they give you the desired calming sensation. That means squares or rectangular beds are they best choice.

It’s also a good idea to ensure that the different sections of the garden are clearly delineated. You might do this by keeping the borders trimmed and clear of overgrown grass. Or you may chose to edge the areas with stones, wooden sleepers or short fencing.

Another aspect that you need to consider about the design, is balance. While it is often easier to go for an overall linear effect in the design you will want to balance these aspects out. To do this use more curvy lines and circular features, which create a sense of flow.

Lastly, you also need to consider space and placement in a garden of this sort. One of the key principles of a Zen-style garden is that you are looking to create a sense of expansion and space. That means it’s vital to not overfill a garden of this type, and only include some choice elements that add particular value to your outside space.


Beds

Beds in a Zen garden are unlike traditional flower beds. This is because it’s not the goal to fill them chock full with riots of color and texture. Instead, the idea is to create order and peace by regularly spacing smaller plants and shrubs out.

That is why succulents, in particular, make an excellent choice for this style of garden. They are usually Alpine plants, so they don’t take a huge amount of looking after to be successful, and can grow pretty much anywhere.

They also grow in pleasingly repetitive and symmetrical shapes. Which helps to create that sense of order that you are looking for. In addition, while there is some variation in colour in succulent breeds, rarely will you find ones in bright or intense colour. So this muted plated suits such a garden very well.


Lawn

Now deciding what to do with your lawn is also essential when creating a Zen-style garden. For some folks, going down the more traditional route, they may chose to remove the law altogether and replace it with a rock and sand garden. The idea of this being that it not only will it look very simple, but you can also rake it into different shapes and flow for that Zen feel.


zen garden tips


However if you have a family that still wants to use the garden for BBQs and gatherings, it is possible that this might be a step too far. But don’t stress, because you can still rock a modern Zen type garden with a lawn. Just follow the steps below.

First, it needs to be seriously manicured to work well in this style of garden. That means keeping it mowed and the edges sheared.  Or if you prefer, use a service like the one at collegefundlandscaping.com to help you with maintenance.


zen garden tips


It also needs to be in great condition, crabgrass, patches, and weeds are a big no-no for a Zen-style lawn. Which should be green, of an even height and texture.

Lastly, it can also work very will in this setting to divide the lawn up. Either into two halves with a stepping stone path down the middle. Or into four quarters with slate or gravel around the outside.  Which will emphasis the geometric and symmetrical theme.


Zen features

Of course, just because you are aiming for geometric simplicity, doesn’t mean that you can’t include a few garden accessories as well. In particular, mirror balls work well. No, not the one you get at the disco! But stone balls with a mirror finish. Which can be placed carefully at opportune spots in the garden to draw the eye.


zen garden tips


Additionally, water features are a very popular and a great Zen addition to this sort of outdoor space.   Just remember that they need to fit in with the style of the garden. That means out with the decorative stonework, and in with raw natural materials instead. For example, a slate piece foundation or monolith would work well in this setting.

We hope that you enjoyed our Zen garden tips, and will implement them into your outdoor space.

5 Benefits of Growing Chives

Today, I’m sharing gardening tips on the benefits of growing chives.  The flowers on my backyard garden chives are in full bloom, and they are beautiful.  I recommend that you plant a chive or two in your backyard vegetable garden.  The purple blooms are so pretty, and they enhance the flavor of many dishes.  Maintenance is easy, simply remove the spent flowers and cut the plant to back to 2 – 3 inches in the summer.

This should give your plant a good start for another harvest later in the season.  Furthermore,  removing the flowers is an important step.  Otherwise, the seeds will blow and the plants will take over your garden.  You will end up with volunteers, plants which have seeded and germinated from blown or dropped seeds.


garden chives


So, there are several benefits to growing chives beside them.  First, they are very easy to grow.  Once they are planted, they require regular watering and a little fertilizer.  My soil is so rich, I usually by-pass this part of the maintenance, but I do water them.  Here a few other reasons to grow and eat chives:


garden chives


Benefits of Growing Chives:


1.  They’re a magnet for beautiful butterflies.  You kids will love chasing the butterflies across the yard.  Pick up a few butterfly nets and identification books so the kids can research.  The can get some exercise chasing the butterflies and connect with nature.  Here’s another benefit, you can keep them occupied while you put up your feet and sip a cup of coffee.

2.  Also, they are delicious on baked potatoes, omelets and other dishes that call for onions.  I love them in salads as well.

3.  They are a great source of antioxidants and can help fight cancers in the breast, colon, prostate, ovaries and lungs.  This study is from the University of Maryland Medical Center.

4.  Additionally, they are a great source of Vitamin K.  Which, is good for bone strength.

5.  Furthermore, they help lower blood pressure and cholesterol according to the University Hospital of Columbia and Cornell.

6. Although I have not eaten them, the flowers on chives are edible.  For some reason, I just can’t get past the thought of flowers in my food.   On a cake yes, in my salad no.  However, they can be used to decorate a dish or vegetable tray.

7. Did you know that chives can be used fresh or frozen.  You can chop and seal them in an airtight container and keep them in the refrigerator or freezer.

8.  Chives return year after year.


Last, they are low maintenance, have health benefits, and enhance the flavor of your dishes.  Head to your local nursery and pick up a few plants.  Better yet, grow a few plants from seed.

Hardening Off Garden Seedlings

Today, I’m sharing gardening advice on hardening off garden seedlings.  Backyard vegetable gardening is a great way to get outside and get moving.  Growing your own fruits and vegetables is so rewarding.

I love heirloom tomatoes.  Their flavor is unmatched, and I can’t purchase them at my local grocery store or farmer’s market.  So, I purchase seeds, germinate them and transplant them into my garden.  Some of my favorite heirloom tomatoes are Paul Robeson, Cherokee Purple.  Brandywine,  and Hillbilly.  I can’t wait to pluck the first ripe tomato from the vine for a BLT sandwich.   My mother loves them sliced with mayo and salt and pepper.  Either, they’re delicious.


garden seedlings

First, I make a list of vegetables that I want to grow in my summer garden.  It usually includes oregano, dill, cilantro and basil.  I love growing fresh herbs.  All of these ingredients will be used in my sauce or salsa.  So, I attempted to  germinated all of the above along with my heirloom tomatoes.  I’m proud to say all of my tomato seeds germinated.    I usually lose a few or some of my seeds fail to germinate.  Fortunately, this year I had greater success.  I allowed then to stay in the starter pots longer.  I think this step allowed the roots to get stronger before I re-potted them.

So, I save pots from the garden center when I purchase my flowers and reuse them when I start my backyard garden vegetable plants the next season.  My squash, watermelon, peppers and zucchini germinated as well.  I’m looking forward to a great growing season.


When you start seedling inside, they must be harden off.  What is hardening  off seedling you ask?  Hardening off is exposing your seedling that have been started under grow lights to the elements.

My hardening off process starts in mid-late April.  I try to plant everything by Mother’s Day or Memorial Day at the latest.   I use trays to house my seedlings under the grow lights.  It’s easier to move them outside and back in with the trays.


Hardening Off Garden Seedlings:


  • Set your seedlings outside for a few hours in the shade for several days.  I do this for about a week adding an hour to each day.  Be sure to bring them back inside.  They aren’t strong enough to withstand the night air yet.
  • The next move is to gradually expose them to the sun and longer hours outside.  I do this for about 3 days.
  • Last, I leave them out overnight. Once they get used to the temperatures I transplant , I leave them out until I’m ready to plant them in the garden.


hardening off garden seedlings


About 20 plants are ready for the garden.  My estimate is about $5.00 in cost for seeds.  By purchasing heirloom seeds, I’m able to save the seeds from one year to the next to start new plants.  I would never be able to purchase 20 plants from a nursery or garden center for $5.00.  The starter mix and potting soil cost me around $10.00.  Still, it’s cheaper than purchasing from a nursery.


Tilling compost into the garden is next on my backyard vegetable gardening list.  Hopefully, I will have my plants in the garden by Mother’s Day, Memorial Day at the latest.   I hope my hardening off garden seedling tips has been beneficial.  Try starting a few inside and gradually increase your seedlings the founding year.  Slow is best when learning a new technique.  You may also like seeds versus seedlings.