Preschool Educational Activity Color Matching

Today, I’m sharing parenting tips on preschool educational activity. My grandchildren loved playing this game.  So, I thought I would share it with you.  Its a great way to teach children their colors as well as match items.  Preparing preschoolers for kindergarten is essential.  So is preparing kindergarten for first grade.  The earlier we start teaching our children the more advanced they become in their education.

Furthermore, parents must stop waiting for schools to completely educate our children.  Giving them extra assignments and spending time teaching them is a great bonding experience.  Just as important, you as the parent can assess your child’s skills rather than waiting for a progress report.  Trust me, their teachers will appreciate your efforts.  It also gives you some insight when you have a parent teacher conference.  You’re actually speaking from a first hand perspective.


preschool educational activity


Benefits of Preschool Educational Activities:

  • Develops fine motor skills
  • Improves memory
  • Improves the ability to distinguish similarities and differences
  • Visual memory
  • Improves attention to detail
  • Great for cognitive development


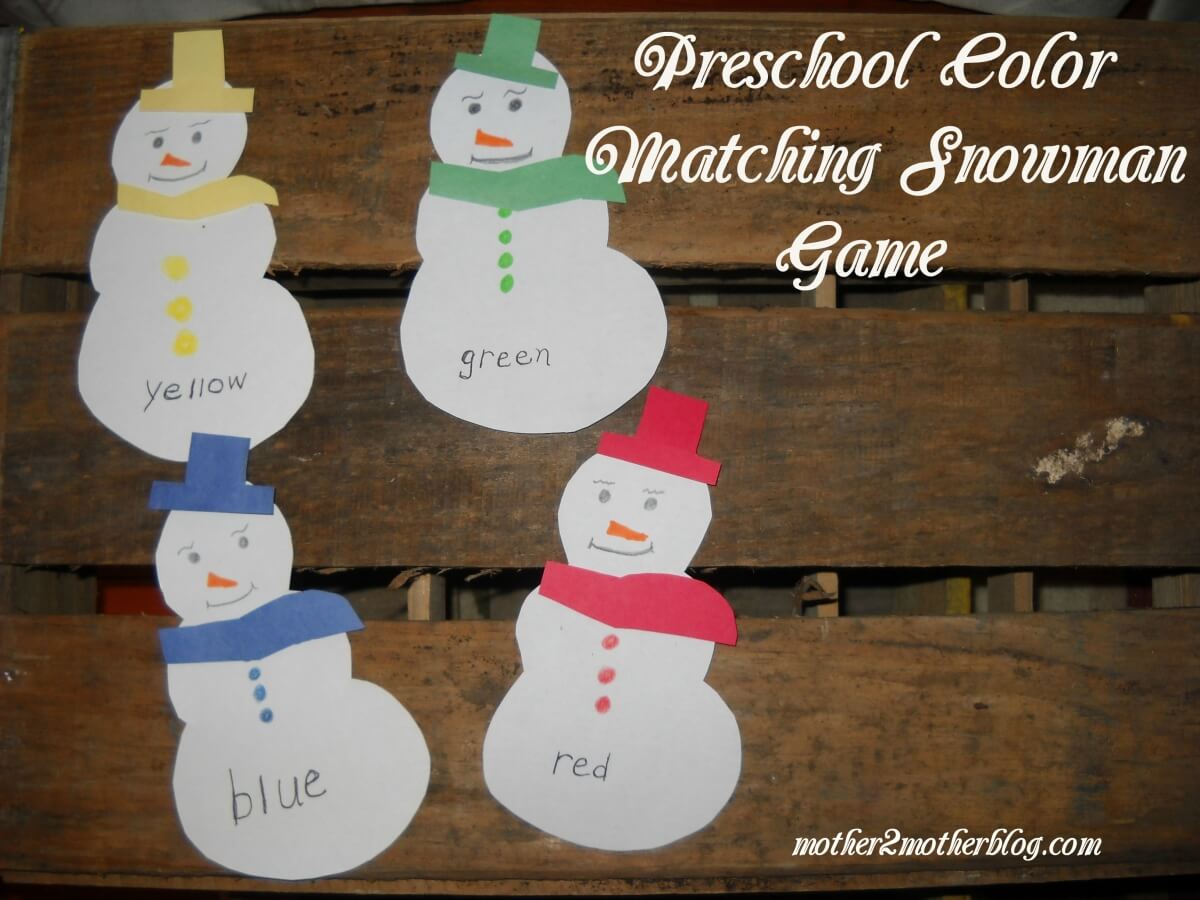
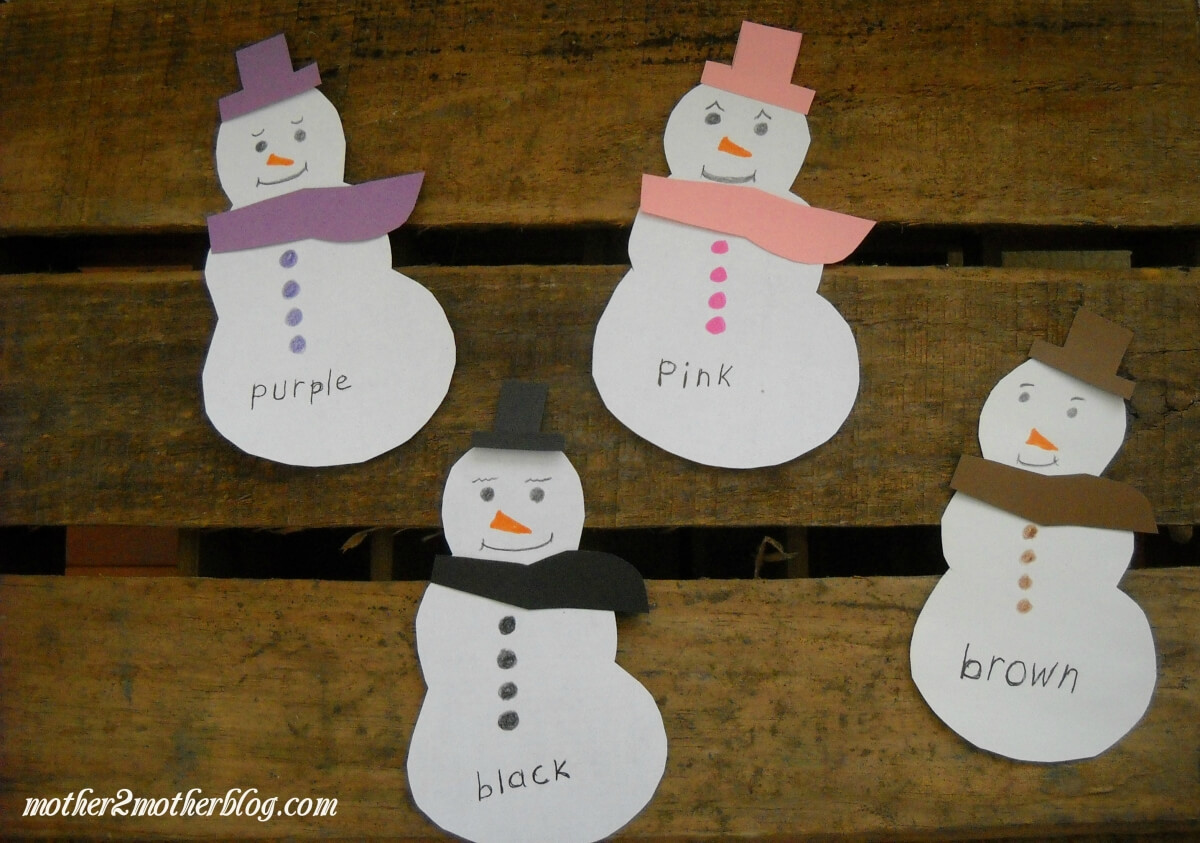
My granddaughter is adamant that playing matching games helps improve memory.  She is quite astute when she is playing games that require memory skills. My preschool educational activity will help to enhance your child’s ability to recognize colors.  Simply match the scarf and hat with the same color dots on the snow man.  They can also enhance their vocabulary by learning how to pronounce the colors and learning how to spell each color.
Kindergarten Match Game


First, you will need the following items to make these adorable snowmen:

  • white construction paper or cardstock for the body of the snowman
  • color construction paper or cardstock for the hat and scarf
  • colored pens or crayons to match the hat and scarf
  • scissors
  • pencil for tracing

Note:  I used copier paper for the snowman and construction paper to make the hat and scarves.


Step 1 –  I found it easier to make a sample snowman. Next, I folded a sheet of construction paper in half and than folded it again. I placed the sample snowman on top of the folded sheet and cut around it.  I was able to create 4 snowmen at once using this method. This step really cuts down on time.

Step 2 – Select various colors of construction or cardstock for the hat and scarfs.  I cut these out free hand.  As you can see from the picture, they are not uniform.  The goal is have a variety of colors for the match.

Step 3 – Make faces for the snowmen as shown with a black crayon or pen.  Or,  get creative and come up with your own style.

Step 3 – Make the buttons on the snowman the same color as the top hat and scarf.  You can use crayons or pens for this step.  ( I found the pens to be easier to use). Once the buttons are made, print the color the button, top hat and scarf on the bottom of the snowman as shown.


Last, I hope you enjoyed my preschool educational activity.  You may also like:  Snowman Preschool Math Game – Mother 2 Mother Blog


Snowman Preschool Math Game

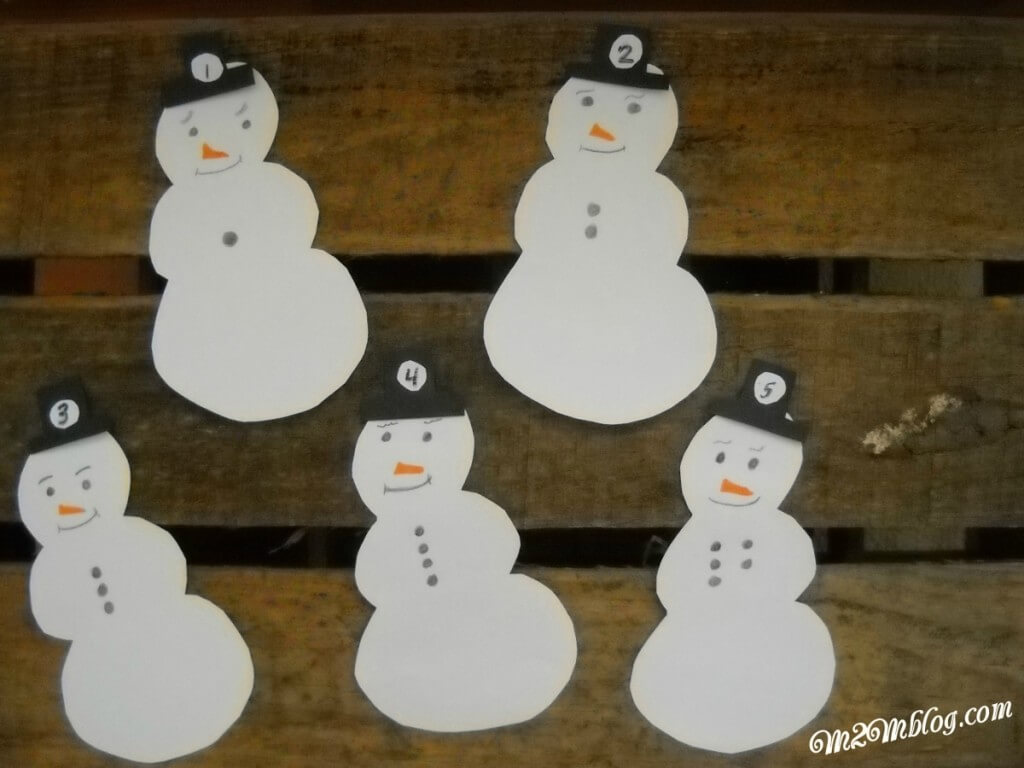
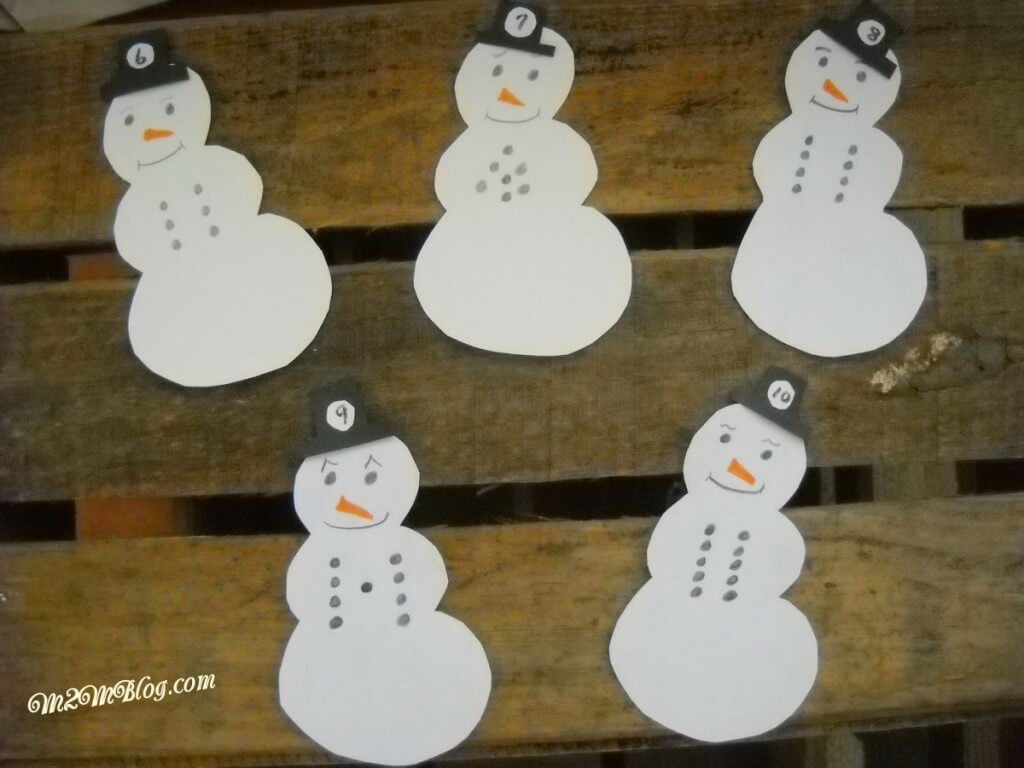
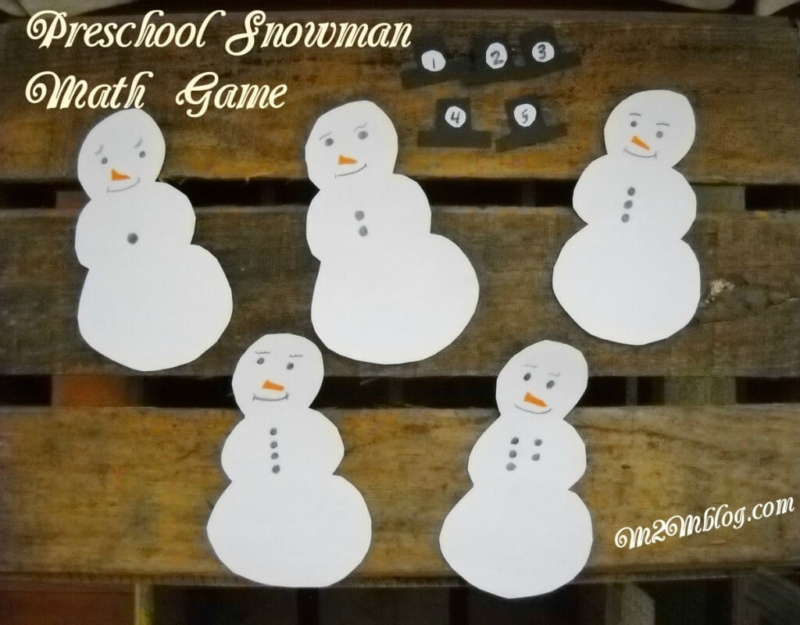
Today, I’m sharing parenting tips on creating our preschool math game.  This week we have a snowman preschool math game that will help your preschooler and or kindergartener count from 1 – 20.  The game helps the student learn by counting the buttons on the snowmen and learn number recognition by placing the correct hat on the snowman’s head.


preschool math activity sheet


How to Create the Snowmen:

First, you will need the following items to make these adorable snowmen:

  • black and white construction paper or cardstock
  • black marker or pen
  • scissors
  • pencil for tracing
  • orange marker

First, I found it easier to make a sample snowman and top hat to trace and cut around.  I used construction paper from the dollar store to make the snowmen or printer paper will work too.  Next, I folded a sheet of construction paper in half and than folded it again. I placed the sample snowman on top of the folded sheet and cut around it.  I was able to create 4 snowmen at once using this method.  Since you will need 20 snowmen, this method cuts down on time.

Additionally, it was easier to use the cardstock for the top hat and cut out each one individually.  You will need a circle for each hat so you can write the number on it.  I suggest cutting out the small circles for the hat individually.  Afterwards, glue the circle on the hat and than allow it to dry before writing the number on the hat.

While the glue is drying, make the faces and draw the buttons on the body of the snowmen from 1 -10 or 1 – 20, depending on how many you wish to make.  My 9 year old grandson helped draw the faces and make the buttons on each snowman. Once the bodies are made, write the numbers on the hats.

preschool games, numbers games for preschoolers, winter activites, winter games


Image-Snowman-Counting-Game-6-10


Last, teaching your child to count using this snowman preschool math game is not only educational, it will be fun.  Making education fun should be the goal. The goal is to count the buttons and than match the hat to the coordinating snowman.  If you have an older child like my 9 year old, let them count with your preschooler or kindergarten.  Finally, it’s a great way to teach them to count without getting bored.  So, stayed turned to our next snowman game.  You may also like Kid’s Winter Crafts for Kids.


How To Make a Grapevine Wreath Snowman

winter crafts, snowman crafts, grapevine wreaths


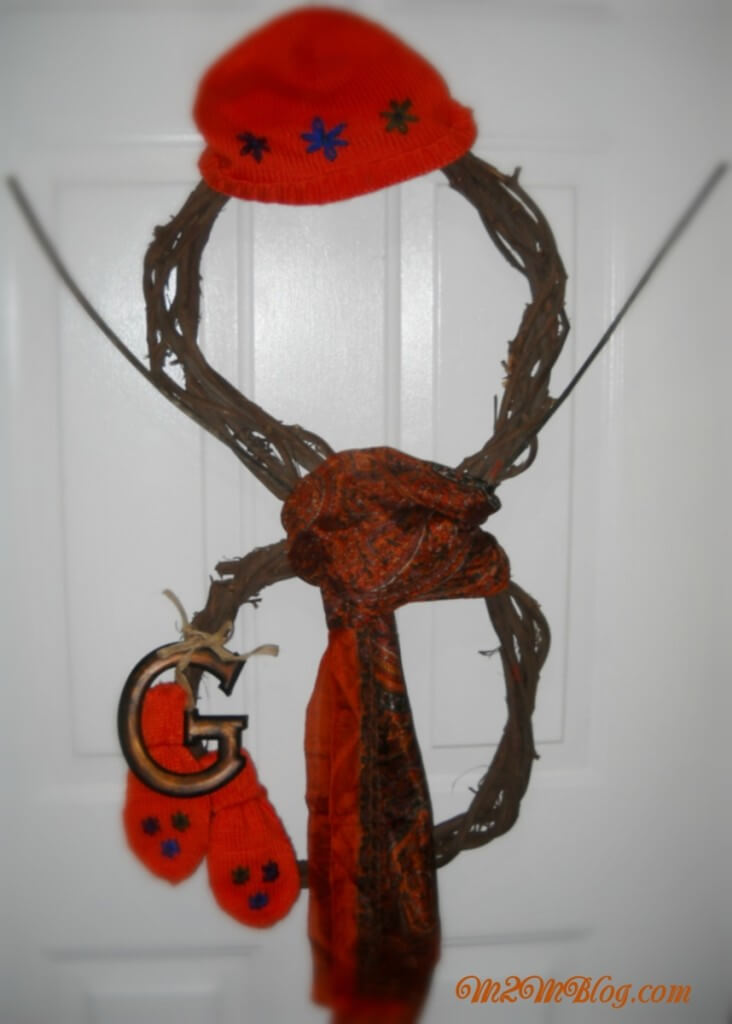
I love crafts, and when you’re buried under 3 feet of snow they sure keep you from going insane.  This grapevine wreath snowman was put together in about 30 minutes during our latest blizzard.  I know the storm was heading our way, so I headed to one of my favorite places for bargains, The Goodwill.  I purchased the 2 grapevine wreaths, mittens, matching hat and scarf for $5.59.  Afterwards, I headed to Michaels and nabbed the letter for $1.50 from the Bargain Ben.  It was the perfect size and blended well with the accessories. Score!

You will need:

  • 2 or 3 grapevine wreaths small to large (Check thrifts for bargains.  Michaels is a good resource too. Print your 40% off coupon.)
  • accessories (Dollar General or Family Dollar are good inexpensive resources too.)
  • Letter (Optional)
  • craft wire

Here’s the steps for making the snowman:

The grapevine wreaths that I used are the same size.  For $2.00, I decided that I would make it work. I laid the wreath on newspaper before working. Grapevine wreaths are known to drop leaves and small pieces. I connected the 2 wreaths with the craft wire.  I wrapped the wire around the two wreaths tightly to ensure they fit together nicely.  Before taking any additional steps, I also added wire to the top so I could hang it.  This is important.

I opted not to hot glue the mittens and hat to the wreath because the set is in excellent shape.   So, I’ll donate them back to the Goodwill undamaged.  Instead of using hot glue, I placed a piece of the thin craft wire carefully through the tops of each of the mittens.  Next, I wrapped the ends of the wire that I threaded through the mittens around the wreath one at a time.  Allow the top mitten to cover the wire from the second mitten.

Fortunately, the letter had a ribbon at the top.  As a result, I cut it and tied it to the wreath so it would hide the craft wire on the top mitten.  Next I tied the scarf around the section where the two wreaths meet. This scarf is silk, I plan to wear it in the summer and fall.  You can use a wool scarf as well.

Adding the hat was tricky.  I opened the hat and placed it over the wreath as best I could.  Once I had the hat in place, I sprayed it with spray starch to help stiffen it so it would keep its shape.  I allowed it to dry and sprayed it again and again.  Once the hat was dry and stiff, I hung the wreath and added the twig arms.

Finally, you can make a cardboard top hat if this type proofs to be difficult and glue it to the wreath.  Paint the cardboard hat either black or red and allow it to dry before placing it on the snowman. I love it, how about you.