How To Blanch Tomatoes Before Freezing

Are you wondering how to blanch tomatoes?  Today, I’m sharing gardening tips how you can blanch tomatoes in just a few easy steps. I love harvesting my garden and canning/freezing tomatoes for chili and soup in the winter  Most of the tomatoes that I grow are Heirlooms.  They’re not the best looking tomatoes, but they have a great variety and the best taste.

So, Heirloom tomatoes are at the top of backyard vegetable gardening planning.   My favorites tomatoes are Cherokee Purple and Paul Robeson.  I can’t get enough.  I love slicing them and spreading a little mayo over them with a little pepper or on a BLT.  It just doesn’t get any better than a fresh tomato from a backyard garden.


blanching tomatoes


When I harvest enough tomatoes, I get out the blanching basket and my Ball Canner. The tomatoes taste as good during the winter as they do when I pick them from the vine.  I freeze some of the tomatoes, but can the majority of them.


blanching tomatoes


Here’s a few tips on how to blanch tomatoes:  


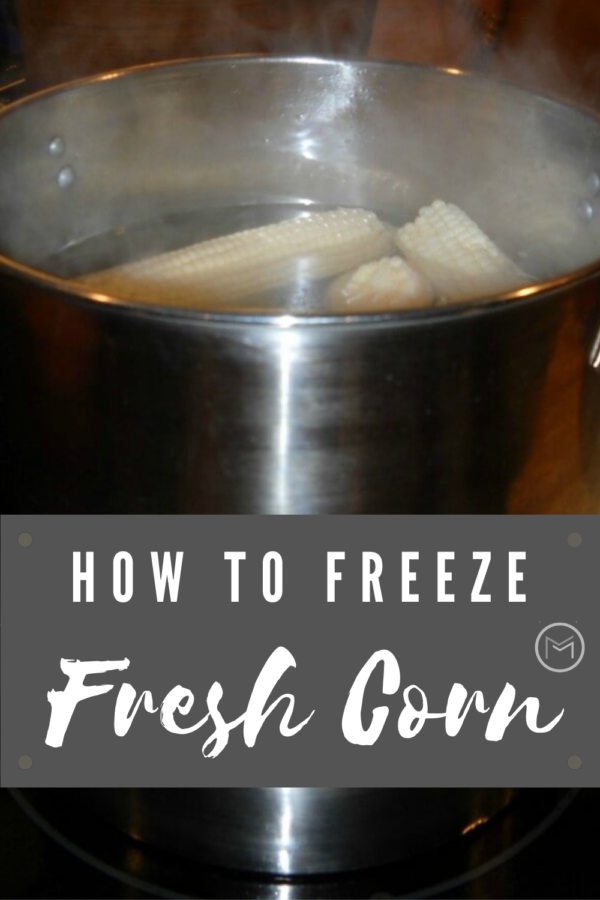
Purchase a steamer basket for blanching tomatoes in your stockpot.  I also use it to blanch green beans and corn before freezing.  Blanching tomatoes is easy and a necessary step to remove the skin before freezing or canning.  It locks in the flavor and here’s the steps:

1.  Choose tomatoes that are not bruised or cracked.  If you don’t have a backyard garden, visit your local farmer’s market.

2.  Next, fill your stockpot half-way and bring the water to a roaring boil.  Do not fill completely, immersing the basket will cause the water to rise.

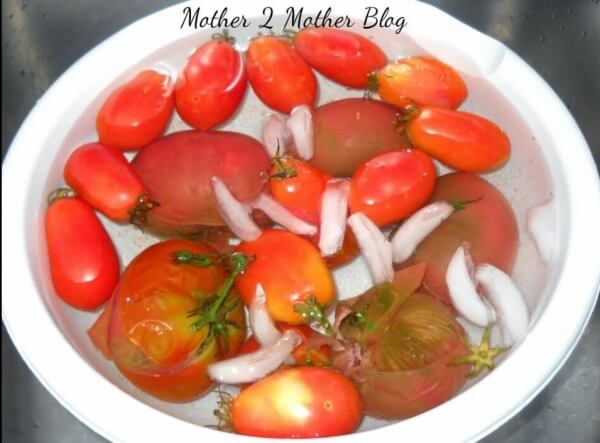
3.  Fill a large bowl with ice water.  This step is important, ice water will stop the tomatoes from cooking and cool them down enough to remove the skin.

4.  While you’re waiting for the water to boil, remove any stems and make an x on the bottom of each tomato.  Making an x on the bottom of the tomato helps loosen the skin during the cooking process.  (This step is optional.  I have blanched tomatoes without the x).

5.  Once your water is boiling, place the basket inside the stockpot for approximately 30 seconds – 1 minute. Do not cook your tomatoes longer than the 1 minute time frame.  Some of the skins on the tomatoes may start slipping off the tomatoes during the boiling process and that’s fine.  You’re going to remove the skin from the tomatoes, this is the goal.

6.  Remember, remove the basket from the stockpot after 1 minute and emerge the tomatoes into the ice water with a slotted spoon for about 5 minutes.  You can see the skin slipping off a few of the tomatoes in the picture below. You can also see that I did not remove the stem from a few tomatoes.  No harm was done.


How to Ice Blanched Tomatoes


7.  Remove the skin from the tomatoes, the skin should easily slip off the tomatoes.  I compost the skin and stems from the tomatoes.

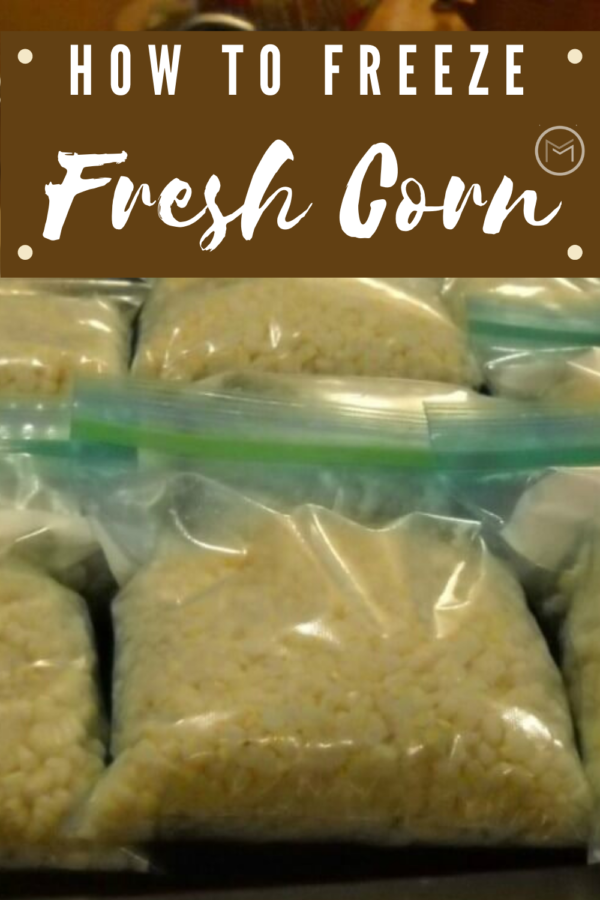
8. At this stage I can my tomatoes.  However, you can freeze them too.  I recommend slicing large tomatoes before placing them in quart or gallon freezer bags.  Smaller tomatoes can be left whole.  If you have a sealer, now is the perfect time to bring it out.  I like to use quart bags for freezer storage.  It’s a sufficient amount for most of my dishes.

9. Write the date on the freezer bag with a permanent marker and freeze until ready to use.

10.  If your bags are sealed properly, your tomatoes should not sustain freezer burn and should be good to use through out the winter.


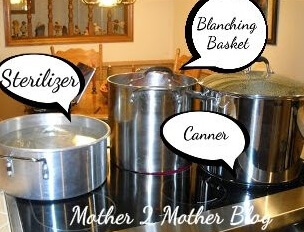
In the picture above, you can see the pan I use to sterilize my quart jars, lids and tops.  I also have a stockpot that I use to blanch the tomatoes and my Ball Canner.  It is made specifically for glass top stoves, and works like a charm. I’ve been using it for years to can my tomatoes, tomato sauce, salsa, pickled jalapeno peppers and more.

So, stay tuned for my canning session.  I usually put up 15 – 20 quart jars of tomatoes each season.  I use the canned jars of tomatoes in my chili, soup, salsa and other recipes.  What are you harvesting from your garden?


Composting Leaves for Beginners

Today, I’m sharing gardening tips on composting leaves for beginners. Fall is a great time to start preparing  garden compost for backyard vegetable gardens.  Having rich soil is essential in for growing flowers and vegetables.  I started composting several years ago, so I could have readily available compost for my veggies.  

I started c0mposting with 2 compost bins that I use for kitchen scraps, yard cuttings, grass etc.  The compost bins weren’t breaking down fast enough for me, so I started composting my neighbor’s leaves.  I’m not sure that I will return to the compost bins after seeing the results of the composted leaves. I love how the leaves break down and how fast they return black gold to me.  The leaves are easier to compost, and they don’t require any work unlike the compost bins.


composting leaves for beginners


Composting leaves is simple, just leave the leaves in lawn bags and let them do their thing.  My neighbor brings me 15 – 20 bags each fall. However, there are other uses for the leaves too.  For example, the top picture is a bag that I use around my garden plants as mulch.  This year I created paths in the garden to keep the weeds down with them. Normally I use straw, but I didn’t purchase any this year so I had to use my leaves.


composting leaves for beginners


The above bag of leaves is in the mist of breaking down.  You can see where the leaves are decomposing in the bag.  Because I have 5 – 10 bags of black gold for the next year’s garden, the other bags can sit and decompose throughout the year.  So, stop burning those leaves and find a spot for them to decompose.  It’s easy!

Tips for Composting Leaves for Beginners:

1.  Remove large sticks, pine cones etc. from the leaves.
2.  Use inexpensive lawn bags to house them.  I purchase cheap ones from the Dollar Store.
3.  Crumble the leaves as much as you can before placing them in the bag.  Because my neighbor gives me her leaves, I have to open the bags and crumble them myself.  If you have kids let them crumble them.  It gets them involved in gardening. Or, use a weed wacker to break up the leaves.
4.  Wet the crumbled leaves thoroughly, seal the bag and place it in a spot where they won’t be disturbed. I use a stick and punch a few small holes in the bag so it will get water from the rain and snow during the winter months.


The picture below is a bag of leaves that have completely broken down into what gardeners call black gold. Every gardener wishes for black gold. This bag is beautiful and full of worms. It took a few years for the leaves to break down to this state, but it is so worth it. The compost in the bins isn’t close to being this rich.  I must say that I have not given the bins the attention that they require.

Compost bins must be heated up by using a certain amount of greens and browns, such as cuttings from the lawn, leaves, kitchen scrapes, newspaper, etc. It also requires water and turning.  My bags of leaves just require storage space, and nature does its thing.  I hide my bags behind one of my storage buildings.  The longer you leave them, the more they break down.  I love composting tips for beginners that are easy.  I thought you would feel the same.


composting leaves for beginners
 

Composted leaves will enrich your soil and help produce beautiful flowers and vegetables.  You can either till it into the garden or place a scoop into the hole before adding your plant. I also add a scoop around the base of my plants.  Simply use a small hand trowel to place the compost around the plant. Most importantly, the compost is organic and it’s free.

So, once the leaves have been raked and bagged it’s time to do fall lawn care.  Fall lawn care should include aerating the soil, fertilizing, over seeding and continuing weed control.  Aerating the soil is important, especially if you intend to overseed your lawn.  Aeration allows water, nutrients, and oxygen to get to the root of your lawn.  As a result, it also allows seeds to touch the soil and receive water when you overseed.

Finally, fertilizing your existing lawn is a step you should take in the fall.  The moisture on the lawn in the morning helps to absorb the fertilizer.  The fertilizer in turn, helps with the roots of the lawn.  Additionally, strong roots will produce a lush, green lawn in the spring.   We hope you found my composting leaves for beginners beneficial.

How To Freeze Fresh Corn

Today, I’m sharing gardening tips on how to freeze fresh corn.  Fresh corn will be on the market this summer, and you don’t want to miss out.  I love it grilled, in soup, in chowder, boiled, fried you name it.  My favorite corn is Silver Queen. It’s a late corn, but so worth the wait.  Freezing corn is a yearly ritual for me, so I’m going to show you how to freeze fresh corn.  Shucking it is another issue, but I found a solution to that too.  Check out my post on How to shuck corn in the microwave.  It’s one of my best backyard vegetable gardening tips.  


freezing fresh corn


I shucked, blanched, cut off the cob, and froze about 100 ears last season.  Preparing corn for the freezer is easy and so worth it.  I purchase my corn from a local farmer.  He sells it at a bargain rate. He removes the corn from the stalks the day before you pick it up.  So, it doesn’t get any fresher than this.  Purchasing fresh corn this way saves space in my garden for other goodies too.


how to freeze fresh corn


How to Freeze Fresh Corn: 


  1. Shuck and remove all silk from the corn on batches of 10 – 15 ears.
  2. Boil them for about a minute or two in a large stock pot.


how to freeze fresh corn


3.  Have an ice batch ready for the ears of corn.  I use my sink.  This should be completed before you start the boiling process.  An ice bath is imperative in your preparation of the corn for the freezer.

4.  Remove the cobs from the boiling water after 2 minutes and immediately place them in the ice water bath.  The ice water will stop the cooking process.  This is important because you don’t want to cook it as if you’re preparing it to eat.  Although I do leave a few cobs in the boiling water, because I do want to eat them later, lol.


5.  Once the corn has cooled down about 5 – 10 minutes, cut the corn off the cob in a large bowl.  I use an extra large bowl and a chef’s knife to remove the kernels. I also use the corn holders on one end, it makes it easier to handle the corn while removing the kernels.

6.  Once I have the kernels removed from the cob, I pack quart freezer bags.  Buy quality bags and make sure the bags are sealed properly or use a vacuum sealer.  If you have one sitting in a cabinet, now is a perfect time to use.  I don’t bother to date the bags because they will be gone by spring. You can use a permanent marker to date the bags.  However, in my household they will all be gone my spring. 


Quart bags are perfect for my household.  I can just pull out a bag for soup, mix with green beans, fry it or however I want to use it.  It’s as fresh as it was the day I purchased it.  Put a few bags in your freezer to use this winter.  You won’t regret it.  Stay tuned for my post on blanching tomatoes and green beans.  


how to fresh corn
We hope that you have found our tips on freezing fresh corn beneficial.  You may also like our tips on 10 Benefits of Vegetable Gardening too and how to grow sweet corn.

How To Pickle Peppers From Your Backyard Garden

 Today I’ll be showing you How to Pickle Peppers.   Do you like hot peppers on your sandwiches, nachos, in beans, salads, or dips? They’ll be as fresh months from now as they are today if you pickle them.   My daughter loves them straight from the jar.  She actually asked if I would mail her a few jars through the mail.  I declined that request, but I do take  jars when I visit her.  My daughter’s sister-in-law is a fan too.  So pickling peppers is one of my top backyard vegetable gardening tasks.  


Pickled Peppers


This batch is a combination of:

  •  Hungarian Wax
  •  Sweet Banana
  •  Chilies
  •  Jalapeno
  •  White Belle


However, any combination will work.  So, I throw whatever peppers are ripe in the garden into the bowl.  Some people prefer to use jalapeno peppers only, but I like to broaden my horizons.  I make a homemade pickling broth to cover my peppers.  You will need to prepare your canner for this recipe.  


Here’s the broth recipe for the pickled peppers:  

You may have to double the recipe depending on how many jars you will be canning:

  • 1 cup water
  • 4 cups of white vinegar
  • 1/2 cup of Kosher salt


Here’s the steps to canning the pickled peppers:

  • Bring the broth to a boil.
  • Add a teaspoon of pickling spice to the bottom of 1/2 pint sterilized jars.
  • Pack the jars with peppers and pour the pickling broth over the peppers.
  • Prepare them for a hot water bath by removing the bubbles with a plastic knife.
  • Take the knife around the jar a few times and ensure the peppers are packed tightly.  Wipe the rims of each jar with a clean cloth.  Place the sterilized lids and rims on each jar.
  • Water bath for 15 minutes.  They are delicious.


*Note – Do not use blemished peppers when canning your produce.  Make sure all of the peppers are blemish free and solid.  I hope you enjoyed the post on How to Pickle Peppers.


Growing Dill In The Home Garden

One of the herbs on my backyard kitchen gardening list is dill.  It’s very easy to grow, and can be started from seed or direct sowed in your kitchen garden.  If you are a beginning garden purchase a plant from your local nursery.  Be warned, I purchased a plant from the nursery to place in my garden one summer.  The next gardening season, there were volunteers everywhere. 
Unfortunately, I had already purchased a dill plant from a nursery.  I sure wished I had saved my money purchasing the plant.  Lesson learned, check the garden for volunteers before you head to the garden center.  Dill and onions are great companion plants.  Check out my post on companion planting.  


garden dill


Dill from your garden can be used in the following ways:

1.  Homemade dill pickles
2.  Dip for potato chips and veggies
3.  Garnishes
4.  Sauce for salmon cakes


garden dill


I’ve made make spicy dill pickles for the past two seasons and used fresh dill from the garden. This year I will be making bread and butter pickles.  I also dry my dill and store it in an airtight container for dip.  Fresh dill can also be used on fish, not my thing but many people love using it in that manner.

Last, we hope you like our growing dill tips.  It is an easy herb to grow, and has given me lots of volunteers during the growing season.  It loves my garlic plants.  I have to harvest often, so it doesn’t choke out my onions and garlic.  As a result, I should have more than enough to dry and store for dip and to share with family.  If you love veggie dip, this herb will enhance it immensely.  It’s much more flavorful than store brought dill.  I’ll be sure to post my dip recipe the next time make it, which will be soon.


5 Benefits of Growing Chives

Today, I’m sharing gardening tips on the benefits of growing chives.  The flowers on my backyard garden chives are in full bloom, and they are beautiful.  I recommend that you plant a chive or two in your backyard vegetable garden.  The purple blooms are so pretty, and they enhance the flavor of many dishes.  Maintenance is easy, simply remove the spent flowers and cut the plant to back to 2 – 3 inches in the summer.

This should give your plant a good start for another harvest later in the season.  Furthermore,  removing the flowers is an important step.  Otherwise, the seeds will blow and the plants will take over your garden.  You will end up with volunteers, plants which have seeded and germinated from blown or dropped seeds.


garden chives


So, there are several benefits to growing chives beside them.  First, they are very easy to grow.  Once they are planted, they require regular watering and a little fertilizer.  My soil is so rich, I usually by-pass this part of the maintenance, but I do water them.  Here a few other reasons to grow and eat chives:


garden chives


Benefits of Growing Chives:


1.  They’re a magnet for beautiful butterflies.  You kids will love chasing the butterflies across the yard.  Pick up a few butterfly nets and identification books so the kids can research.  The can get some exercise chasing the butterflies and connect with nature.  Here’s another benefit, you can keep them occupied while you put up your feet and sip a cup of coffee.

2.  Also, they are delicious on baked potatoes, omelets and other dishes that call for onions.  I love them in salads as well.

3.  They are a great source of antioxidants and can help fight cancers in the breast, colon, prostate, ovaries and lungs.  This study is from the University of Maryland Medical Center.

4.  Additionally, they are a great source of Vitamin K.  Which, is good for bone strength.

5.  Furthermore, they help lower blood pressure and cholesterol according to the University Hospital of Columbia and Cornell.

6. Although I have not eaten them, the flowers on chives are edible.  For some reason, I just can’t get past the thought of flowers in my food.   On a cake yes, in my salad no.  However, they can be used to decorate a dish or vegetable tray.

7. Did you know that chives can be used fresh or frozen.  You can chop and seal them in an airtight container and keep them in the refrigerator or freezer.

8.  Chives return year after year.


Last, they are low maintenance, have health benefits, and enhance the flavor of your dishes.  Head to your local nursery and pick up a few plants.  Better yet, grow a few plants from seed.

How To Build A Green Bean Trellis

Last year I used a teepee trellis for my pole beans and it worked well.  So, I want to share with you How to Build a Green Bean Trellis so you have a cool trellis for your beans too.   Planting both bush and pole beans were on my backyard vegetable gardening list of things to do.  Well, time is not always on  my side.  So, I decided to go another route.

home gardening, vegetable gardens, bean trellis 


I had made a trellis for my green beans in an earlier growing season.  But, I decided to modify it to maximize my green bean harvest rather than plant bush beans.  My goal was to add bars to the trellis teepee so I could plant beans completely around it.  However, one side was left open. I wanted my grandchildren to have a seat inside of the teepee while I’m gardening.  So, an adorable miniature chair will be placed inside the green bean trellis for them to sit. 


Making a bean teepee can be simple and inexpensive.  I used the bamboo poles from last season and cuttings from my bamboo squash trellis.  I found left over string from other projects under my sink and used it to tie the smaller bars around the legs of the teepee.  String is great for the tendrils of the plant to latch onto. Lowes and Home Depot sell bamboo poles that won’t break the bank if you can’t found a resource locally. The Dollar Store sells string.  My brother has a yard full of bamboo, so I luck out. 


 DIY garden trellis


Here’s what you will need to build a green bean trellis:

  • The poles should be 6 – 8 feet tall and you will need 4 pieces. 
  • I used (4) 7 foot poles and 5 bars across. 
  • 1 5 ft. fence T-post
  • Be sure to secure the poles tightly at the top and get them deep into ground before you tie on the horizontal poles.


Here’s the steps for building a green bean trellis:

1.  Tie your 4 poles at the top securely.
2.  Your poles should look like A-frames.
3.  Place the frames in the ground deep enough to hold them securely.
4.  Tie the smaller pieces (20) across the bars to form 3 sides.  Leave an opening to place a chair for the kids or spacing for growing lettuce through the summer, which requires shade.  The leaves of the beans will provide the shade.
5.  Plant your choice of pole beans completely around the bottom of the teepee and watch them climb.
6.  Place a 5 foot garden t-post on the rear of the teepee.  Re-enforce the teepee by tying string from the top of the teepee to the T-Post. This will give the teepee strength when it is covered with vines and green beans.  


Last, I use Blue Lake pole beans.  I believe they are more flavorful and less stringy than other beans.  However, planting Jade Bush Beans along with the pole beans will prove beneficial.  Also, companion plant green beans with tomatoes and cucumbers.  Place your green bean teepee close to your tomatoes and cucumbers.  Here’s a picture of the teepee covered with green beans.  It was so heavy with beans it started to lean forward.  We pulled it back and re-enforced it with a fence t-post stake in the back of the teepee.


Green bean trellis


It is now straight and loaded with enough of green beans to freeze several quarts for winter.  Perfect for soup and green beans and corn.


Green Bean Teepees


You may also like:  Using Eggshells In The Garden 


5 Health Reasons To Garden

Summer is around the corner and I’m looking forward to having fresh and chemical free vegetables.  Backyard Vegetable Gardening has become a part of my soul.  My grandfather was a gardener, and I guess it seeped into my heart when I visited his farmette during the summer.  There are many reasons to garden, but the health benefits alone are a good enough reason to at least have a small garden.


Backyard Gardening


I’ve been backyard gardening for several years and wanted to share the health benefits of having a kitchen garden:

1. High In Antioxidants

Garden herbs help reduce heart attacks.  Additionally, they are high in antioxidants according to Fitness Magazine. Oregano, basil, rosemary and parsley are a few of the herbs that you will find in my backyard kitchen garden.  I love using oregano and basil in my sauces, parsley on potatoes and rosemary on chicken and in stuffing dishes.

2. Exercise

Having a backyard kitchen garden provides an opportunity to get moderate exercise.  It required you to use your arms to rake and hoe, bend and stoop to plant vegetables, herbs and flowers.  Furthermore, you stretch and use muscles that you haven’t used for some time.  Personally, the first few days in my backyard garden leaves my muscles sore and helps for me get a good night’s sleep.

3.  Boosts Vitamin D

Sunshine is the best way to boost Vitamin D intake.  I could be in my garden for an hour or two several days a week.  So, I wear a sunhat and plenty of sunscreen while gardening.  Bug spray helps too.

4.  Reduces Stress

Gardening reduces the Cortisol level, which is produced when you’re feeling stressed.   Pulling weeds and nurturing your backyard garden plants can be therapeutic.  It provides an opportunity to clean your head, think about life and make future plans.


Backyard Gardening


5.  Better Nutrition

Home grown vegetables, herbs and fruits provide better nutrition and are more flavorful than most store produce.  Most importantly, my backyard garden is organic.  No harmful chemicals are used in our around my garden.


So, home grown herbs and vegetables have become an important staple in my home.  Additionally, I look forward to picking fresh lettuce, tomatoes and herbs for my dishes  And, preserving them for use during the winter.  The flavor versus what is purchased in a grocery store is beyond comparison.  I enjoy walking into my garden and retrieving peppers and tomatoes straight from the vine when I’m cooking. The fresh herbs provide a wonderful enhancement to sauces, stuffing and salads.  Fresh cucumbers straight from the vine, basil and spring water makes a refreshing drink on hot summer days.

Start planting and reap these health benefits as well as a new found flavor and perspective on fruits and vegetables.  Start with container gardening.  Plant a few herbs and tomatoes in containers, and than start planning for next year’s raised bed or roll gardens.

You may also like:

Gardening With Children

Using Eggshells In The Garden


Hardening Off Garden Seedlings

Today, I’m sharing gardening advice on hardening off garden seedlings.  Backyard vegetable gardening is a great way to get outside and get moving.  Growing your own fruits and vegetables is so rewarding.

I love heirloom tomatoes.  Their flavor is unmatched, and I can’t purchase them at my local grocery store or farmer’s market.  So, I purchase seeds, germinate them and transplant them into my garden.  Some of my favorite heirloom tomatoes are Paul Robeson, Cherokee Purple.  Brandywine,  and Hillbilly.  I can’t wait to pluck the first ripe tomato from the vine for a BLT sandwich.   My mother loves them sliced with mayo and salt and pepper.  Either, they’re delicious.


garden seedlings

First, I make a list of vegetables that I want to grow in my summer garden.  It usually includes oregano, dill, cilantro and basil.  I love growing fresh herbs.  All of these ingredients will be used in my sauce or salsa.  So, I attempted to  germinated all of the above along with my heirloom tomatoes.  I’m proud to say all of my tomato seeds germinated.    I usually lose a few or some of my seeds fail to germinate.  Fortunately, this year I had greater success.  I allowed then to stay in the starter pots longer.  I think this step allowed the roots to get stronger before I re-potted them.

So, I save pots from the garden center when I purchase my flowers and reuse them when I start my backyard garden vegetable plants the next season.  My squash, watermelon, peppers and zucchini germinated as well.  I’m looking forward to a great growing season.


When you start seedling inside, they must be harden off.  What is hardening  off seedling you ask?  Hardening off is exposing your seedling that have been started under grow lights to the elements.

My hardening off process starts in mid-late April.  I try to plant everything by Mother’s Day or Memorial Day at the latest.   I use trays to house my seedlings under the grow lights.  It’s easier to move them outside and back in with the trays.


Hardening Off Garden Seedlings:


  • Set your seedlings outside for a few hours in the shade for several days.  I do this for about a week adding an hour to each day.  Be sure to bring them back inside.  They aren’t strong enough to withstand the night air yet.
  • The next move is to gradually expose them to the sun and longer hours outside.  I do this for about 3 days.
  • Last, I leave them out overnight. Once they get used to the temperatures I transplant , I leave them out until I’m ready to plant them in the garden.


hardening off garden seedlings


About 20 plants are ready for the garden.  My estimate is about $5.00 in cost for seeds.  By purchasing heirloom seeds, I’m able to save the seeds from one year to the next to start new plants.  I would never be able to purchase 20 plants from a nursery or garden center for $5.00.  The starter mix and potting soil cost me around $10.00.  Still, it’s cheaper than purchasing from a nursery.


Tilling compost into the garden is next on my backyard vegetable gardening list.  Hopefully, I will have my plants in the garden by Mother’s Day, Memorial Day at the latest.   I hope my hardening off garden seedling tips has been beneficial.  Try starting a few inside and gradually increase your seedlings the founding year.  Slow is best when learning a new technique.  You may also like seeds versus seedlings.


Using Eggshells In The Garden

Stop, don’t throw those eggshells away.  Today, I’m sharing tips on using eggshells in the garden.  Yes, eggshells are beneficial in the backyard garden.  So, add eggshells to your list of backyard vegetable gardening items needed this growing season. Your tomato and pepper plants will thank you.  So, grab a container and start saving them throughout the year.  Ask your family members or neighbors to save them for you too.  Especially, if you don’t consume a large quantity of eggs.  Explain that using eggshells in the garden will benefit the tomatoes they will receive in exchange.  This will give them an incentive to save the shells for you.  


using eggshells in the garden


Before using the eggshells in the garden take these steps:

  • Rinse the eggshells thoroughly
  • Dry the eggshells on low temperature in the oven or microwave them.  (You want the shells to be brittle)


using eggshells in the garden


Once are cool, crush them and put them in a plastic bag or container. You can store them in your refrigerator if you don’t have counter space.  A rolling pin or wooden spoon is a good way to crush the eggshells.  Turn this task over to the kids.

So, when garden season arrives place a generous dose of the crushed eggshells in the hole when you plant your tomatoes.  They are a great source of calcium for the plants.  Furthermore, I also sprinkle the shells around the plant once I get the tomatoes in the ground.  I actually do this throughout the growing season.  The eggshells will help give your tomatoes a calcium boost, and help fight off blossom end rot.


how to use eggshells in the garden


Secondly, I mix the crushed eggshells in with my birdseed.  Bluebirds, Baltimore Orioles, Scarlet Tanagers and Barn Swallows love eggshells too.  You can spread the eggshells on a log or on the ground if you don’t have a platform feeder.  We hope that you enjoyed our tips on using eggshells in the garden, and you will start recycling your eggshells.  You may also like 20 Flowers to Use in a Wildflower Garden.