Smart Upcycling Ideas for Crafts

Today, I’m sharing upcycling ideas for crafts.  Upcycling is a great way to use things that you might otherwise throw away.  It could be something that could be used for a new crafting project or two.  It’s great for the environment, good for your bank account and lots of fun.


craft ideas


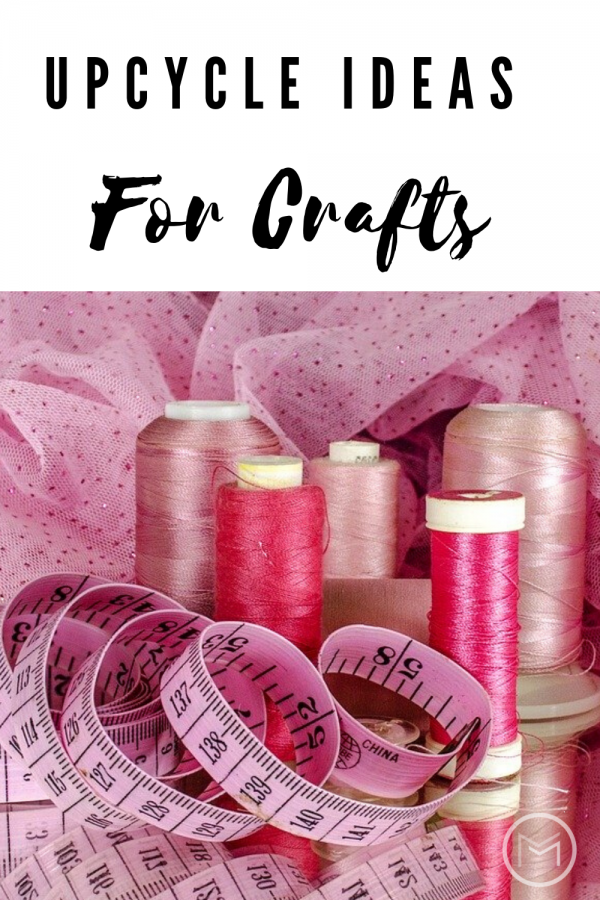
Here are a few smart upcycling ideas for crafts that you may want to try:


Turn Old T-Shirts into a Blanket

Most of us have old t-shirts.  They’re important wardrobe staples.  But, what do we do with them when they’re no longer in style or they’ve ceased to fit any longer? One idea, is to get out the sewing machine and turn those t-shirts into a beautiful blanket. This works particularly well for old t-shirts and other tops that have big, bold graphics on them.  But, any old shirts can be used.  Add trimmings of lace or fringe to the edges and you’ll create something really special. It’s so easy to do too.  You literally just have to cut the shirts into squares and sew them together.  You could do that in a weekend!


Turn Socks into Leggings

If you happen to have a little one running around and a lot of socks that you don’t really wear, you could turn those socks into itty bitty leggings.  Those leggings can save you a few dollars and give your kid something unique to wear. If you’re a basic sewer, it’s a project you should be able to do in a few hours.


Washi Tape Photo Frames

Are your photo frames old and out of style? Don’t get rid of them, washi tape them. Washi tape is basically a low-tack sticky tape that comes in a range of colors and designs.  They were originally based on the delicate patterns of origami paper, and it is wonderful stuff for any crafter. You can use it for myriad things from wrapping presents to making over your bicycle with a fantastic new design.  But, one of the very simplest projects for washi tape is improving your photo frames.  Literally, all you have to do is cut out and stick pieces of tape over the existing frame in any way you fancy. Trust me, it’ll look great.


Mod Podge Shoes

Got a pair of shoes that are still perfectly fine to wear, but which have been scuffed beyond repair? Cut up some comics, wallpaper, or magazines and stick them onto your shoes in the form of a collage using Mod Podge. When it’s dry, apply another layer to seal, using a foam brush to avoid brushstrokes, and let dry. You’ll have a “brand new” one of a kind pair of shoes to wear to that party in no time at all.


craft ideas


Transform Drawers into Side Tables

Turning old drawers into side tables is so easy and so stylish. All you have to do is remove the drawers from your old unit.  Next,  turn them on their sides and attach a couple of legs, which you can make out of scrap wood or buy at any decent craft store, to the bottom. You can then use MDF to create shelves with on the drawer cavity if you desire.  Or, leave the cavity whole to display bigger items.


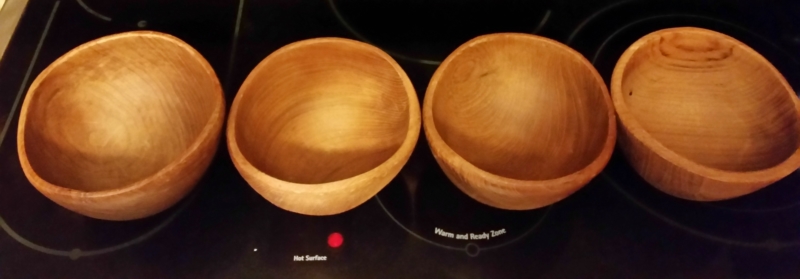
Use Your Old Vinyl as Funky Bowls

Vinyl records might be back in fashion, but if you’ve got a few lying around that are no longer worth much or which are not playable, you can still put them to good use by turning them into funky retro serving bowls. All you have to do is place your records over an ovenproof bowl on a baking tray with a can on top to weigh it down. Place into the oven at 200°F and bake for 10 minutes.  The record will start to warp and mold itself to the bowl. You can then gently mold it into shape with your hands.


Turn Sweaters into Pillows

Sweaters are so darn comfy that it seems a shame to throw them out when they get past their best, but you really don’t need to do that. Sweaters can very easily be turned into cute pillowcases that are perfect for creating that hygge look around the home.


Last, as you can see upcycling ideas for crafts comes in many forms.  And, it can help you to create all manner of wonderfully inventive items from stuff that would otherwise have ended up in the trash, so why not give it a go. What will you make today?


DIY Pine Cone Fire Starters

Fall is here!  Today, I’m sharing tips on how to make pine cone fire starters.  It’s the perfect time for a roaring fire in the fireplace or fire pit.  Picture yourself sipping a cup of coffee, a glass of wine, making s’mores or roasting hot dogs with the kids, it doesn’t matter.  Just get the fire started.

They’re perfect for camping or a wood burning fire place or stove too.


pine cone fire starters


Next, spend an afternoon searching for pinecones in your backyard or neighborhood’s.  My daughter has more pine cones than she could ever use in her yard, so I fill a basket when I visit.  If you’re not lucky enough to have access to pine cones, you can purchase them.  I used a variety of sizes in this batch.


You will also need:


how to start fires


How to Make Pine Cone Fire Starters:

  • Start simmering about 3 inches of water in a small pot.
  • While the water is heating, wrap a piece of wire around the bottom of each pine cone as shown below.   You will be use the wire to dip the pinecones into the wax.  I purchased the 20 gauge galvanized wire.  I prefer that weigh because its heavy enough to use on my wreaths for hanging, but also useful with other crafts.
  • Slowly add a pound of the wax pellets to the pot.  Allow the pellets to melt slowly and completely. Also, I used white pellets.  I like the softness of the white wax.  However, you may prefer yellow.
  • Place the pine cones on a cooling rack after you dip them into the wax.  I lined a cookie sheet with wax paper and placed a cooling rack on the cookie sheet.
  • Allow the wax to harden before placing the pine cones back into the wax.  I dipped each pine cone about 3 or 4 times.


The smaller pine cones shown below are from the Dollar General.  They were 12 for a $1.00 in the Christmas section, so I grabbed a few boxes to add to my pine cone stash.  They have strings wrapped around them because they are Christmas tree ornaments.  However,  I just removed the strings before dipping them into the wax.  I used an old spoon to place the smaller pine cones in the wax and to remove them from the pot.  But, you can wrap the wire around them too.


pine cone crafts


fire starters


Once the wax hardened, I removed the wire.   I love how the wax varies on each pine cone.  I left some of the pine cones in the heated wax longer than others.  You can get creative and add glitter while the wax is hardening or a fragrance oil to the pine cones. I use fragrance oils because they’re stronger than essential oils.  Peppermint, Snickerdoodle, Cupcake, and Orange are a few of my favorites.


fire starters


starting fires in fire places


I head to the Smoky Mountains at the end of October each year.  This is the wood burning fire place in the house where I relax for a week.  I’ll be taking this batch of pine cone fire starters to use when I want a roaring fire.  The weather is usually a little chilly, so the fire place is always a welcome feature.  Make a few batches for your next camping trip, backyard fire pit or fireplace.  You may also like:  Sea Shell Embellished Picture Frames.  


How to Remove Contact Paper From Thrift Finds

Today, I’m sharing thrifty tips on how to remove contact paper.  I purchased an old dry sink to turn into a bar.  Unfortunately, the drawers were lined with contact paper.  The contact paper was beautiful, but leaving it wasn’t an option for my project. Neither was painting over it.  I wanted to keep the integrity of the drawers.  If you have struggled with how to remove contact paper from drawers, cabinets, trays or some other object I understand.  Keep reading, I have the solution for removing contact paper.


thrift store finds


Before indoor plumbing was available, dry sinks were used.  They actually mirror a cabinet with a recessed top.  People placed a basin and pitcher of water on them.  They placed dry sinks in kitchens, bedrooms, and on porches.


Removing Contact Paper


As I stated previously, I wanted to remove the contact paper from the drink sink drawers.  Unfortunately, I tried to lift the paper from the drawer unsuccessfully.  After spending 5 or 10 minutes trying to remove the paper I gave up.  At times, my patience is not one of my virtue.  Furthermore, I try to use as few chemicals as possible in and around my home.  Using a utility knife proved difficult without damaging the interior of the drawers.  As I was contemplating my next move I thought of a post that I had read months and months ago on removing contact paper.

The weapon for removing contact paper is a blow dryer.  Blow dryers are a dime a dozen in my home.  I raised a daughter.  During the teenage years, blower dryers were in every bathroom and closet.  Oh the memories.  So, I knew I had one somewhere in my house.


removing contact paper


I plugged in the blow dryer and went to work. Simply waving the dryer back and forth across the paper I was able to lift the contact paper slowly.  As a matter of fact, the contact paper lifted with ease.  As a result, the process went smoothly and quickly.  However, if you are looking to preserve the paper, using a blow dryer is not the answer.


how to remove contact paper


Stay tuned for the end result of my dry sink makeover.  You may also like:   Thrift Store Teak Bowls 


Thrift Store Find – Hand Carved Teak Bowls

Today, I’m sharing tips on finding thrift store teak bowls. I’ve always loved thrift stores, yard sales, and auctions.  Unfortunately, I had to set that passion aside over the years because of my career and other demands on my time.  I have gradually returned, and decided to share my thrifty finds with you.


teak bowls


When I was raising my daughter as a single mother, I had to figure how to budget and stick to it.  This included decorating my home, purchasing clothing, food, vacations and everything else that came along.   The solutions to these demands were growing my own food, second hand stores, clearance racks, and yard sales.  I truly believe that someone else’s trash is another person’s treasure.

Browsing thrift shops was a way for me to relieve stress too.  A little retail therapy goes a long way.  And, I didn’t have to pay a fortune for my therapy.  I visited one of the local thrift stores recently, and found these 4 teak bowls.  They appeared to be hand carved, because their shapes were irregular. They just appealed to me, and called out my name.  The price was $.99 per bowl.  They may have been priced so low because of their imperfection, but to me that uniqueness is what makes them valuable.


Thrift Shopping


As a single parent, buying things and figuring out how to use them later was not an option for me.  Everything purchased had to be a price within my budget and have a purpose.  That thought process is still in my DNA, even though I have reached a stage in my life where I can afford pretty much what I want.  For some reason, I have no desire to change that thinking.  It keeps me from overspending, and helps me stay on track with my finances.


Thrift Shopping


As I admired the teak bowls, I thought about how I would use them.  Ice cream with the grandchildren came to mind immediately.  Sold!  I could also use them for salads, spaghetti, chili, cereal, and the list goes on.

When I flipped the bowls over to check the price, I found this label on the bottom.  Teak is native to India, Sri Lanka, Indonesia, Malaysia, Thailand, Myanmar and Bangladesh.  It is also used to make boats, furniture, carvings and other small wood projects.

Knowing the origin of the teak bowls increased the value for me.  It made me want to preserve the uniqueness and irregularity of the bowls.  So, they became more of a bargain from a thrift shop.  One of the things about thrifting is being able to see the beauty in an item that another person no longer sees. The fact that I found a set selling on Etsy for $62.00 helps too.

If you’re a thrifty shopper, I hope that you will appreciate my hand carved teak bowls too.  If you’re not, I encourage you to check out a few shops, flea markets or auctions.  You may also like: Auction Tips for Beginners.

How to Become a Flea Market Shopping Pro

flea market shopping
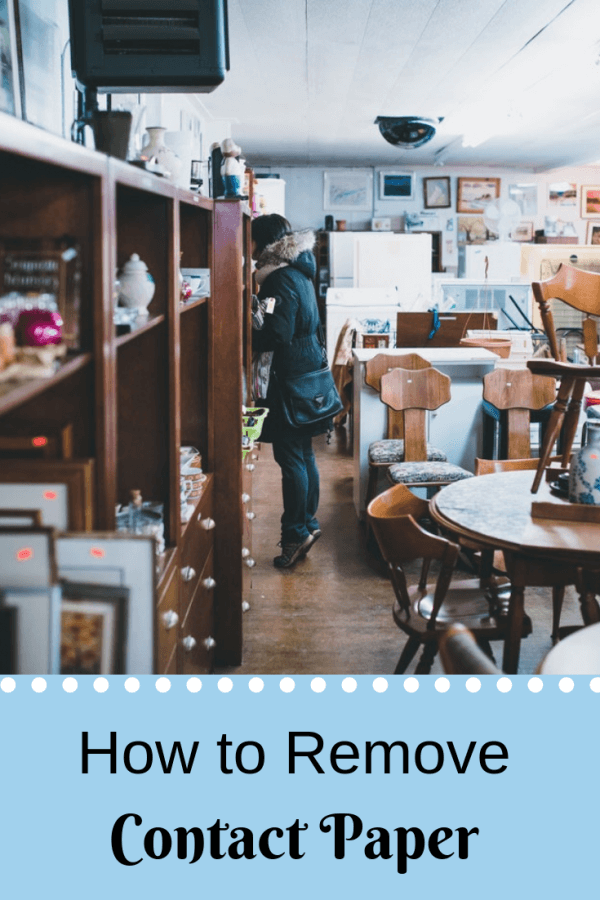
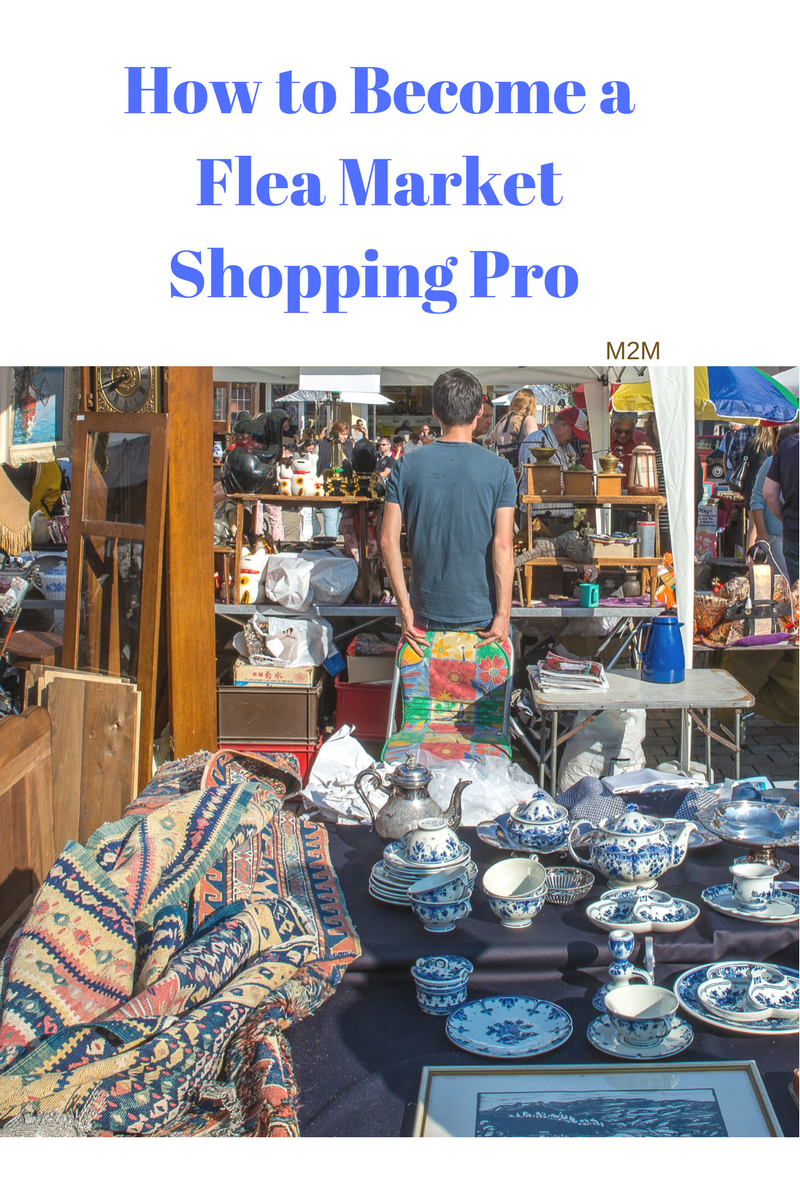
Summer is here, and it’s the perfect time to head to the flea market.  I love finding bargains or negotiating a good deal.  Flea markets are popular on the week-ends in most cities or towns.  There are indoor markets that are open during the week as well. Check your local listing for hours.

In addition to flea markets, there are farmer’s markets.  Farmer’s markets have a heavy emphasis on fresh produce and organic items.  However, there are other flea markets that focus on everything from tools to antiques. No matter where you live, city or country, there’s a flea market nearby.

Here’s a few tips to help you successfully score a haul on your next trip:

  1. Arrive Early – In my experience, you find the best deals when your arrive early.  Quality items are items are still available, and ready for a new home.  You can also find deals in the afternoon.  Many dealers don’t want to pack up their wares, so they are willing to lower prices.
  2. Wear Comfortable Clothing and Shoes  – In the summer, lightweight clothes is a must.  Walking shoes are suggested rather than flip flops.  However, if your feet and legs can withstand those cute flip flops go for it.  I would dress in layers during cooler weather.  You can always take off a jacket or sweater or put one on.
  3. Bring Water and Snacks – It’s important to stay hydrated during hot, summer months.  Most flea markets will have vendors, but if you want to save a few buck bring a tote and pack a few bottles of water
  4. Take Cash – Money talks.  Vendors would prefer cash rather than running a credit card.
  5. Make Quick Decision on Purchases – Delaying making a purchase could cost you that item that you have your eye on.  If you’re connecting with an it, take it home.
  6. Make Sure You Can Haul Your Goods – Make a list of items that you would like to obtain, and determine if you will need a truck to haul your goods. With most vendors, you are immediately responsible for your purchases once the transaction is made.  Some vendors will deliver for an additional fee.
  7. Don’t Be Afraid of Items That Need Repairs – If you see a piece of furniture that has good bones, but has scratches, dings, weak legs or needs the seat replaced, don’t run.  These items can be repaired.
  8. Don’t Be Afraid to Negotiate – Most vendors are willing to lower their prices if your offer is within reason.
  9. Check out Vendors Who Are Packing Up
  10. Try to Bundle Items – If you find several items that you want to purchase from the same vendor ask if they will give you both items for a particular price.  Most will be willing to give a great deal to move several pieces.

So, put on a pair of comfortable shoes and get ready to grab some great deals at your local flea market.  You may also like Auction Tips for Beginners.


How To Install Bathroom Sink Faucets

bathroom faucets


Give your bathroom a fresh new look with one of our Maykke bathroom sink faucets.  You can install new bathroom sink faucets in an afternoon. Whether you’re upgrading your bathtub faucet or doing a complete remodel, Maykke offers a wide array of bathroom faucets.  Furthermore, you will also find other bathroom fixtures to upgrade your bathroom.

Tools and Materials Needed:

Bucket
Basin Wrench
Adjustable Wrench
Putty Knife
Silicone Plumber’s Caulk
Rags

First, bathroom taps and bathroom faucets come in several shapes, styles, and designs including bronze faucets or brushed nickel faucets. Sinks will have either one, two, or three holes to accommodate your faucet.  The holes will either be widespread or center set. Take note of your sink design before purchasing your new faucet. If your bathtub faucet is brushed nickel, you should either replace the bathtub faucet to match your new bathroom faucets or purchase a brushed nickel faucet for your sink.

bathroom sink faucet


Getting Started

Next, place a rag and bucket below the plumbing of your sink to catch any drainage that may occur.

Remove the Old Faucet

Turn the water supply to your bathroom faucet, usually located under the sink.  Additionally, turn on both your hot and cold water to relieve the water pressure.  Also, wait until the water stops flowing.  Than unscrew the supply lines from the water valve by hand or with a basin wrench. Unscrew the lift rod from the base of the sink, then unscrew and remove the nuts securing the faucet to the sink. Lift the old faucet from the sink.  Remove any silicone caulk used to secure your old sink with a putty knife.  Finally, thoroughly clean the area underneath your old faucet.


bathroom sink faucets


Remove the Drain

Place your bucket underneath the P-trap on your drain and unscrew the slip nut on the P-T rap. Unscrew and remove the drain flange from the tailpipe connected to your sink and set it aside. Push the tailpipe up to remove the old drain and clean the area underneath the old drain.


bathroom sink faucets


Install the New Faucet

Finally, follow the manufacturer’s specific instructions for the new installation of your bathroom sink faucets. Most bathroom sink faucet installations start with installing the faucet gasket to the faucet and placing the faucet through the mounting holes. Use plumber’s chalk to secure the faucet to the sink. Insert the new drain into the sink’s drain hole and secure it to the new drainpipe included with your faucet. Install the new drain rod and reconnect the supply lines to your sink and water supply. Turn on the water supply and turn on the hot and cold water, tighten any leaky or loose connections as you see them.

Auction Tips For New Bidders


Are you interested in attending upcoming auctions, but unsure what to expect?  Attending auctions can be a great way to score antiques and other household items cheap.  However, you must know the basics before you attend. You don’t want to wander around the auction house or grounds looking uninformed.  Most importantly, you don’t want to make mistakes that will cost you financially.

Check Out On-line Pictures Before the Auction – Many auctioneers will have photos of the items up for auction on their website.  Check out the photo gallery so you can get an idea of what’s going up for bid.

Wear Comfortable Shoes – Auctions can last hours, so wear comfortable shoes.

Bring a Tape Measure  – If you are bidding on items for your home,  bring a tape measure to ensure it will fit into the vacant spot in your home.  You will want to measure you space at home, and make a note so you can reference it once you arrive at the auction.

Arrive Early  – Arrive early so you can check out the items up for bidding.  Check pieces for damage and box lots to see if it’s something you want to bid on.

Register to Bid – Be sure you have your driver’s license with you and another form of identification.  You will need to register before you can bid.  The auctioneer will assign a bidding number.

Check Out Fees Before You Bid – Know the method of payment allowed and any fees before you arrive at the auction. Some auctioneers will charge bidders for using credit cards.  Most auctions will accept checks without an upfront fee. Furthermore, some auctioneers charge a buyer’s premium, additional  percentage charged, on purchases.  Know if the fee is applicable, and remember this when you are bidding.

Bring Cash or Checks – If you plan to write a check, be sure you have check blanks with you.  Also, if your purchases are small, cash is a good way to pay.  Also, many auctions sell refreshments.

Bring Blankets and or Tarps  – Have a blanket handy to cover purchases until you’re ready to load it into your car or truck.  A tarp is nice to have on hand, especially if it rains.

Bring a Folding Chair – Auctions can be an all day affair.  So, folding chairs are great when you need a break,  relax, eat or check out the scenery.

Set a Limit on Your Bid – Decide how much you want to spend on each item and stick to it.  It’s easy to get caught up in a bidding war in the excitement and overbid on an item.

Pay Attention – Be mindful of what you are doing.  Accidently rising your bidding card could cost you.  The auctioneer will see your card and assign the current bid to you.  It is rare that they remove the bid.

Be Prepared to Haul Merchandise Away – Make sure your vehicle is large enough to hold purchases.  You are responsible for transporting all items that you bid on.

Most importantly, have fun.  Mingle, ask questions and just enjoy the day.


How To Decorate A Vintage Sled

Today, I’m sharing tips on decorating a vintage sled.  My vintage sled brings back so many childhood memories.  First, I found this beauty in an antique shop in Lancaster, PA.  There were several sleds in the shop, but I was looking for a special sled.  It had to be a Lightning Guider sled, and I wasn’t going to settle for less.  The owner overheard my conversation with a few of the girls that I was traveling with.  She came out and said I have a Lightning Guider in the back if you would like to see it.  It was exactly what I was looking for, and the owner sold it to me for far less than its value.


decorating a vintage sled


So, when I was growing up we had plenty of snow in the winter.  Not only did we have plenty of snow, we had plenty of snow days out of school.  My father always brought several Lightning Guider sleds for Christmas.  As a result, we jumped for joy when school was canceled.  We knew  we would be sled riding all day and eating King’s Syrup sandwiches.  King Syrup was so thick and delicious.  We loved fixing them ourselves and loved the fact that we didn’t have to bother mom to fix our sandwiches.  I think she was so grateful to have a few minutes to herself that she didn’t care how much bread we grabbed, or how much syrup we put on the bread.  We fixed and ate all that we wanted.

After we ate our syrup sandwiches, we would bundle up and head across the street for hours of fun sled riding down the hill.  We would stay out until we just about froze.  Painfully, I remember my father pulling off our boots and sitting us beside the wood stove so we could  thaw out.  Furthermore, I also remember him using sandpaper to sharpen the blades so the sleds would go faster while we were warming up.  Oh the good ole days. Unfortunately, they stopped manufacturing the Lightning Guider in the 1990’s.  What a shame, because it was the fastest and the best quality sled on the market.  It is now a classic, and I will hold on to it forever.


decorating a vintage sled


Decorating a Vintage Sled:


  • I needed fresh greenery for a few center pieces for my tables.  So, I decided to add it to my vintage sled as well.   Luckily, I have plenty of pines, spruce and other greenery surrounding my property.  If you’re not as lucky, check out your local Christmas tree lot.  Most are more than willing to give you a few bundles for free. Also, the greenery will stay fresh in the cold air through the holiday season.
  • I used pine and spruce cutting on my vintage sled.  However, use whatever you have on hand.  I used smaller pieces on top of longer pieces to give it depth, and tied it together with my garden twist ties. You can use twine to tie it together as well.
  • Use additional twist ties or twine to tie the greenery to the sled.
  • I pulled this bow out of my Christmas decoration boxes.  I simply fluffed the bow out and readjusted it.  It was on the sled from the previous year. I reuse as many items as I can.
  • The purchased the sliver bells beneath the wreath from my local Goodwill.  I love that store.  Find some unused items that will pull the look together in your stash.  If you can’t find anything head to the Dollar Store or Goodwill.
  • A friend found the ice skates at a local Goodwill in Harris, PA and shipped them to me, lol.  She knew that I would use them for Christmas.  I have a second pair that a lady was selling when her daughter decided she didn’t want ice skating lessons anymore.  Check around for used skates if you want to add them to your sled.

I hope hop my decorating a vintage sled post has motivated you to go in search of a sled.   I received so many compliments, and it was definitely a conversation piece. Did you have a Lightning Guider when you were growing up? If not, share a memory from your days of sledding.