Attracting the Tiger Swallowtail Butterfly

Today, I’m sharing gardening tips on how to attract the Tiger Swallowtail Butterfly to your backyard.  Summer is filled with beautiful flowers of every color, pollinators, children playing and butterflies fluttering.  I’ve been adding plants to my backyard that will attract more butterflies.  Also, I purchased butterfly nets for my grandchildren to catch and release them.  It’s great exercise for them, and a great way for them to learn about nature’s pollinators.  So, I’m going to share tips on various butterflies that you may find in your backyard or may want to attract.


tiger swallowtail butterfly


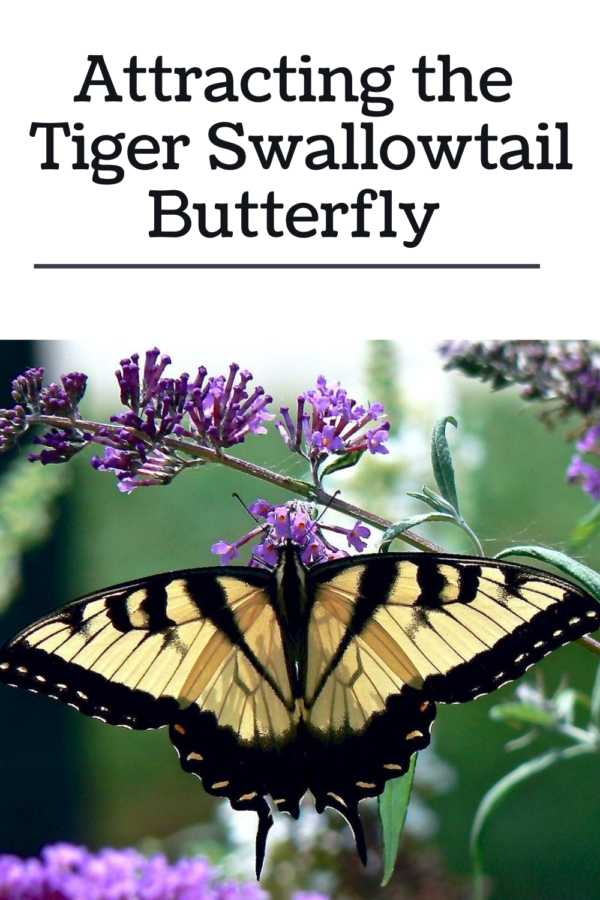
One of my favorite butterflies is the Tiger Swallowtail.  I love their bright yellow and black colors.  I welcome them every year in my backyard.  The Tiger Swallowail is one of the most familar butterflies in the eastern United States.  It’s so popular the following states have adopted them as their state butterfly:


  • Delaware
  • Georgia
  • North Carolina
  • South Carolina
  • Virginia


The tiger swallowtail butterfly certainly won my heart, so I can understand why various states have adopted them.  You can attract them to your backyard from spring to fall with the right plants.  That’s right, you can attract these beauties all summer.  However, you must provide plants that produce nectar, listed below, and woody plants where they lay their eggs if you want to keep them around.


Note:  I am an Amazon Associate.  If you click on any of the products or purchase, I may be compensated a small fee.  However, there will be no additional cost to you.


Host Plants for the Tiger Swallowtail Butterfly:

  • Butterfly Bush
  • Milkweed
  • Lilac
  • Phlox
  • Honeysuckle
  • Joe Pye Weed


Woody Plants for Tiger Swallowtail Butterfly: 

  • Cottonwood
  • Ash
  • Birch
  • Wild cherry
  • Tulip tree
  • Magnolia
  • Willow


Fortunately, I have both ash and wild cherry trees in my backyard.  This galvanized tub sits below the cherry trees.  Now that I know they love salvia, I’ll plant more.


tiger swallowtail butterfly


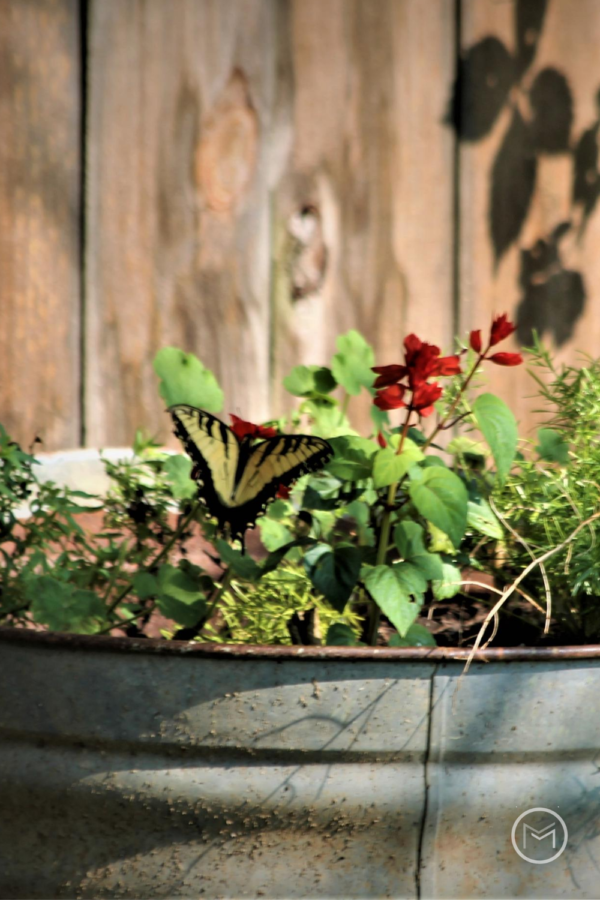
This male tiger swall0wtail butterfly was enjoying my salvia.  He enjoyed the nectar for quite awhile.  I would suggest that you take your camera or phone with you when you head out.  I have missed so many opportunities to capture great nature photos because I left my behind.  The tiger swallowtail has a two week life span.  So, enjoy these beauties while you can.


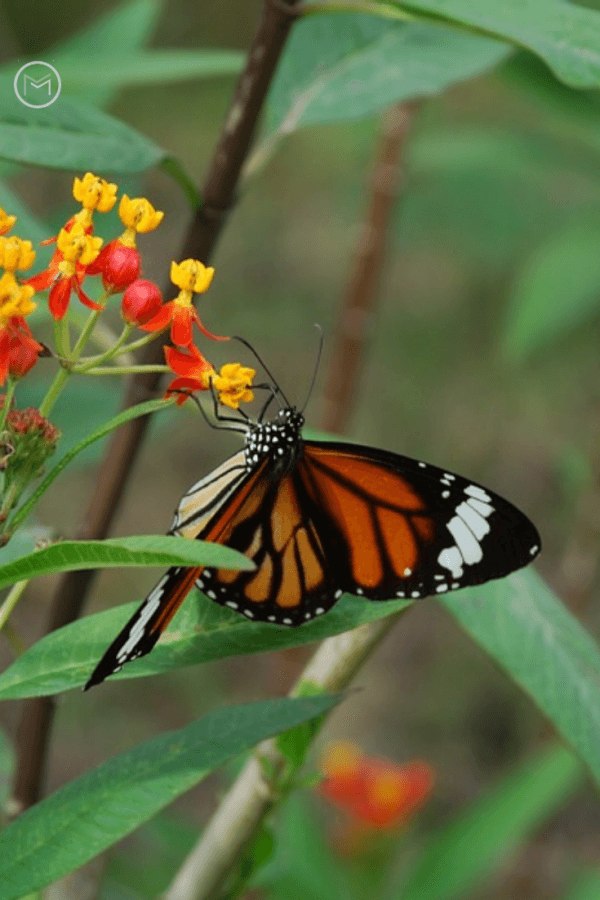
Identifying Traits of the Tiger Swallowtail Butterfly:

  • Yellow to yellowish orange
  • Males have 4 black (tiger) strips on their wings
  • Wings are bordered in black with yellow spots
  • Long black tails have blue patches
  • Females can range from the same yellow color as the male to a dark almost black color


female tiger swallowtail butterfly


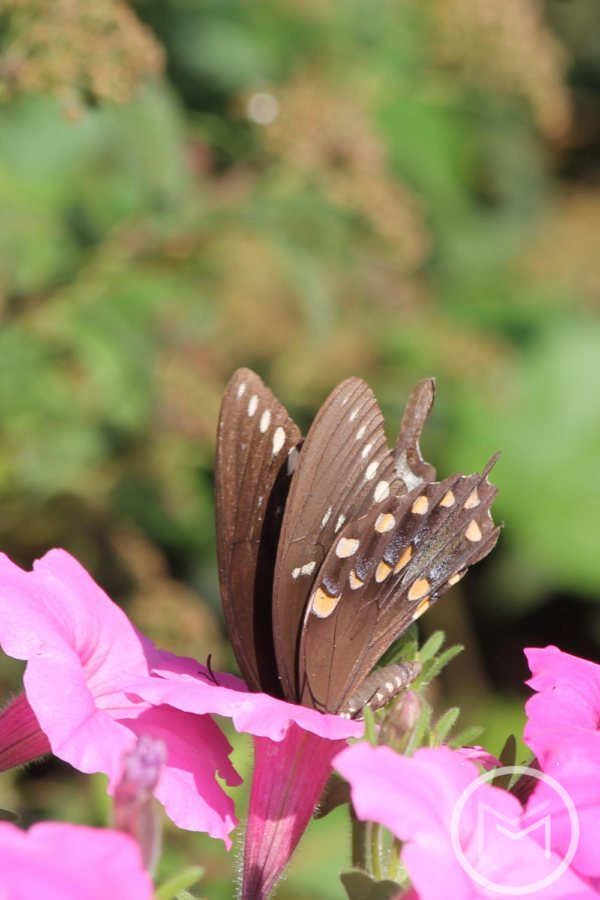
This female tiger swallowtail butterfly, above, loves my petunias.  She visited oftens.  Growing host plants in your backyard will attract the tiger swallowtail butterfly.  Look for plants that are native to your area.  Know your garden zone.  It’s imperative to selecting plants for your backyard.  I garden in zone 6B, so native plants in my state may not be native plants in yours. So, make sure you do your research on what will work for you.  A bonus of using native plants is that they are already acclimated to your area.  And, native plants are easier to grow and require less maintenance.

The eastern tiger swallowtail live in deciduous woods along streams, rivers and swamps.  I have a bird bath with a fountain that runs in my backyard.  I’m not sure, but I believe it is an attraction as well as the trees and flowers.  I love experimenting to see what I attract.  I suggest that you do the same.

Why Do I have Drooping Sunflower Heads

Today, I’m sharing garden tips on drooping sunflower heads.  I grow sunflowers every year for pollination and food for wildlife.  Unfortunately, I always have drooping sunflower heads.  When I first saw the drooping sunflower heads, I was disappointed.  I grow a variety of sunflowers from Russian Mammoth, which I have grown up to 14 feet high to a smaller variety like Lemon Queen.  Regardless, I end up with drooping sunflower heads.


drooping sunflower sunflower heads


Why You Have Drooping Sunflower Heads:


Seeds are Maturing –  Once sunflower heads have completely bloomed and pollinated, the sunflower head will become heavy with seeds.   As a result, the heads will bend over.  One good thing about the bend head is that they will drop seeds.  Hopefully, they will germinate the next growing season.   The American Goldfinch love the seeds. They arrive early morning and feast throughout the day.  Also, you can harvest the sunflower heads and save the seeds for roasting or adding to your birdseed mixture.  I do both.  And, I share with fellow gardeners.


Weren’t Planted Deep Enough Sunflowers need to be planted deeply so they can hold up tall stalks and heavy flower heads.  Once they droop, there isn’t a lot you can do.  If you can tie up the head without damaging it, give a try.  Otherwise, add organic matter to your soil.  The amendment will help the soil absorb water.  Once the plant has been planted, water deeply every 4 – 5 days to encourage deep roots. This will produce a strong, thick stalk with can hold up the heavy heads.  I have had to stalk a few to keep them from falling over.  I always keep metal t-post around.  They are great in supporting the heavy stalks.


Note:  I am an Amazon Associate.  If you click on any of the products or purchase, I may be compensated a small fee.  However, there will be no additional cost to you.


Sunflower Heads are Heavy  –  I plant a combination of giant sunflowers like the Russian Mammoth and the Grey Stripe.  The picture above is the Grey Strip.  My Russian Mammoths and Grey Strip grow around 9 – 11 feet.  The heads are massive, about the size of a dinner plat.  They stand erect once the head appears, but it’s not usual for the head to end up drooping because it’s heavy with seeds.  The head holds approximately 1,000 seeds, and weigh about  2 – 3 pounds.


Lack of Water – If the heads are drooping and the leaves are wilting, your plant probably needs water.   Adding mulch or straw around the stem will help it to hold water.  Water deeply, and make sure they are receiving water when needed.


drooping sunflowers heads


Sadly, I have found that my smaller sunflower plants have drooping heads too.  I love when those little smiling faces are up and shining in the sunlight.  This is a Lemon Queen (above) which droops too.  It is much smaller that the Russian Mammoth and Grey Strip.  It only grows to about 4 or feet and the heads are about the size of a saucer.  This sunflower is one of my favorites.

So, not matter what variety of sunflowers you grow, you will end up with drooping sunflower heads.  It’s all a part of mother nature’s plan

Check out my post on sunflower varieties.  Although, you may end up with drooping heads growing sunflowers is a great activity to do with kids.  They also provide food for wildlife, make great summer bouquets and beautiful wreaths and crafts once dried.  You may also like Gardening for Wildlife.


How to Attract Pollinators to Your Garden

Today, I’m sharing tips gardening tips on how to attract pollinators to your garden.  What are pollinators and why are they needed? New gardeners often have these questions.  First, lets start with what are pollinators.  Pollinators carry pollen to plants so they will product flowers/blooms.

So, it’s important to plant flowers and plants that produce nectar.  Nectar will attract pollinators, which include butterflies, bees, beetles, humming birds, wasps and moths.  These insects and birds are our top pollinators.  However, the wind is also a pollinator.  Flowers, fruits and vegetables are produced by pollinators carrying pollen from one plant to the next.  Without them, there will be no fruit or vegetables to harvest or beautiful flowers to enjoy.  As a result, we must attract pollinators to our gardens.


how to attract pollinators


How to Attract Pollinators: 


Plant Native Plants –  Plant native plants rather than annuals.  Native plants are those that grow naturally in a particular area.  Furthermore, they act has a host for butterflies and they provide support for pollinators.  Native plants require less water, fertilizer, pruning, and they require little or no pesticide.

Provide Shelter – Bumblebees need open ground and bare patches of soil to nest.  Provide an area away from your entryways.  I had Bumblebees make a nest in the shrubbery bed leading to my front door.  That was not a good thing.  Also, dead wood and tree stumps make good nesting areas.  Compost piles, brush and hedges make good nesting areas too.


how to attract pollinators


Use Different Colors in Your Garden –  Make sure your garden has a variety of color and texture.  Red, yellow, lavender, white, pink mix it up. Different sizes and shapes should be considered too.

Provide Water – Pollinators are living creatures, so you must provide water for them to survive.  Install a pond, bird bath, fountain or shallow dish with water.

Have Something Blooming at all Times – When purchasing native plants, consider their bloom times as well as planting zones.  Having a plant blooming from May to September is ideal.


Provide Flowers and Plants in Masses – Plant native plants/shrubs in masses.  Five or more is great.  If your garden area is not large enough to accommodate 5 or more, plant at least 3.

Provides Food – Our backyard birds need food, so look for plants that will help produce food for our feathered friends.  Sunflowers, asters, coneflowers produce seeds and dogwoods, cedar and holly produce berries.  Consider planting a few in your garden.

I hope these tips on how to attract pollinators were beneficial.  Give some thought on what plants would work well in your backyard.  Start with a small area, and increase your plantings yearly.  Finally, saving seed and starting new plants can be a big money saver too.


How to Create Tropical Container Gardens

Today, I’m sharing gardening tips on how to create tropical container gardens.  You can transform your  balcony, patio, garden or backyard into an exotic getaway.  Using simple planters or containers and a variety of tropical plants can create an exciting new look. Dramatic annuals and decorative planters provide rich foliage and astonishing blooms.  Furthermore, outdoor spaces can be transformed with little money and uses the trend toward container gardening.  Lets get started with your transformation.


tropical container gardens


How to Create Tropical Container Gardens:

The Environment

  • When people think of the tropics, their first thoughts are generally sun-kissed beaches with palm trees.  But, that’s not the whole story. Most tropical plants come from the floor of the rainforest.  They get little sun and have high levels of humidity. So, they don’t need as much sun as a cacti. And, tropical plants can live comfortably on balconies or shady backyards.  As a matter of fact, tropical plants prefer indirect sunlight.
  • Because tropical plants need high humidity, they require lots of watering. So, when using decorative planters they need to have good drainage. Choose planters with plenty of drainage holes to ensure the roots of the plants are free from standing water.
  • There is one element tropical plants need less than other plants to help them grow, and that’s phosphorus. Look for fertilizers described as NPK on the label. These types have nitrogen, phosphorus, and potassium as the primary nutrients. Iron and magnesium will help sustain the bright colors of the tropical flowers.  Plant food is recommended as well as adding Epsom salts to the soil at planting.  This will give your plants a magnesium boost.
  • Because the soil in planters and containers is above ground, it’s more exposed to heat and drying winds.  As a result, it loses moisture more readily. This is especially true in a warm weather.  So, tropical containers need to be monitored closely.  It’s imperative that the humidity level around tropical plants not fall too low.Also, the soil should be moist but not soggy.  Overwatering can cause rot and disease if the roots are allowed to stand in water for a long time. The soil in decorative planters should never be allowed to thoroughly dry out.  If so, the sides will shrink. This gap means any water will pour through the container and not reach the roots.  If this happens, push any soil that has shrunk from the edge around the pot to fill in the gaps before watering. One option to reduce evaporation, and maintain the humidity around the plant is to cover the surface with decorative mulch such as orchid bark.

Selecting a Planter or Container

With such a large variety of planters and containers to choose from, where do you start?  Many gardens use the traditional terracotta clay pots.  However, there are advantages and disadvantages for the tropical gardener.  Terracotta pots are heavier than plastic or fiberglass pots and are easily chipped or broken.  Most are more expensive too.

The style of the planter used for tropical container gardens are really a personal choice and the effect you want your tropical garden to project. The size of the containers will be limited by the space available, which will, in turn influence the size and plants  they can accommodate.

Always try and buy brand new planters for tropical plants.  Used pots may have been infected by disease or have chemical residues. If you do want to re-use planters make sure they are washed well.  Wooden containers need to be lined with plastic, so the water and soil don’t cause them to rot.

If you don’t want your planter to become a water logged, make sure there are plenty of drainage holes in the bottom. Without these holes, the organic compost will become saturated with stagnant water and kill off your tropical plants.


Designing with Plants

Wherever you’re putting your tropical plants, you need to make the design look harmonious with the surroundings.  You want to create an atmosphere you’ll be happy with. Think about what outdoor live plant displays you want the eye to focus on.  Also, think about how the other plants flow around that the center plant. Each planter needs to have a balance of plants.  You want the eye to go to the planter’s focal point. This can be accomplished with asymmetrical or symmetrical designs.

The form of the planter is dictated by the growth habit of the plants you put in it. Some plants like to grow tall, others like to hug the ground, and others want to flow over the edge of a planter. Each can be used to create an overall aesthetic for your tropical container gardens. And then there is texture, as the different types of foliage will give a different feel to a container. Broad leaves juxtaposed with linear leaves like grasses break up the eye line and bring a variation to your design. The best designs work on a variety of textures to add variance to the display. By repeat planting of the same plant in containers a rhythm is achieved. When looking at the planters admirers eyes can move from one planter to the other.

And, the final consideration when designing planters is proportion. There needs to be a balance of heights as well as plants. Garden designers have a rule that plants should not be higher than three times the height of the containers. For large and tall planters, medium to large plants with large leaves work well.  And, for short and shallow planters smaller plants with small leaves and excellent coverage.


tropical container garden


Shape, Texture, and Color

To get tropical container gardens or a garden planter to have a real exotic feel, you need to have plenty of tropical foliage. Most foliage will be green; however, you can break up the green with flowering annuals. There are lots of varieties that work well in planters such as, Vinca, Bacopa, Torenia, Verbena, Lantana, and Wax Begonia to name a few.

You can also break up the green foliage by using Caladium cultivars.  They are available in a range of foliage shapes, sizes and colors. You can choose foliage colors that compliment the flowers or contrast. Think also about the texture of the foliage as some tropical plants have shiny leaves they can draw the eye easier to the highlighted plant in the container.


Designing a Planter

The central plant in tropical container gardens should fill the crown of the planter with compact upright growth. The filler plants are more compact and are there to round out the top of the planter. Allow corner plants to grow over the edges, and allow their growth in more than one direction. Plants place at the side of the container can soften the look, and fill out the space between the corners. When thinking about the plants you’ll put in each individual planter, pick those that have similar watering, feeding, and light requirements.  It’s important that they all thrive in the chosen location.


tropical container gardens


Planter Location

We’re dealing with tropical plants, water retention is a prime consideration. Don’t put your tropical plants anywhere in your garden that is windy. The wind increases evaporation water evaporation. If you have a spot that gets anything from four to twelve hours of sun a day, you can use plants that like full sun or part shade. If the location gets only two to four hours of sun a day then you need to select plants that will accept whole or part shade. A lot of tropical plants can survive with varied light and will grow in the shade.  However, this often means they will have reduced flowering.


Fertilizer

Tropical plants are pretty much like any other and like to get regular feeds a slow-release fertilizer in the soil and water with liquid fertilizer. Add a slow-release fertilizer at planting.  Be sure to mix it thoroughly with the soil.


Maintenance

Like all gardens, tropical planters need to be maintained. It’s not just a matter of planting and forgetting. In the early stages to promote leaf growth, the plants will benefit from pinching, that’s the removal of young shoots. As the plant begins to grow, gentle trimming may be needed later in the season. As part of your watering regime, spraying with insecticidal soap or oil will keep pests and disease in check. Oh, and don’t forget the weeding!

12 Best Slicing Tomatoes for Backyard Gardens

Today, I’m sharing gardening tips on the best slicing tomatoes for backyard gardens.  First, when I’m planning my garden, I think about the tomatoes that I want to plant.  Do I want them for my BLTs, to make sauce or to can for my soup and chili later in the winter.

Slicing tomatoes are great for sandwiches, covering burgers, using on hoagies and subs or smeared with may and salt and pepper. 

For the record, I have planted numerous varieties of tomatoes over the years.  Some have become a staple in my garden, and some I have vowed to never plant again.  So, lets not waste any time.  Lets check out the list.


best slicing tomatoes


Best slicing tomatoes:  


Cherokee Purple – First, my favorite tomato is the Cherokee Purple.   It has a smoky flavor and pairs perfectly on my BLT.  Additionally, I love it sliced with a little mayo, salt and pepper.  You will find them in my garden every year.  The Cherokee Purple is similar to a beefsteak and is a heirloom tomato.

Mortgage Lifter The Mortgage Lifter can weigh as much as 2 lbs. with the right conditions.  So, make you have it staked well.  The plants grow heavy enough to lift a flimsy cage out of the ground.  This tomato originated in West Virginia in 1922.

Paul Robeson – Next, the Paul Robeson tomato is a deep purple color that almost looks black.  It is second on my list of favorite heirlooms.  The Paul Robeson was named after the famous opera singer and civil rights activist, Paul Robeson.  I love these tomatoes on BLTs and sliced with mayo.


best slicing tomatoes


Brandywine Red – The Brandywine Red is one of the most popular heirloom garden tomatoes.  It has a wonderful taste.  Additionally, it’s a beefsteak.  So, it’s great for slicing.  One of my favorites.

Brandywine Pink– Next, the Brandywine Pink is an heirloom tomato like its counterpart, the Brandywine Red.  I love the color of this tomato.  This tomato is a rosy-pink and has a little bit of a tang.

Celebrity  The Celebrity tomato produces large fruit.  So, it’s actually considered an all purpose tomato.  They are large and can be used for slicing, canning and sauce.  Additionally, you can also plant these in large container. So, you can grow them on your patio or balcony if they get enough sunlight.  I like the flavor, and use them on my BLTs.


Black Krim –  The Black Krim has a very rich flavor.  It is high on my list of garden tomatoes.  This tomato is a dark burgundy color similar to the Cherokee Purple, Black Krim, and Paul Robeson.  They are a beefsteak, which makes them perfect for sandwiches.  They originated in Crimea.

HillbillyUnfortunately, the Hillbilly tomato is too sweet to me. So, I really don’t like it on my sandwiches.  However, other family members love them.  I share my garden harvest, so I continue to plant them so they can enjoy them.  The Hillbilly is an heirloom, which originated in West Virginia in the 1800s.  It’s a beautiful color, yellow and orange. It displays beautifully on the BBQ table for burgers.  

Delicious – Also, The Delicious tomato holds the record for the largest tomato ever grown, a whooping 7 pounds.  They find a place in my garden every year. The Delicious is an heirloom, and all purpose tomato.  It’s perfect for slicing, making tomato juice and canning.

HomesteadThe Homestead is an all purpose tomato.  It can be used for slicing, canning, and  salads.  This tomato is sweet.

German Johnson – Another West Virginia tomato that is an excellent slicing tomato.  Additionally, the German Johnson is thought to a parent of the Mortgage Lifter and Radiator Charlie tomatoes.  The German Johnson tomato is popular at Farmer’s Markets, and it is an heirloom.  It has an excellent flavor, and the color is more pink than red.

Better Boy – Last, the Better Boy tomato is great for slicing.  It has been around for about 50 years, and produces a lot fruit.  So, stake this plant heavily.  The flavor is excellent, and it will always find a place on my BLT


It’s nice to have a variety of tomatoes on the dinner or BBQ table in the summer.  They make a great conversation piece too.  Your fellow gardeners will want to know about them.

Finally, check out my list of best slicing tomatoes and purchase a few for your backyard garden.  You won’t be disappointed.


Saving Marigold Seeds From Your Backyard Garden

Saving marigold seeds is a fun and frugal way to enrich your garden the following gardening season.  Today, I’m sharing flower garden tips on how to save marigold seeds from your backyard garden plants.  French marigolds find a place in my vegetable garden and backyard containers each year.  I companion plant marigolds with my tomato plants.  But, I also love them in containers on my deck paired with a sweet potato vine.

There are actually 50 varieties of marigolds; however, three are the most popular.  Marigolds have a daisy or carnation flower that are produced  as a single flower or in cluster.  They are natives of Mexico and prefer sunny locations.  They should receive at least 6 to 8 hours of direct sunlight each day.


saving marigold seeds


Here are the three varieties of marigolds:

  • French – Plant throughout the spring and summer.  Dwarf only growing about a foot.
  • American – Plant in the spring.  Tall, usually grows to about 3 feet.
  • Signet  – Plant throughout the spring and summer.   Flat and look like daisies.

The French marigolds are more compact than the American or Signet varieties.  I love them planted among my tall tomato plants.  You can direct sow marigolds in the spring when all signs of frost has past or start them inside.  If you direct sow, preparing the soil by removing rocks and debris and adding compost to the soil will help you grow a healthy and hardy garden full of marigolds.


Here’s a few benefits on why you should plant marigolds in your garden:

  • They’re easy to grow and be can direct sowed in the garden.
  • Repel pests.
  • Companion plant with tomatoes, cucumbers, strawberries, snap beans, squash, onions, and garlic.
  • Marigolds can be dried for flower arrangements.
  • Comes in a variety of colors like white, yellow, orange, or bi-color.
  • Bees, butterflies, and other pollinators love to feast on the nectar in the blooms.


backyard garden marigolds


Saving marigold seeds from you backyard garden:

Pull marigold plants from your garden and containers at the end of the growing season.  I plant yellow and orange marigolds for the most part.  However, I did plant a bi-color this year too.


marigold plants


Pull the dead/dried pods from the plants.  You will harvest the seed from these pods.  If you have flowers or pods that aren’t completely dry, place the plants in a bag and allow them to dry completely.  You can remove the seeds later.


marigold seeds


Remove the top from the dried pods.  A simple twist should remove the top.  Once the top is removed, open the pod to expose the marigold seeds.


saving marigold seeds


Also, the marigold seeds are long with a black tip.  You will want to separate the seeds from the pod and tips.  Once you have the seeds separated, place them into an airtight container, plastic envelope or paper envelope.  Mark the container with 2019 and the type of seed that you saved.  For example, 2019 Yellow French or 2019 Bi-Color Signet.


saving marigold seeds


So, saving marigold seeds from year to year will save you money on flower purchases from the garden center or your local nursery.  You will find that the marigold plants will reward you with plenty of seeds.  You will have enough to share with neighbors, family or friends for years to come.  Plant them in containers, baskets and in your vegetable garden and borders.  You can never have enough marigolds in your wildlife habitat and gardens.

Finally, you may also like Why You Should Winter Sow Seeds.  If you would like a package of free marigold seeds, please contact me at rhonda@mother2motherblog.com.


Tips on Creating a Wild Life Habitat

Now is a good time to start thinking about your backyard and if it has everything needed to create a wild life habitat.  If not, you can start putting together a plan to remedy the problem.  Today, I’m sharing backyard bird tips on creating a wild life habitat.  My goal is to create a habitat for backyard birds.  However, you can work towards creating a habitat for squirrels, deer, ducks and more.

There are four areas that you should focus on when creating your backyard wild life habitat.  Remember, you don’t have to incorporate every item listed below.  Strive to make it beautiful and an area that you enjoy watching too.  Here’s the areas:


creating a wild life habitat


Shelter

  • Wooded Area
  • Rock Pile
  • Evergreen Trees
  • Brush Pile
  • Log Pile
  • Shrubs
  • Ponds

You will need to provide at least two areas of shelter when creating a wild life habitat.  I provide bird houses, a log pile, and plenty of shrubs.  Fortunately, I also have a row of evergreens on my back property line.


Food Sources

  • Seeds from a plant
  • Berries
  • Twigs
  • Fruits
  • Suet
  • Feeders
  • Nuts

You will need to include at least three of these food sources.  I offer feeders, suet, nuts and seeds from sunflower plants and berries from a wild cherry tree.   Furthermore, I have black walnut trees on my property.  The squirrels stay busy gathering walnuts in the fall and stealing sunflower seeds and peanuts from the feeders in the winter.

You can also plant native plants, berry bushes and fruit trees to help create a wild life habitat too.


creating a wild life habitat


Water Sources

  • Bird bath
  • Lake Stream
  • Pond
  • Spring
  • Pool
  • Butterfly Puddle Area
  • Garden Pond
  • Create a Rain Garden


You will need to provide or have one of these sources.  I have several bird baths and a wet weather stream bed.  It usually runs in the spring if we’ve had lots of rain or a heavy snow fall.  I love when it’s running and so do the mallards.


Sustainable Practices

  • Use a Rain Barrel
  • Create a Rain Garden
  • Use Mulch in flower beds
  • Reduce Lawn Area
  • Use Native Plants
  • Compost
  • Eliminate Chemical Fertilizers and Pesticides


I use several of these practices for my backyard garden and flower beds.  Mulch is used in my flower beds and I have two compost bins.  I also eliminated chemicals on my property.  I hope to incorporate a rain barrel in the spring to water my garden and plant more native shrubs.  Check your local Conservation Agency.  Sometimes, they give away free rain barrels.

Place your feeders, bird baths, waters and areas that you can observe and enjoy too.  It’s no fun working to create a beautiful yard, and than not enjoy it.  I love opening my curtains in the morning and enjoying nature throughout the day.  Check out some wild life magazines to get ideas or better yet use your creative eye and instincts.

You may also like:  How to Attract Backyard Birds.


Tips on Landscaping Small Yards

Flower gardening can be therapeutic.   Today, I’m sharing tips on landscaping small yards.  The idea of hiring a professional designer for your garden can be daunting for the typical household.  Especially, if you only have a small front yard.  We assume that gardening talents are best suited for large areas.  Furthermore, if you don’t live in a Beverly Hills mansion you probably don’t need a professional gardener.  It is a common belief that garden designs need spacious areas.  Not true!


landscaping small yards


We are probably influenced by the pictures of parks, castles and celebrities’ homes.  They include garden designs with luxurious water features.  There are live fish, creative hedge cuttings, and magnificent flower displays.  However, there is more to gardening and outdoor scenes than meets the eye.  Small yards could benefit from the know-how and style of a professional too. Here’s a few tips on landscaping small yards:


Eliminate Landscaping Mistakes 

When you work with a small space  you need to be creative.  It’s important to maximize what you have.   It’s precisely what landscaping a small yard is about.  For small yards, landscapers ensure that they maximize the space without compromising on style, diversity, and vegetation. Too many home gardeners are worried about creating an outdoor garden that is inviting and relaxing.  Professionals can help you understand what your soil needs in terms of nutrients.  Furthermore, they understand what plants will thrive in your tiny space.  Adding unnecessary features or plants that won’t survive is not beneficial.  Everything needs to have its place.


landscaping small yards


Learn to Preserve Wildlife 

Your yard may be small, but it can still play a significant role in the conservation of wildlife.  With the help of a professional, you can create a bee-friendly path.  For example, using flowers that naturally attract these active pollinators should be incorporated.  A lavender bush would be the perfect addition to a small garden.  It injects both color and scent.  Additionally, lavender is also ideal for small gardens as it grows in the roughest conditions.  As a result, you don’t have to worry about prepping your soil.  Furthermore, your garden contractor can be a precious ally when it comes to developing eco-friendly maintenance habits.  They will utilize natural repellents rather than pesticides and insecticides.

Maximize Your Money  

Last but not least, your small yard could save you a ton of money.  As a result, you can work on a vegetable bed.  A specialist will advise you on the most suitable vegetables for your soil, your climate, and your lifestyle.  Many veggies come in dwarf sizes, which makes space less of a worry. Ideally, you should opt for vertical growers, such as beans, beets, or cucumbers.  In a small area, you need to rely on crops that grow quickly.  Growing vegetables can soon reduce your need for grocery shopping.  Additionally, you can follow the tips of a professional to create a compost bin that will nourish your vegetable bed while repurposing all your kitchen and yard waste and paper.


Every garden can benefit from the knowledge and expertise of a certified landscaper.  Homeowners who are struggling to bring their small yard to life could create a wildlife paradise with the help of professionals who can ensure a cost  and space saving design.


45 Compost Items for Hot Compost Bins

Today, I’m sharing garden tips on household items you can compost.  If you’re a backyard gardener, you should be composting.  What is compost you ask?  Compost is organic material from kitchen scraps, yard clippings, and water that breaks down to fertilizer.  It’s a great way to recycle your kitchen scraps, yard and garden waste, and weeds.  Furthermore, it saves you money on buying garden center products and chemicals.


items for compost bins


First, there are 3 methods of compostinghot, cold and trench methods.   Today we’re going to discuss items that you can put into your hot compost bin.  If you decide to start a hot compost bin, you must remember to turn it.  Furthermore, a hot compost bin requires that you add items in layers.  This will help heat the pile to approximately 160 – 180 degrees and start the decomposition process.  Add a layer of green and than a layer of brown in your compost bin.

Next, be sure to place your compost bin on level ground and near your garden area.  It will help when turning the pile and placing content back into the bin.  Here is a list of items that you can and can’t use in your hot compost bins:


(Green) Items

  • banana peels
  • melon rinds
  • carrot peelings
  • pizza crust, taco shells etc.
  • apple skins and cores
  • coffee grounds
  • tea grounds
  • peanut and sunflower seed shells
  • weeds
  • fresh grass
  • plant clippings
  • cereal
  • toast
  • crushed egg shells
  • tomato skins
  • squash/zucchini peels
  • stale bread and biscuits
  • grapes
  • blueberries
  • strawberries
  • waffles
  • crackers
  • dead house plants
  • horse manure
  • chicken manure
  • pig manure
    *no dog or cat feces
    *no meats, fats or oils


(Brown) Items

  • leaves
  • shipping boxes
  • cereal boxes
  • egg cartons
  • paper towel rolls
  • toilet paper rolls
  • shredded mail and paper
  • coffee filters
  • wood ash
  • straw
  • paper towels
  • dried grass
  • wood shavings
  • newspaper
  • sawdust
  • corn stalks
  • lint
  • dryer sheets
  • feather dusters


items used in compost bins


Researchers have suggested that home owners have an average of 200 pounds of kitchen scraps/waste per year.  Add that to your yard waste and you can start creating your own organic black gold for your garden.  Instead of sending your scraps to the landfill, recycle it.  The landfills will be happy and so will your garden.

You will need a good compost bin and kitchen compost pail.  Your compost bin can be handmade or you can purchase one.  Be sure that is made of quality and you can turn your pile.

C0mposting requires patience, your pile won’t break down overnight.  Unfortunately, it will take months to produce organic matter for your garden and flower beds.  But, once it breaks down you will be thrilled.  You may also like:  How to Prepare Soil for Next Year’s Garden.


Preventing Blossom End Rot In Your Garden

Today, I’m sharing tips on preventing blossom end rot.   Backyard vegetable gardening can be fun and beneficial to your health.  And, there’s nothing better than a backyard garden home grown tomato.  Gardeners drool just thinking about the first vine ripen tomato for the BLT, salad or other recipe.

Unfortunately, growing a successful backyard vegetable gardens requires love, care and skill.  When we see those black spots on the bottom of our tomatoes, squash, and peppers, it can be devastating.


backyard gardening


Preventing Blossom End Rot:


In order to prevent blossom end rot, a gardener needs to understand the problem.  Blossom end rot is a result of a calcium deficiency.  Fortunately, gardeners can take care of the problem before it occurs.   Here are few tips that will help you avoid a ruined backyard garden crop:

Prepare your soil before you plant  –  Test your soil before you plant your garden.  Doing a soil test will let you know about any deficiencies.  You can purchase a kit or take samples to you local county Extension Office.

Add calcium to your plant – I add eggshells to the bottom of the transplant holes when I plant my tomatoes and peppers.  I save eggshells throughout the yard, wash and dry them thoroughly, and crush them to use in the garden.  I also use the eggshells to provide calcium for my backyard birds during the spring when they’re laying eggs too.

You can also add Epsom Salt to the tomato and pepper hole before adding your plants too.  Once you add the Epsom Salt, cover it with a layer of salt before adding your plants.  You don’t want to burn the roots of your plants.

Make sure you don’t over or under water plantsUsing a mulch will help maintain an even water level.  I use straw to mulch my plants.  Dried grass or leaves can also be used.

Stake plants early – When I plant my tomatoes and peppers, I place the cage around them or stake them immediately.  This avoids damaging the roots of the plants later.

Avoid damaging your plant’s roots – Avoid using a hoe around your plants once they are planted.  Simply removing weeds by hand will suffice.

Work eggshells into the soil around the plants – Work eggshells into the soil around your plant after you transplant it to add a top dressing.


Remember, prevention is the best medicine for a backyard garden.  However, checking for early signs on your fruit is key too.  If you spot the disease early follow these steps:

Remove the affected vegetables from the plant – Clip the diseased fruit from the plant with a pair of sharp scissors or clippers.

Make a calcium spray  – Spray your plants with an organic calcium spray.  Mix 2 tablespoons of Epsom Salt to a gallon of water.  Use a spray bottle to spray your plants.


I hope you grow a bumper crop of tomatoes this season.  You may also like:  Favorite Heirloom Tomatoes and Characteristics