Today, I’m sharing thrifty tips on how to remove contact paper. I purchased an old dry sink to turn into a bar. Unfortunately, the drawers were lined with contact paper. The contact paper was beautiful, but leaving it wasn’t an option for my project. Neither was painting over it. I wanted to keep the integrity of the drawers. If you have struggled with how to remove contact paper from drawers, cabinets, trays or some other object I understand. Keep reading, I have the solution for removing contact paper.
Before indoor plumbing was available, dry sinks were used. They actually mirror a cabinet with a recessed top. People placed a basin and pitcher of water on them. They placed dry sinks in kitchens, bedrooms, and on porches.
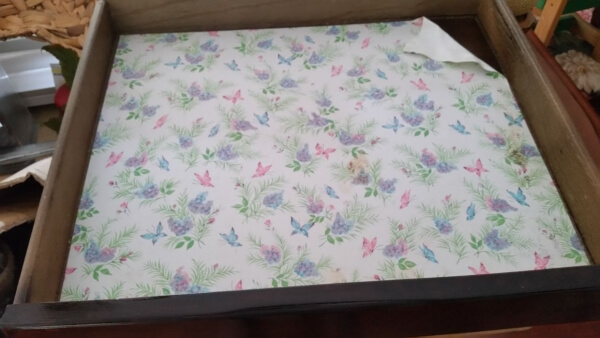
As I stated previously, I wanted to remove the contact paper from the drink sink drawers. Unfortunately, I tried to lift the paper from the drawer unsuccessfully. After spending 5 or 10 minutes trying to remove the paper I gave up. At times, my patience is not one of my virtue. Furthermore, I try to use as few chemicals as possible in and around my home. Using a utility knife proved difficult without damaging the interior of the drawers. As I was contemplating my next move I thought of a post that I had read months and months ago on removing contact paper.
The weapon for removing contact paper is a blow dryer. Blow dryers are a dime a dozen in my home. I raised a daughter. During the teenage years, blower dryers were in every bathroom and closet. Oh the memories. So, I knew I had one somewhere in my house.
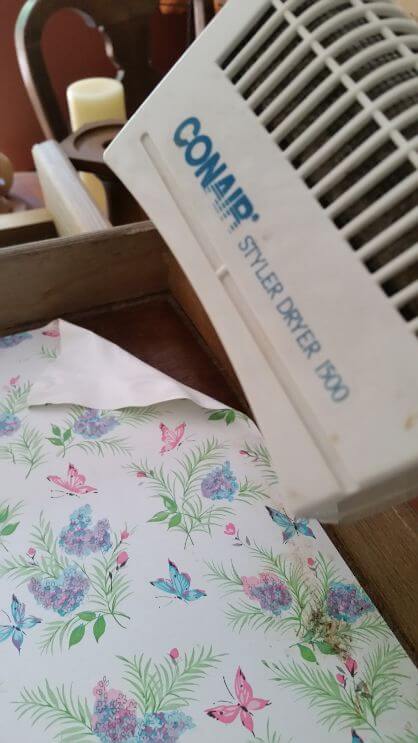
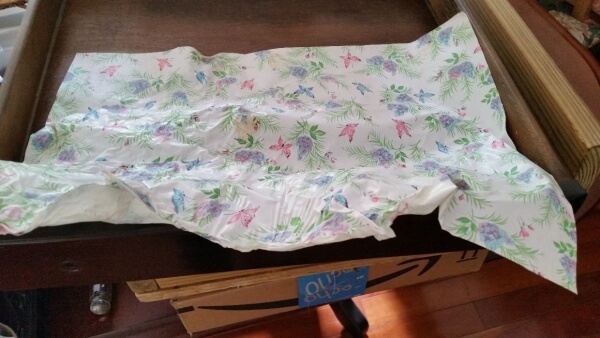
I plugged in the blow dryer and went to work. Simply waving the dryer back and forth across the paper I was able to lift the contact paper slowly. As a matter of fact, the contact paper lifted with ease. As a result, the process went smoothly and quickly. However, if you are looking to preserve the paper, using a blow dryer is not the answer.
Stay tuned for the end result of my dry sink makeover. You may also like: Thrift Store Teak Bowls


