How to Plan a Kitchen Garden

Today, I’m sharing gardening advice on how to plan a kitchen garden. Fall and winter is the perfect time to start planing and sowing seeds indoors or outdoors.  As a matter of fact, the best time to start planning is when there’s snow on the ground and it’s cold outside.  A well planned garden will lead to a successful garden.

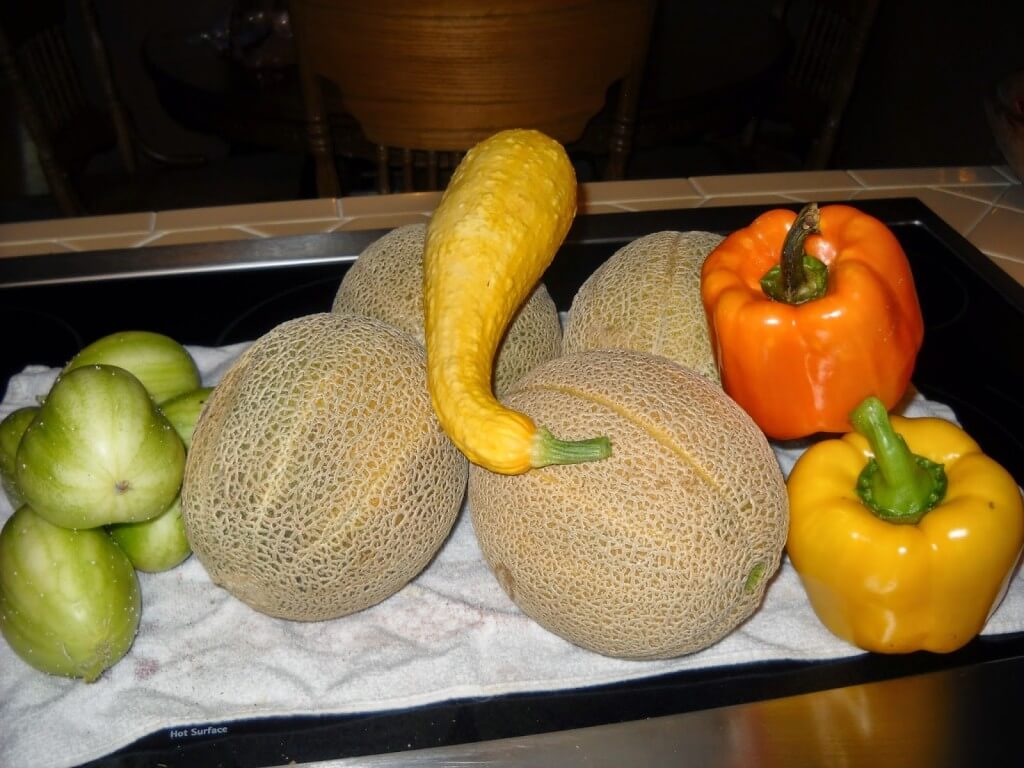
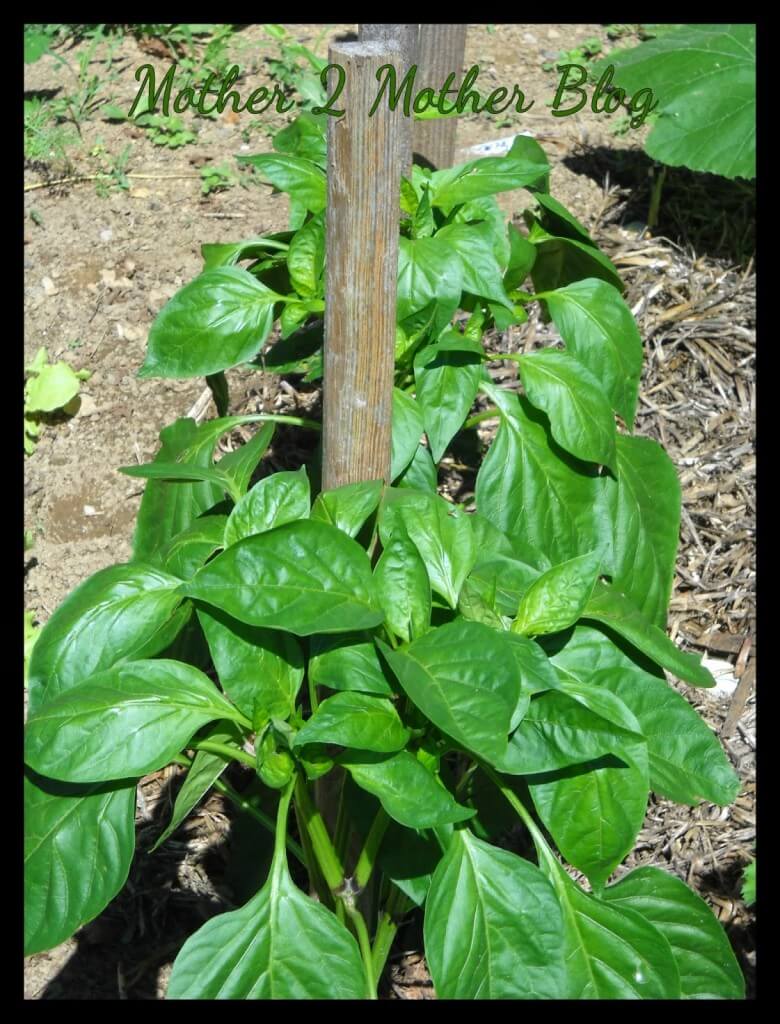
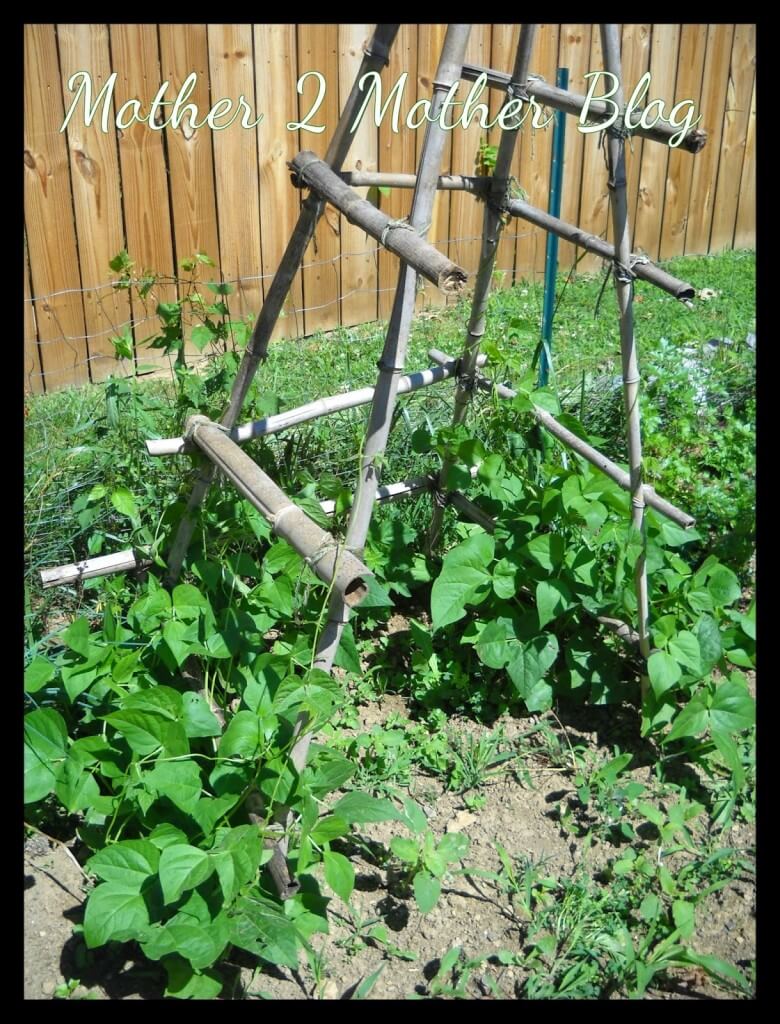
If you’re striving to get healthier, there’s nothing better than fresh vegetables. I have been gardening for years and now considered a master gardener.  My focus has been on tomatoes, peppers, garlic, green beans, watermelons, and herbs.  However, I do add in sunflowers and marigolds.  Planting a kitchen garden helps save on the grocery bill, and you will be able to to freeze and preserve your harvest.

planning a kitchen garden


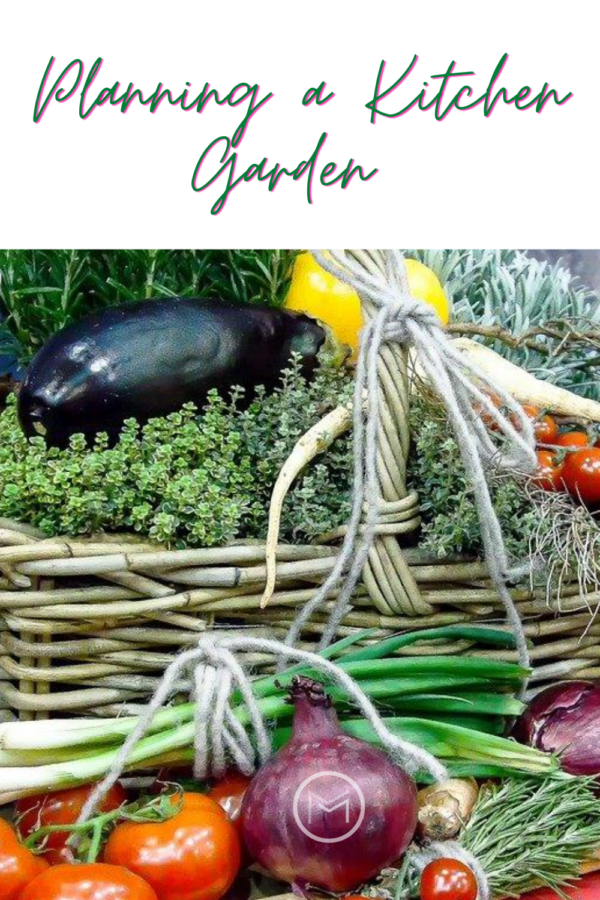
Here’s a few steps on how to plan a kitchen garden:


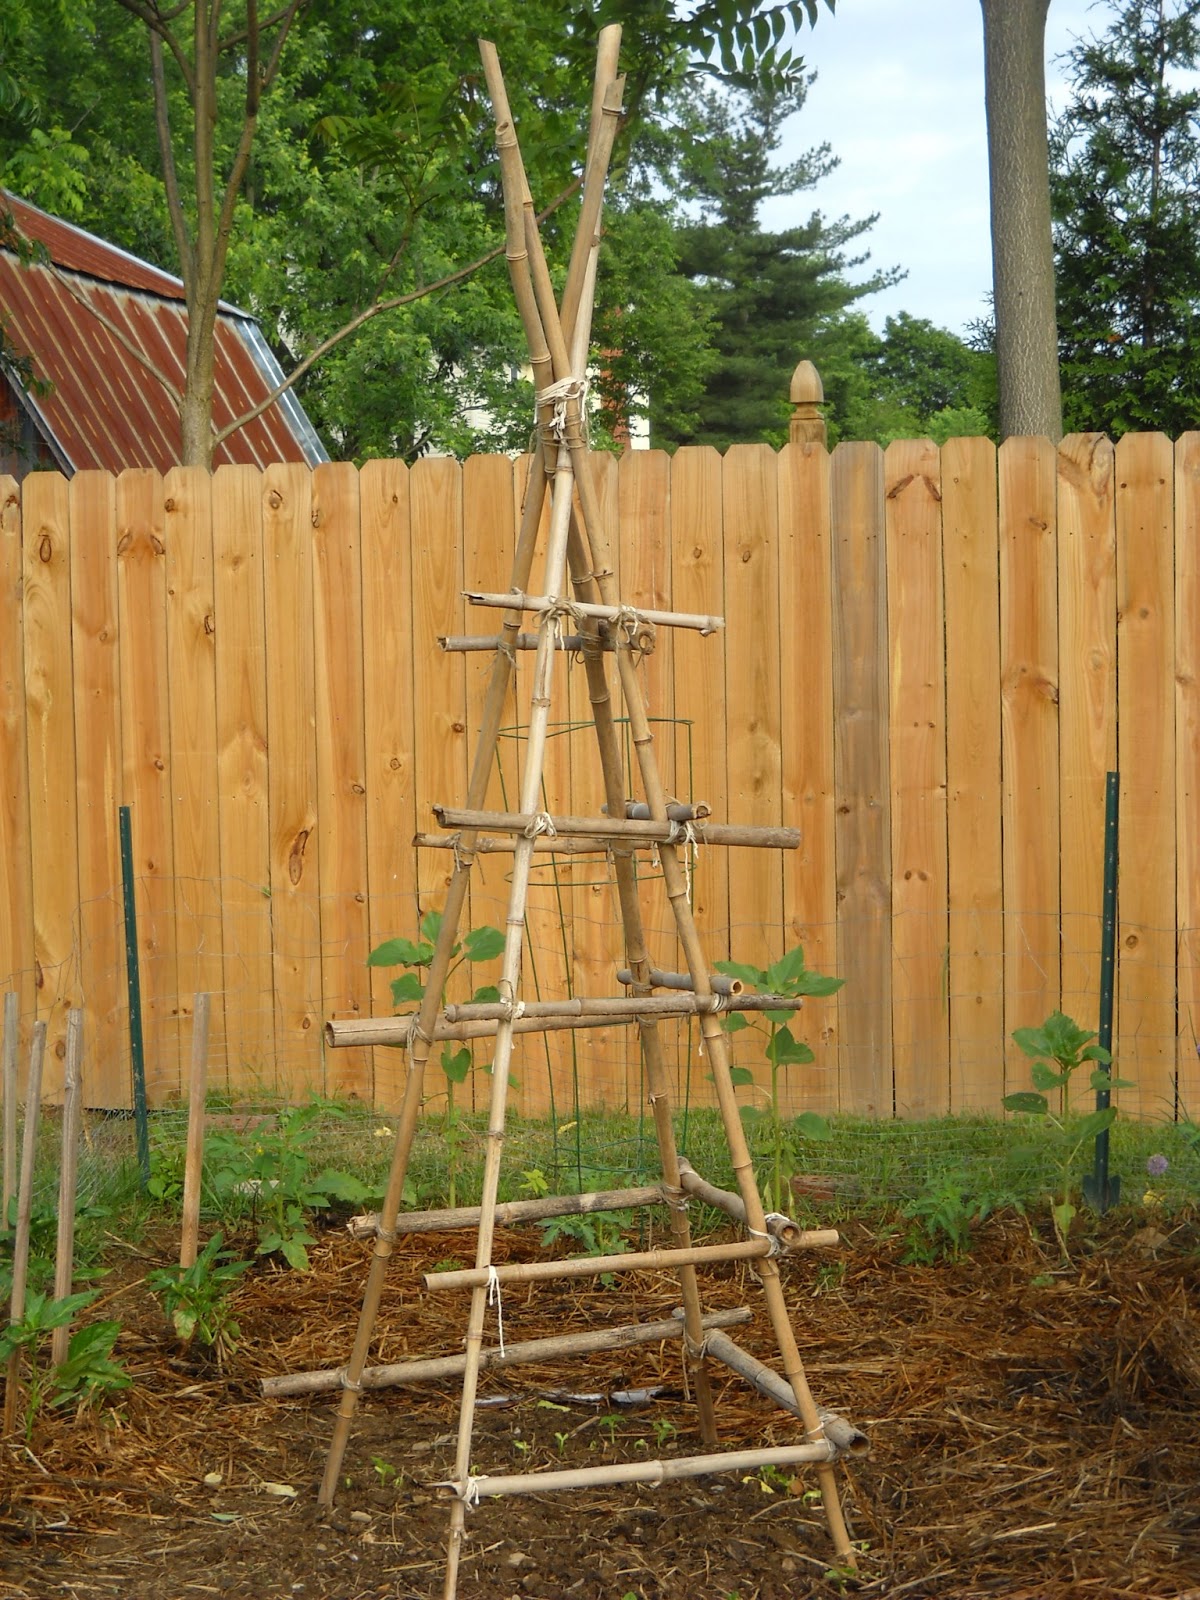
  • Plan your garden layout – Will you be using raised beds, row gardening, or containers? Will you plant a small, medium or large garden? The size of your garden will determine how many plants you will need to purchase or need to start from seed.  You also need to start thinking about the containers you will be using or pricing material for your raised beds if this is the route you will be taking.   How many bags of gardening soil will you need for your pots and raised beds.
  • Decide what you want to plant – Do you want to do herbs only or a variety of vegetables? Will you be planting Hybrid or Heirloom seeds/vegetables?  How many will you plant.  My suggestion is that you plant what you like and will use during the summer and winter months.  Will you be canning your harvest or sharing it with food banks or neighbors and friends.
  • Order seeds – Browse catalogs and on-line websites to determine what you need to purchase or join seed swaps. You can order seed catalogues and browse them on the cold, snowy days.  You will be able to purchase seeds that you won’t find locally.  Also, the Dollar Store and Dollar Tree both have a selection of seeds for bargain prices. I’ve purchased from both, and had success with them germinating.  I also purchase from Gurney, Johnny’s, Parks Seed, Territorial and Baker Creek seed companies.
  • Prepare for indoor sowing – If you indoor sow, set up a schedule for sowing your seeds.  Make sure your lights are working properly, you have sufficient containers, potting mix etc.
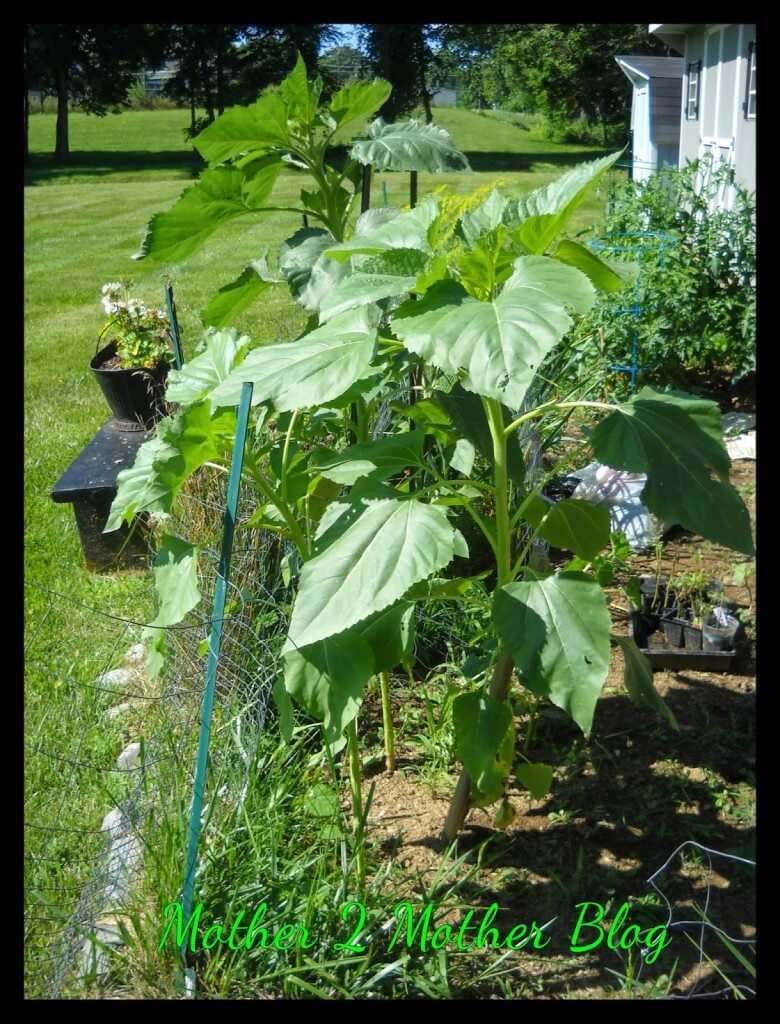
  • Start winter sowing  – You can start summer flowers and vegetables in containers and place them outdoors to get a head start on the growing season. I start my sunflowers using the winter sowing method. I have also been successful winter sowing vegetables.  I’ve been so successful, that I no longer use the indoor sowing method.  But, you decide what works with you.   If you decide to winter sow, check your plastic containers supply.  Make sure you a variety of sizes and shapes.  I love using Gatorade bottles, 2 liter soda bottles, quart or gallon milk jugs work great too.
  • Check your inventory – make sure you have everything in working order and you have sufficient supplies for your garden.


planning a vegetable garden

Think ahead.  For example, I’ve decided to increase my basil plants from 2 to 6.  I love using fresh basil in my tomato sauce.  But, I also like to share it with my sister and daugher.  I also freeze fresh basil for use in dishes throughout the winter.  Placing dried herbs in my Christmas gift baskets was a big hit.  People love homemade gifts.  Especially, if they’re yummy.

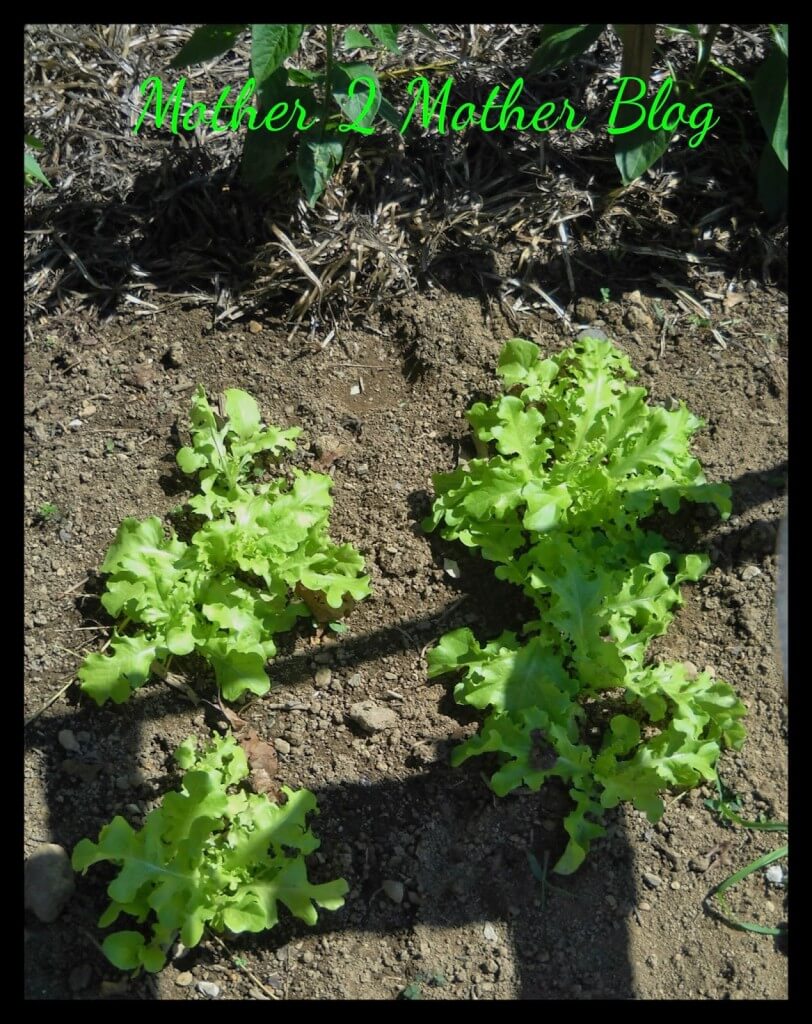
I normally put in 10 -15 tomato plants, 3 – 4 belle and hot peppers, 2 squash, 2 zucchini,  6 cucumbers, 24-30 cloves of garlic and a few rows of green beans.  Other years, I may take out or put in something different.  I will be cutting back on the vegetables that I have an adequate supply stored.  I will be replacing some of the plants with cauliflower, cantaloupe, water melons, leaf lettuce, collard greens, and a variety of herbs.

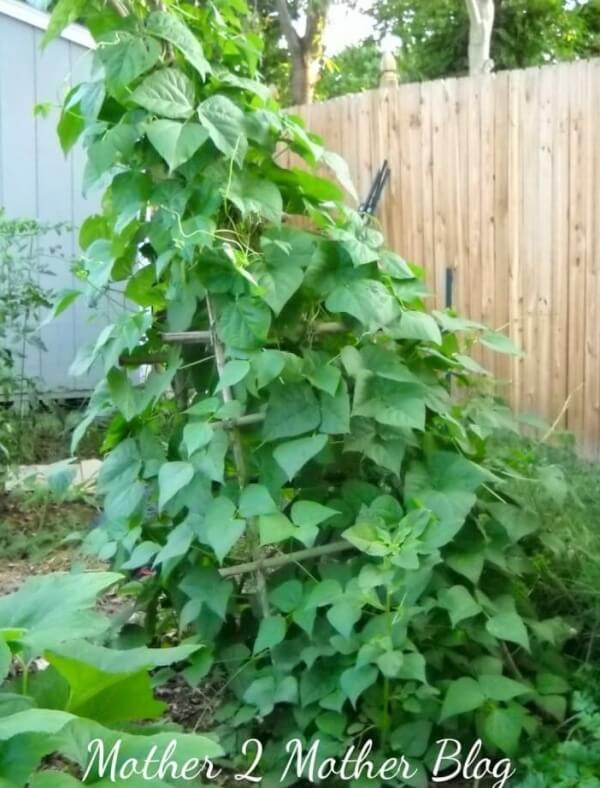
So, I use the direct sowing method for my green beans, cucumbers and lettuce.  However, I use the winter sowing for my sunflowers tomatoes, herbs, squash, zucchini, peppers, cauliflower, fruits and flowers.

I will be doing a series of posts on sowing seeds, gardening in containers, row garden preparation, preserving the harvest and everything in between on the blog.  Stay tuned.

I hope that you found my steps on how to plan a kitchen garden helpful.  If you have a question while planning, starting your seed, implementing your garden or just feel overwhelmed, send an email to The Mail Box using rhonda@mother2motherblog.com, and I will respond to your questions.  Lets get healthy together!

 If you like this post you may also like:How To Dry Kitchen Garden Herbs;                                                                   How to Harden Off Garden Seedlings;  Planting and Harvesting Garlic

Growing Cantaloupe in Your Kitchen Garden

My second favorite item on my backyard vegetable gardening list is home grown cantaloupes. My garden is winding down and I’m feeling a little sad.  So, I sooth myself when I’m closing the garden for the year by planning my garden for the next season.  I spend months deciding what I want to plant and that usually cheers me up. Yesterday, I pulled my last squash and cantaloupes. I have tons of tomatoes and green beans left.  So, I will preserve and freeze those next week-end.  I see tons of tomato sauce and salsa on the horizon.  Tomato sauce and salsa are great ways to use in the garlic, basil and oregano in the garden too.  


how to grow cantaloupes


These are Hale’s Best Cantaloupes below, which is an Heirloom seed.  Let me tell you they are delicious.  I’ll be having fresh cantaloupes for the next few days, and I can’t wait.  I started the cantaloupe plants under grow lights in mid-March and moved them into my garden in June.  If you’re wondering how to grow cantaloupes in your kitchen garden, I have the answer:

  • You can direct sow the seeds in the garden when the soil warms up.  Follow the instructions on the seed packet.
  • You can winter sow your seeds in bottle green houses.
  • Start your seed under grow lights.
  • Purchase plants from a nursery or garden.


I mulched around the plants with straw and left about 6 feet of space for them to spread. I harvested eight cantaloupe from 2 plants. Not bad for a pack of $1.00 seeds.  I’ll be saving seed from these melons to plant next year and the year after that.  Hales Best Cantaloupes are the sweetest and most delicious on the market.


I’m a frugal gardener.  I put my garden in for pennies by purchasing Heirloom seeds and than saving the seeds from year to year.  Purchasing plants from garden centers can get expensive.  Especially,  if your goal is to garden on a budget.  I choose what I want to splurge on, and groceries is not one of those things. If you plan to save seed from your garden, make sure you don’t purchase or use Hybrid seeds or plants.  You want the same characteristics of the parent plant versus inbreeding/cross breeding.  So, heirlooms are the way to go.


I planted Belle peppers, which performed nicely too.  After picking them off the plants, I usually chop and freeze my peppers if I don’t have a dish that requires them planned.  I like to get them into freezer bags as soon as I pick them off the vines. The sooner you lock in the freshness the better. Did you know that orange, red, and yellow peppers are green before they turn into these beautiful colors?  I love stuffing the colorful peppers.  They make a nice statement on the table.

So, if you want these colorful peppers, you have patience.  It takes a while for them to transition from green to the red, yellow or orange stage. Additionally, there are also male and female peppers.  Finally, check out how to determine and use male and female peppers here.


My Kitchen Garden Is Thriving


I spent some time in  my kitchen garden checking on my babies and pulling weeds.  The only negative that find in gardening is weeds.  In the above picture are Sugar Baby watermelons, cantaloupe, and a yellow watermelon which I have never grown before.


I cut down on my peppers this year.  I have an orange, red and green belle.  I lost my white belle. I have a Tabasco and a jalapeno planted as well.  


My Blue Lake pole beans are starting to climb.  Hopefully I will have a good crop.  I did remove the weeds and laid a path of newspaper and leaves to help keep the weeds down.


My sunflowers are getting huge.  I started these in bottles during the winter.  You can see my post on Greenhouse Bottles here.


I have a small bed of lettuce, which is looking good.  I have a shady spot, that receives some sun, so I’m going to start another bed this week. Homegrown lettuce taste so much better than store brought.  


My cucumbers are starting to climb.  A few have latched onto my make-shift trellis, but it looks like I will have to train one.  I used left over rabbit fencing for my trellis staked with 2 fence posts. Last year I used a bamboo trellis, it didn’t work very well.  I have Marketmore, Lemon, Boston Pickling and Salt and Peppers cukes in this area.  


This is garlic, which I will be digging up in another 1 – 2 weeks.  This is the first season that I was able to grow it successfully.  The first season I planted in the spring, and it did not do well.  I planted this crop last fall and it has done great.  The leaves are starting to dead back, so it’s getting close to  harvest time.  I can’t wait to use fresh garlic in my recipes this summer and into the winter.  


Stay tuned for a future post on the other veggies in the garden.  I’ll be starting my seeds for my fall crops, cauliflower, kale, spinach, and collards.  What’s growing in your garden?  Leave a comment and I’ll stop by to check out what’s thriving.  

5 Benefits of Growing Chives

Today, I’m sharing gardening tips on the benefits of growing chives.  The flowers on my backyard garden chives are in full bloom, and they are beautiful.  I recommend that you plant a chive or two in your backyard vegetable garden.  The purple blooms are so pretty, and they enhance the flavor of many dishes.  Maintenance is easy, simply remove the spent flowers and cut the plant to back to 2 – 3 inches in the summer.

This should give your plant a good start for another harvest later in the season.  Furthermore,  removing the flowers is an important step.  Otherwise, the seeds will blow and the plants will take over your garden.  You will end up with volunteers, plants which have seeded and germinated from blown or dropped seeds.


garden chives


So, there are several benefits to growing chives beside them.  First, they are very easy to grow.  Once they are planted, they require regular watering and a little fertilizer.  My soil is so rich, I usually by-pass this part of the maintenance, but I do water them.  Here a few other reasons to grow and eat chives:


garden chives


Benefits of Growing Chives:


1.  They’re a magnet for beautiful butterflies.  You kids will love chasing the butterflies across the yard.  Pick up a few butterfly nets and identification books so the kids can research.  The can get some exercise chasing the butterflies and connect with nature.  Here’s another benefit, you can keep them occupied while you put up your feet and sip a cup of coffee.

2.  Also, they are delicious on baked potatoes, omelets and other dishes that call for onions.  I love them in salads as well.

3.  They are a great source of antioxidants and can help fight cancers in the breast, colon, prostate, ovaries and lungs.  This study is from the University of Maryland Medical Center.

4.  Additionally, they are a great source of Vitamin K.  Which, is good for bone strength.

5.  Furthermore, they help lower blood pressure and cholesterol according to the University Hospital of Columbia and Cornell.

6. Although I have not eaten them, the flowers on chives are edible.  For some reason, I just can’t get past the thought of flowers in my food.   On a cake yes, in my salad no.  However, they can be used to decorate a dish or vegetable tray.

7. Did you know that chives can be used fresh or frozen.  You can chop and seal them in an airtight container and keep them in the refrigerator or freezer.

8.  Chives return year after year.


Last, they are low maintenance, have health benefits, and enhance the flavor of your dishes.  Head to your local nursery and pick up a few plants.  Better yet, grow a few plants from seed.

How To Build A Green Bean Trellis

Last year I used a teepee trellis for my pole beans and it worked well.  So, I want to share with you How to Build a Green Bean Trellis so you have a cool trellis for your beans too.   Planting both bush and pole beans were on my backyard vegetable gardening list of things to do.  Well, time is not always on  my side.  So, I decided to go another route.

home gardening, vegetable gardens, bean trellis 


I had made a trellis for my green beans in an earlier growing season.  But, I decided to modify it to maximize my green bean harvest rather than plant bush beans.  My goal was to add bars to the trellis teepee so I could plant beans completely around it.  However, one side was left open. I wanted my grandchildren to have a seat inside of the teepee while I’m gardening.  So, an adorable miniature chair will be placed inside the green bean trellis for them to sit. 


Making a bean teepee can be simple and inexpensive.  I used the bamboo poles from last season and cuttings from my bamboo squash trellis.  I found left over string from other projects under my sink and used it to tie the smaller bars around the legs of the teepee.  String is great for the tendrils of the plant to latch onto. Lowes and Home Depot sell bamboo poles that won’t break the bank if you can’t found a resource locally. The Dollar Store sells string.  My brother has a yard full of bamboo, so I luck out. 


 DIY garden trellis


Here’s what you will need to build a green bean trellis:

  • The poles should be 6 – 8 feet tall and you will need 4 pieces. 
  • I used (4) 7 foot poles and 5 bars across. 
  • 1 5 ft. fence T-post
  • Be sure to secure the poles tightly at the top and get them deep into ground before you tie on the horizontal poles.


Here’s the steps for building a green bean trellis:

1.  Tie your 4 poles at the top securely.
2.  Your poles should look like A-frames.
3.  Place the frames in the ground deep enough to hold them securely.
4.  Tie the smaller pieces (20) across the bars to form 3 sides.  Leave an opening to place a chair for the kids or spacing for growing lettuce through the summer, which requires shade.  The leaves of the beans will provide the shade.
5.  Plant your choice of pole beans completely around the bottom of the teepee and watch them climb.
6.  Place a 5 foot garden t-post on the rear of the teepee.  Re-enforce the teepee by tying string from the top of the teepee to the T-Post. This will give the teepee strength when it is covered with vines and green beans.  


Last, I use Blue Lake pole beans.  I believe they are more flavorful and less stringy than other beans.  However, planting Jade Bush Beans along with the pole beans will prove beneficial.  Also, companion plant green beans with tomatoes and cucumbers.  Place your green bean teepee close to your tomatoes and cucumbers.  Here’s a picture of the teepee covered with green beans.  It was so heavy with beans it started to lean forward.  We pulled it back and re-enforced it with a fence t-post stake in the back of the teepee.


Green bean trellis


It is now straight and loaded with enough of green beans to freeze several quarts for winter.  Perfect for soup and green beans and corn.


Green Bean Teepees


You may also like:  Using Eggshells In The Garden 


Hardening Off Garden Seedlings

Today, I’m sharing gardening advice on hardening off garden seedlings.  Backyard vegetable gardening is a great way to get outside and get moving.  Growing your own fruits and vegetables is so rewarding.

I love heirloom tomatoes.  Their flavor is unmatched, and I can’t purchase them at my local grocery store or farmer’s market.  So, I purchase seeds, germinate them and transplant them into my garden.  Some of my favorite heirloom tomatoes are Paul Robeson, Cherokee Purple.  Brandywine,  and Hillbilly.  I can’t wait to pluck the first ripe tomato from the vine for a BLT sandwich.   My mother loves them sliced with mayo and salt and pepper.  Either, they’re delicious.


garden seedlings

First, I make a list of vegetables that I want to grow in my summer garden.  It usually includes oregano, dill, cilantro and basil.  I love growing fresh herbs.  All of these ingredients will be used in my sauce or salsa.  So, I attempted to  germinated all of the above along with my heirloom tomatoes.  I’m proud to say all of my tomato seeds germinated.    I usually lose a few or some of my seeds fail to germinate.  Fortunately, this year I had greater success.  I allowed then to stay in the starter pots longer.  I think this step allowed the roots to get stronger before I re-potted them.

So, I save pots from the garden center when I purchase my flowers and reuse them when I start my backyard garden vegetable plants the next season.  My squash, watermelon, peppers and zucchini germinated as well.  I’m looking forward to a great growing season.


When you start seedling inside, they must be harden off.  What is hardening  off seedling you ask?  Hardening off is exposing your seedling that have been started under grow lights to the elements.

My hardening off process starts in mid-late April.  I try to plant everything by Mother’s Day or Memorial Day at the latest.   I use trays to house my seedlings under the grow lights.  It’s easier to move them outside and back in with the trays.


Hardening Off Garden Seedlings:


  • Set your seedlings outside for a few hours in the shade for several days.  I do this for about a week adding an hour to each day.  Be sure to bring them back inside.  They aren’t strong enough to withstand the night air yet.
  • The next move is to gradually expose them to the sun and longer hours outside.  I do this for about 3 days.
  • Last, I leave them out overnight. Once they get used to the temperatures I transplant , I leave them out until I’m ready to plant them in the garden.


hardening off garden seedlings


About 20 plants are ready for the garden.  My estimate is about $5.00 in cost for seeds.  By purchasing heirloom seeds, I’m able to save the seeds from one year to the next to start new plants.  I would never be able to purchase 20 plants from a nursery or garden center for $5.00.  The starter mix and potting soil cost me around $10.00.  Still, it’s cheaper than purchasing from a nursery.


Tilling compost into the garden is next on my backyard vegetable gardening list.  Hopefully, I will have my plants in the garden by Mother’s Day, Memorial Day at the latest.   I hope my hardening off garden seedling tips has been beneficial.  Try starting a few inside and gradually increase your seedlings the founding year.  Slow is best when learning a new technique.  You may also like seeds versus seedlings.


Using Eggshells In The Garden

Stop, don’t throw those eggshells away.  Today, I’m sharing tips on using eggshells in the garden.  Yes, eggshells are beneficial in the backyard garden.  So, add eggshells to your list of backyard vegetable gardening items needed this growing season. Your tomato and pepper plants will thank you.  So, grab a container and start saving them throughout the year.  Ask your family members or neighbors to save them for you too.  Especially, if you don’t consume a large quantity of eggs.  Explain that using eggshells in the garden will benefit the tomatoes they will receive in exchange.  This will give them an incentive to save the shells for you.  


using eggshells in the garden


Before using the eggshells in the garden take these steps:

  • Rinse the eggshells thoroughly
  • Dry the eggshells on low temperature in the oven or microwave them.  (You want the shells to be brittle)


using eggshells in the garden


Once are cool, crush them and put them in a plastic bag or container. You can store them in your refrigerator if you don’t have counter space.  A rolling pin or wooden spoon is a good way to crush the eggshells.  Turn this task over to the kids.

So, when garden season arrives place a generous dose of the crushed eggshells in the hole when you plant your tomatoes.  They are a great source of calcium for the plants.  Furthermore, I also sprinkle the shells around the plant once I get the tomatoes in the ground.  I actually do this throughout the growing season.  The eggshells will help give your tomatoes a calcium boost, and help fight off blossom end rot.


how to use eggshells in the garden


Secondly, I mix the crushed eggshells in with my birdseed.  Bluebirds, Baltimore Orioles, Scarlet Tanagers and Barn Swallows love eggshells too.  You can spread the eggshells on a log or on the ground if you don’t have a platform feeder.  We hope that you enjoyed our tips on using eggshells in the garden, and you will start recycling your eggshells.  You may also like 20 Flowers to Use in a Wildflower Garden.

Selecting Belle Peppers for Home Cooking

Today, I’m sharing gardening tips on selecting belle peppers.  If you want to experience the true flavor of belle peppers, you must have knowledge of how to select belle peppers for home cooking.

So, each year I plant a combination of belle, cayenne, and jalapeno in my backyard vegetable garden.  At the end of the season, I freeze the belle peppers, dry the cayenne, and pickle the jalapenos.

I love planting a variety of belle peppers.  Furthermore, I try to grow a variety of colors that include green, yellow, red and orange.  I even tried a white variety, but was unsuccessful.  All belle peppers start out green.  With patience, they will turn yellow, red and orange depending on what you have planted.
selecting belle peppers
Belle peppers are great in casseroles, omelets, sauces, chili and other dishes.  I also use my belle peppers in veggie trays,  pasta dishes, jambalaya and anything else I can cook up. The red, yellow and orange peppers make an impact in dishes.  They’re really pretty in omelets and vegetable trays too.  They give dishes a little color as well as flavor.  Presentation is everything when it comes to eating.


Selecting Belle Peppers


Know the difference between male and female belle peppers?  Using the right peppers will enhance the flavor of your dishes.  Males should be used in certain dishes and females in others.  That is why selecting male and female peppers is important.


  • Lesson 1 – Male peppers have 3 bumps on the bottom.


selecting belle peppers


  • Lesson 2 – Male peppers are usually a little taller and have less seeds than the female.  Most shoppers go for the biggest peppers; however, they don’t consider the dishes they will be preparing at home.  Male peppers  are better for cooking foods like chili, tomato sauce and other dishes that require heat.


selecting belle peppers


  • Lesson 3 – Female peppers have 4 bumps on the bottom. Females are more round and have a sweeter taste than the males.  I use these for vegetable trays, fresh salads and cold pasta dishes. However, they have more seeds than the male.


Finally, the next time you’re at the grocery store, use your new knowledge on selecting belle peppers.  Simply flip those babies over and check out the bumps.  Most importantly, make your selection according to the dish you’re preparing.


Reasons To Garden In Your Backyard

Today, I’m sharing gardening tips on reasons to garden in your backyard. I started gardening years ago, and it quickly became a passion.  Planting a vegetable garden was something that I always wanted to do, but never made the time.  I love fresh vegetables, especially tomatoes.  The taste and price of tomatoes in my local grocery store sent me into high gear.  They were expensive, hard, and tasted like cardboard.  


reasons to garden


My grandfather had a garden when I was growing up. Picking weeds out of his garden was an expectation when I was visiting.  I also remember all of his children being supplied with fresh vegetables during the summer, and the week-ends spent canning the harvest.  Fortunately, I decided to grow my own vegetables, and I’m so glad I did.  I look forward to each growing season now.  


Reasons to Garden: 


  1. It’s so relaxing. And I’ve learned to appreciate the open country and the quiet that it brings. 
  2. My land wasn’t being using to its full potential.  
  3. Store brought fruits and vegetables are expensive.
  4. I love working with my hands, and making things grow. 
  5. Saving money on my grocery bill is a plus. 
  6. Provides an opportunity to connect with other gardeners.  Connecting with others who grow fresh vegetables and flowers provides an opportunity to learn different techniques and make new friendships.  
  7. My vegetables are better than the stores.  I love walking by the produce in the grocery store smiling because I know mine is better.   
  8. I’ve learned to grow my vegetables from seed.
  9. I love having fresh vegetables, homemade salsa and sauce during the winter.   
  10. I love sharing my harvest with family and friends and the local food banks.
  11. Great exercise without leaving home.  


reasons to garden


Yes, gardening is time consuming, but it’s so rewarding.  It’s a great way to get out of the house and get moving.  I sleep so much better after a day of working in my yard. Furthermore, involve your children.  They can get a sense of how food grows and will make better choices in food selection.  They will also learn how to sustain themselves, and save on the grocery bill.

You don’t need acres of land to garden.  If you lack land, put a few planters on your deck or patio.  You can grow tomatoes, lettuce, carrots, radishes and the list goes on in containers.  Do you currently garden?  If so, do you use containers, raised beds or row garden?  Also, check out my other backyard vegetable gardening tips before you leave.


Vegetable Garden Closed


I’ll be spending the day closing out the garden.  Frost it hit Friday night, so it’s done for the season.  This is my second year gardening, and I’m really enjoying it.  There’s nothing better than picking fresh vegetables in your back yard and preserving them for future use.  This year I planted a variety of tomatoes, squash, zucchini, peppers, green beans and Sugar Baby watermelons.  

I love sliced tomatoes with a little mayo.  I freeze the green beans to use with green beans and corn for holiday meals and family gatherings.  This year I froze a variety of peppers and tried my hand at pickling them.  I have to say the pickled peppers are the bomb.  I sent a few jars home with my daughter and in-laws and they received great reviews.  They are so good the cleaning lady at my office chased me down as I was leaving with two empty jars asking me to refill them, lol. 
I eat them on nachos, in chili and anything else that I can find to put them on.   I made fresh salsa and canned it.  It’s a lot of work, but so worth it.  I love being able to pull out a jar of garden fresh salsa during the winter and it tasting like I just worked down to the garden and picked the ingredients.  I’ll be munching while reading my kindle when the cold weather sets in.  What I’ve enjoyed most is having my grandson involved in watering and harvesting the veggies. 

Here’s a picture of one of my prized tomatoes weighing in at 1.136 ounces.  It was huge and delicious.  I managed to harvest at least 6 colanders of green beans putting away 5 – 6 quarts in the freezer.  Probably the same amount for peppers.  In addition to the frozen peppers, I’ve canned (pictured below) 30 – 40 pints/quarts of pickled peppers, most given away.  
 
I’m working on 12 pints of salsa this week-end.  I’ll be putting them in baskets along with salsa chips and homemade cookies and brownies for Christmas gifts.   Do you have a garden?  How productive was it?  If not, are you interested in planting one and exchanging gardening techniques and seeds next season?  Please leave me  a comment and let me know your thoughts.  You can find my gardening blog here