7 Foods Backyard Birds Love During the Winter

Today, I’m sharing a list of winter foods for backyard birds.  If you love helping mother nature during the winter months, we have a few tips on what our feathered friends will devour.  These winter food for backyard birds have been tested in my own backyard.  As a result, I can assure you that your feathered friends will not leave a morsel.  I have been bird watching for about 5 years now.  And, I’ve tried a variety of foods for my backyard birds.


winer food for backyard birds


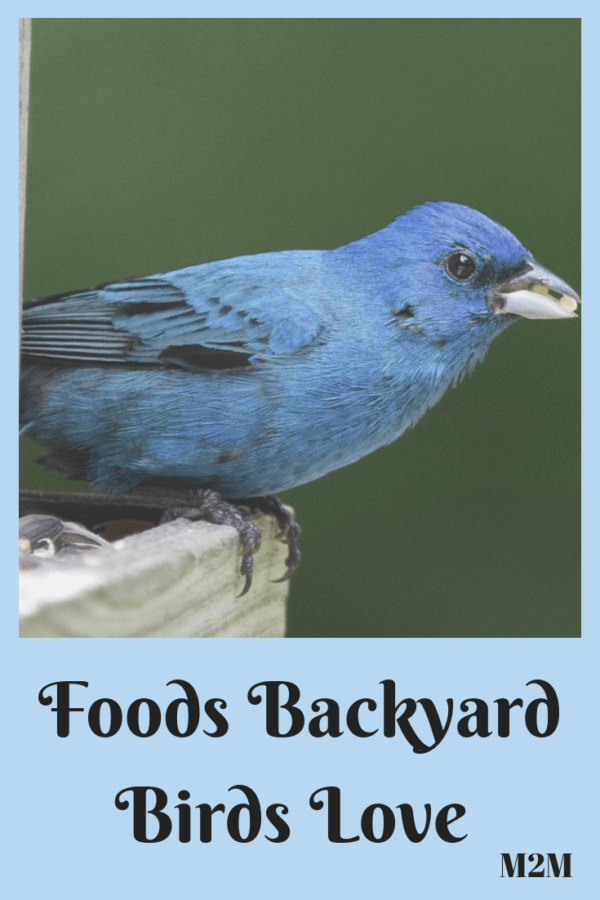
Here’s a list of winter food for backyard birds:


Cracked Corn – First, cracked corn is a favorite at my feeders.  It is simply corn kernels that have been dried and cracked into smaller pieces.  Cracked corn provides protein and fiber for backyard birds.  However, there’s one drawback, black birds love cracked corn too and will devour your feeders if they find it.


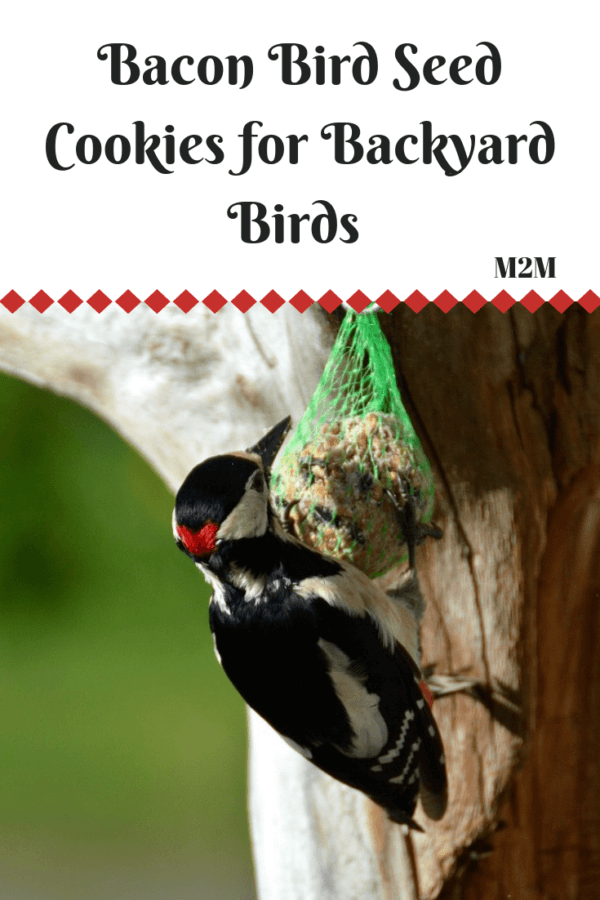
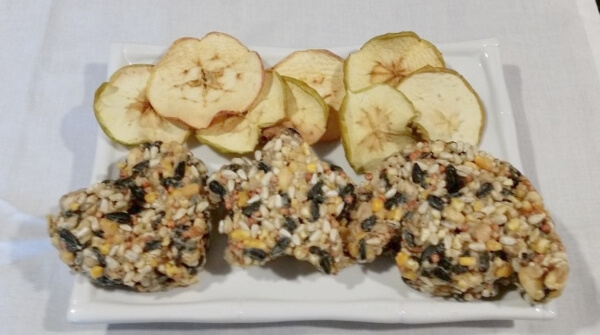
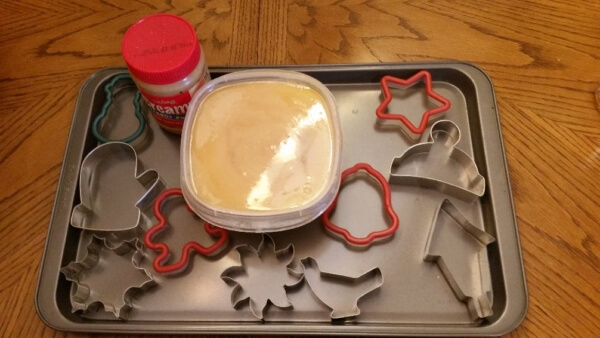
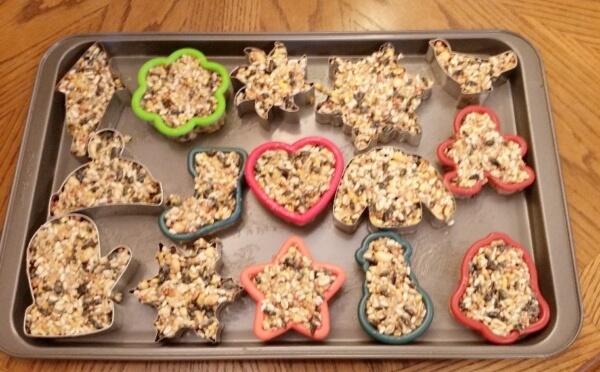
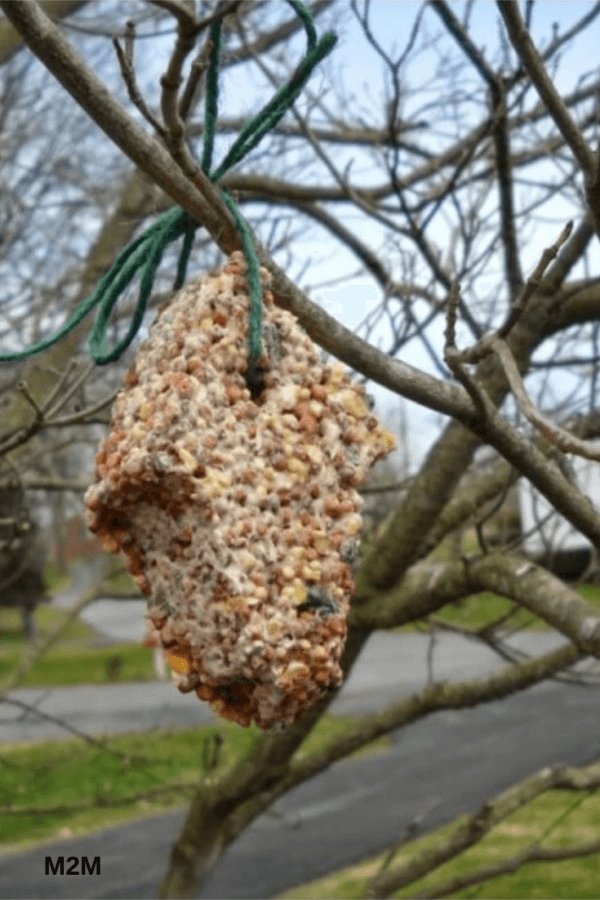
Suet Cookies – So, you can purchase suet from your local butcher shop or grocery store.  Suet is fat from beef or pork.  Over the course of the year, I started saving my bacon grease to make bacon birdseed cookies.  It’s something I learned from my grandmother, and it’s one of the foods backyard birds love.  If you don’t want to use bacon grease, Crisco will do.

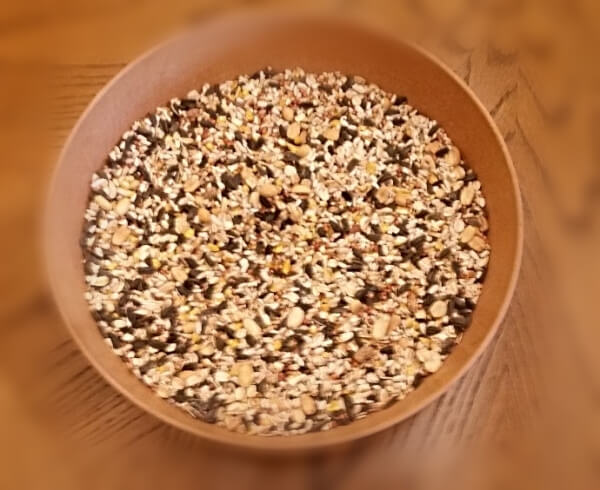
When I want to make suet cakes or cookies for the birds, I just add the bacon grease to a mix of no waste bird seed, black oil sunflower seeds, cracked corn, dried fruit and shelled chopped peanuts.   Additionally, here’s the recipe for my bacon bird seed cookies.  I guarantee that your backyard birds are going to love them!


Fruit – Next, birds love fruit.  Either fresh or dried fruit will do.  For the most part I use apples, whatever I can get cheaply.  I simply chop up one or two and add them to my birdseed mixture.  You can also add raisin or cranberries to the mixture.  I look these items at the Dollar Tree.  The also have dried apples and bananas.  Be sure to add one or two of my birdseed peanut butter pinecones to your feeding station too.


Apples

  • Cedar Waxwings
  • Evening Grosbeaks
  • Pine Grosbeaks
  • Blue Jays
  • Common Flickers
  • Chickadees
  • Red-headed Woodpeckers
  • Robins
  • Bobwhites
  • Mockingbirds
  • House finches


Oranges

  • Mockingbirds
  • Orioles
  • Red-Bellied Woodpeckers
  • Rose-Breasted Grosbeaks
  • Gray Catbirds
  • Scarlet tanagers


Grapes

  • Evening Grosbeaks
  • Robins
  • Brown Thrashers
  • Blue Jays
  • Cedar Waxwings
  • Magpies
  • Cardinals
  • Western Tanagers
  • Mockingbirds
  • Orioles
  • Towhees
  • House Finches
  • Steller’s Jays
  • Bluebirds
  • Woodpeckers


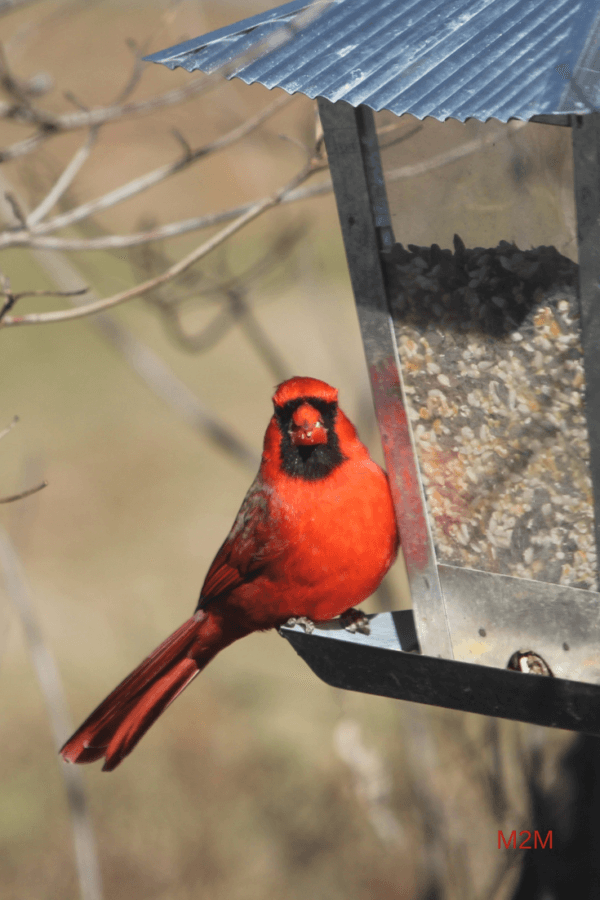
Black Oil Sunflower Seeds –  Additionally, Black Oil Sunflower seeds are a favorite at my feeders.  As a result, they go fast.  Cardinals, Blue Jays,  Woodpeckers, Titmouse and more love these seeds.  Make sure you have a large supply on hand.  As a matter of fact, I purchase black oil sunflower seeds in 20 pound bags.  I usually use at least 2 bags of this seed during the winter.


winer food for backyard birds


Safflower  Seeds
–  Furthermore, I enjoy making my own birdseed mix.   So, I mix mostly Safflower Seeds and Black Oil Sunflower Seeds in my feeders along with cracked corn.  Fortunately, squirrels don’t like the Safflower Seed.  Apparently, they have a bitter taste.  However, they will eat the entire feeder of Black Oil Sunflower Seeds.  Although, Safflower is more expensive than the Black Oil Sunflowers Seeds, not having the squirrels devour my feeders makes it worth it to me.


foods backyard birds love


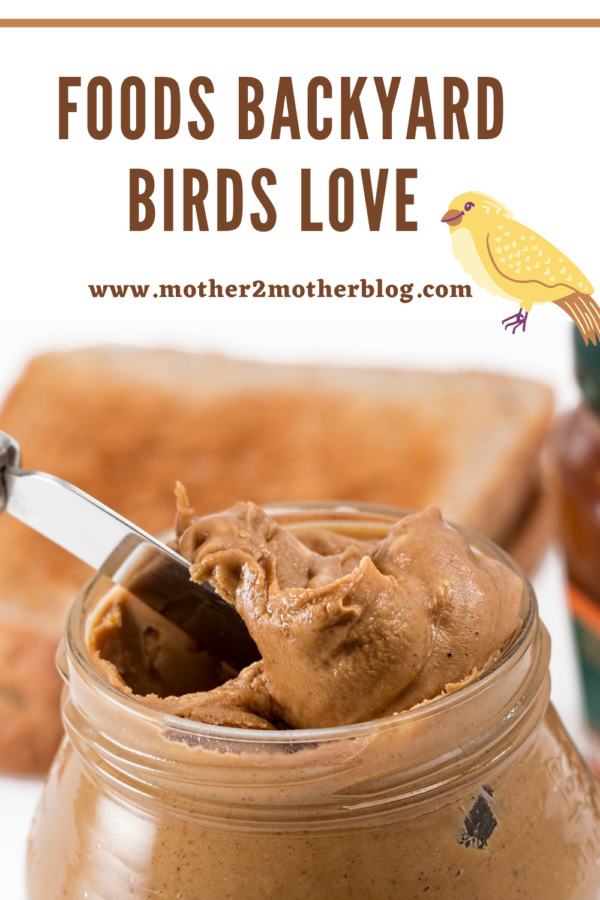
Peanut Butter – Yes, birds love peanut butter.  So, it is at the top of the list of foods backyard birds love.  Furthermore, it is a great source of fat for birds in the winter.  As a result, I spread on it pine cones along with seeds, dried fruit and chopped peanuts.  So, check out my peanut butter pine cones here.


foods backyard birds love


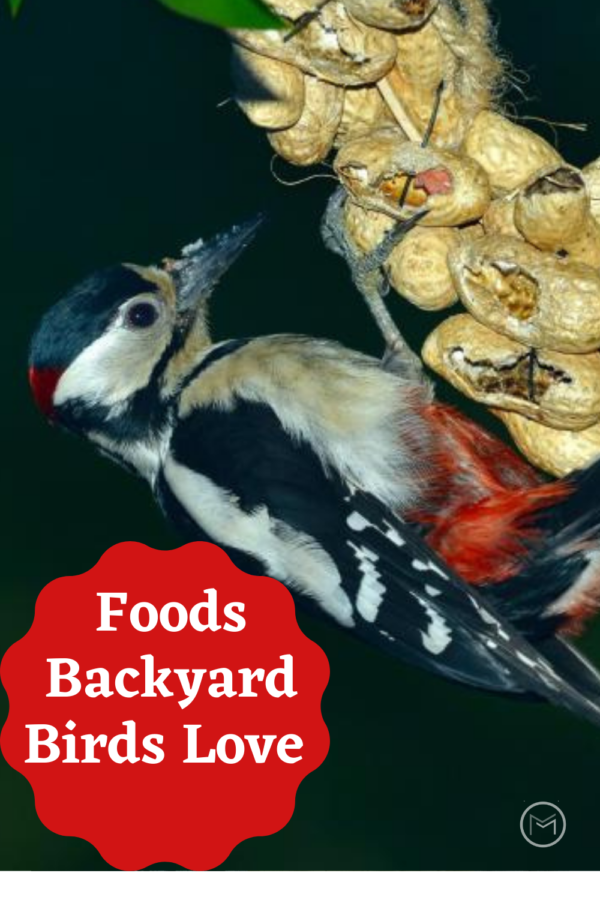
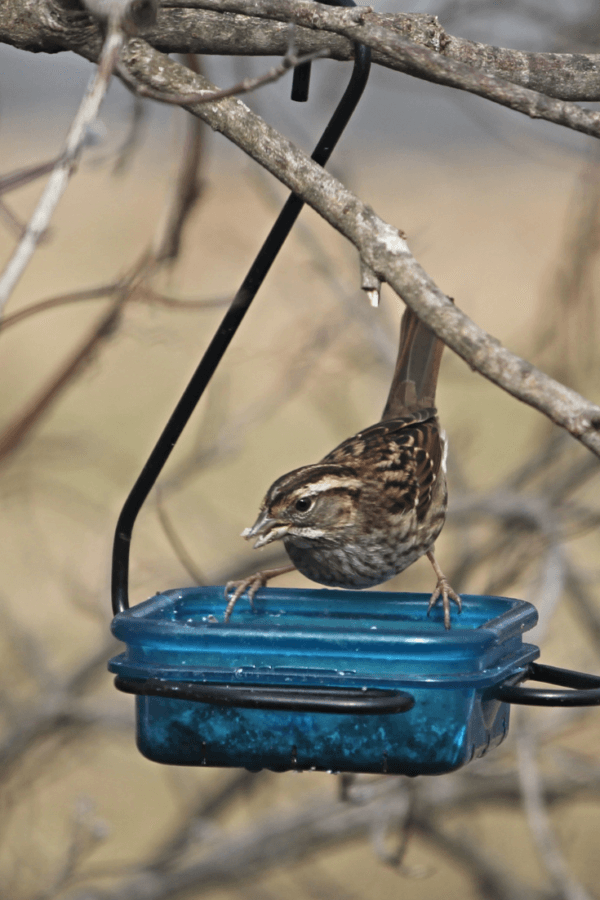
Peanuts –  Next, to keep cost down, I purchase unsalted peanuts in bulk for my Blue Jays.  I place them in my homemade peanut holder above.  In addition to the Blue Jays, Dark-Eyed Juncos and Woodpeckers love the peanuts too.  Unfortunately, I have to limit how much I set out for my backyard birds. The Blue Jays are greedy and will take every peanut in about hour.   I have 4 that come to the feeding station regularly.  Actually, I believe they cache a lot of them.  They hide them for days that I don’t set peanuts out or when other food supplies are low.  Update:  There are about 8 Blue Jays that come to the feeder now.

Finally, we hope that you will pick a few items from our list of foods that backyard birds love and help keep them full and warm this winter.  Also, share the activity with the kids.  It teaches them the importance of helping nature.  Fortunately, my grandchildren love seeing the birds at the feeder too.  It’s a great family activity.  They love making the birdseed cookies.  It’s a great rainy or snowy day activity.


Bacon Bird Seed Cookies for Your Backyard Birds

Today, I’m going to share my recipe for bird seed cookies.  Winter is fast approaching, and backyard birds will be on the hunt for food. Feeding backyard birds during the winter has become a ritual for me.  Watching birds and providing for them has become a part of my gardening experience.  Especially, in winter months.  I’m also teaching my grandchildren to help mother nature provide for her flock as well. 


bird seed cookies


For the past few years, I have made bird seed cookies and peanut butter pine cones as treats.  This year, I decided to add suet bird seed cookies from bacon grease to the meal plan.  The birds love them, and it’s a great way to use the bacon fat from breakfast.  I only use the suet bird seed cookies cakes during the winter months.  If the temperature is too warm, they will melt and create a mess or become rancid.


Cookies for birds


So, if you want to make these tasty treats for your backyard birds, you will need the following ingredients:

Bird Seed Mixture – I have a combination of Black Oil Sunflower Seeds, Safflower Seeds, Cracked Corn and peanut chips in this batch  However, you can use whatever mixture of seeds that you have on hand.

Bacon Grease – I save the bacon grease from breakfast for my suet, and I have also used grease from ground beef.  I strain the oil to ensure there are no particles of bacon or ground beef going into the can when I save it.  I simply want the fat from the bacon and ground beef.  You can also use fat from your local butcher store.

Flour –  1 cup of flour or more.  You can also use oats or grits.

Peanut Butter –   About 2 tablespoons of crunchy or creamy peanut butter to the mixture.  I use the store brand.

Variety of Cookie Cutters – Winter, Christmas or other shapes that you would like to use will be fine.

Drinking Straws – You will want to stick a straw through the mixture once you have the cookie cutters filled.  You will want to make a hole in the cookie so you can run a string or ribbon through it so you can hang it.  Or, you can just place the cookies in a suet cage or dish.


bird seed cookies

Suet Cookies for Birds


  1. Add the bacon/ground beef grease to the birdseed mixture, as well as the peanut butter and flour.
  2. Mix it until you get a consistency you like.  You can add more of any of the ingredients.
  3. Once you have a consistency you like, place the mixture in the cookies cutters.  My granddaughter had a great time filling the various cookies cutters.  Her favorite was the heart.
  4. Be sure to pack the cookie cutters full.  You want the bird seed cookies to be thick.


bird seed suet cookies


5. Once you have the cookie cutters filled, place the cookie cutters in your freezer or refrigerator for a few hours. You want the cookies to harden.
6.  You can remove the cookie cutters once the cookies are frozen or had enough,
7.  Use a spatula to remove the cookies from the cookie sheet.  Place the cookies in gallon freezer bags or a freezer container.  You can place them in your refrigerator.  They store perfectly.


Note:  I am an Amazon Associate.  If you click or purchase one of the products, I may be compensated a small fee.  However, there is no additional cost to you.


bird seed cookies


The birds will love them, I guarantee it.  Especially,  on cold, icy and or snowy days.  Oh, who am I kidding.  They devour them on warmer days too.  However, I recommend that you only use these bacon bird seed cookies in the colder months.  They will melt if it’s too warm.  The above picture is a Downy Woodpecker.  He visits everyday for breakfast or  lunch and hangs around for quite awhile.


Backyard Birdseed Cookies


The picture above is a House Wren.  They’re tiny birds that visit daily, usually in a flock.  They hang around for awhile feasting on the bacon cookies or head to the feeder.

This is a great project to make with your kids or grandkids.  Additionally, check out the cookie cutters at the dollar store, yard sales and flea markets for fun shapes to use.


How to Start a Sweet Potato Vine From a Cuttings

Today I’m sharing flower garden tips on how to start a sweet potato vine from cuttingsI love sweet potato vines in my summer container gardens. They really fill the containers, and gives it elegance with the overflow of the vine. Unfortunately, sweet potato vines can be a little pricey when purchased from a garden center or nursery.  Starting your own will cut down on your garden expenses.  So, I decided to grow sweet potato vines from cuttings using the plant that I purchased back in the spring. Furthermore, starting your own will allow you to use the vine in several containers.


We’re expecting frost in my area within the next week.  Rather than let the frost kill my sweet potato vine like I usually do, I’m finally going to produce additional plants by rooting potato vines from cuttings.


How to Start a Sweet Potato Vine:

  • First, you will need a container filled with water.  This is the container that you will use to place your cutting in.  I used 2 pint size mason jars.  However, you can use what you have on hand.  Make sure the stem of your cuttings will fit into the container and there’s room for the roots to spread.
  • Additionally, you will need a clean pair of sharp scissors or garden shears to cut the vine.
  • Newspaper to work on.


how to start a sweet potato vine


  • Next, cut off the top of the vine. 
  • Afterwards, I cut the remainder of the vine into pieces.  Make sure the pieces that you cut are long enough for you to remove at least 3 – 4 of the bottom leaves.  Most importantly, you want to make sure the stem is long enough to submerge in water to form roots.


how to start a sweet potato vine


  • Don’t leave your stem too long.  I cut this piece about 2 inches from the bottom leaves.  You want to make your cut just below the leave node, where you removed a leaf.  (The arrow is pointing to my cut mark.)  Remember, your goal is to transfer the rooted stem to a pot of soil once it roots.
  • Don’t forget to change your water regularly.  You want to make sure your plant is healthy enough to transfer out in the spring.


Last, a sweet potato vine looks gorgeous in containers with petunias or other low growers.  I like to pair mine with marigolds.  Get creative.  I’m sure you will find the perfect combination.  You may also like:  7 Uses for Sunflowers.


Tips for Fall Flower Garden Maintenance

Today, I’m sharing fall flower garden maintenance tips.  Fall is a busy time in the flower garden.  The growing season may be coming to an end, but it’s the perfect time for clean up and other gardening tasks.  Use my list of reminders and tips to keep up with your fall garden maintenance and chores.  Fall flower garden maintenance will help prepare your garden for winter and anticipation of spring!  Check out my other flower gardening tips below.  


fall gardening activities


Flower gardens slow down after frost kills the foliage and knocks down tender plantings.  However, flower gardeners find there are still a few seasonal chores to do in the fall:


Dig and Store Tender Bulbs, Corms, Tubers and Rhizomes

Summer bulbs are tender, which means they will not survive cold climate winters outdoors. You can let them freeze to death during the winter and replace them in the spring.  Or, you can save them to enjoy next year by digging them up and storing them indoors.  For example: Cannas, Dahlias, and Gladiolus can be stored during the winter.


fall garden maintenance

Via https://www.flickr.com/photos/dinesh_valke/420062003/


Cut Back Perennials

Next, trim off frost killed stems and foliage. Leave evergreen basal rosettes and foliage intact.


Leave Seeds as Natural Bird Feed

Furthermore, many birds appreciate the seedy winter snack inside ornamental dried and faded flowers.  For example, coneflower and black eyed Susan are great snacks for birds. The plants are easy to tidy up in the spring when they are weather beaten, soft and soggy from months of snow and rain.


Pull Spent Annuals

Nothing looks as sad as dead annuals left over the winter. Pull them up and toss them in the compost pile. Cover the soil with mulch to prevent erosion during the winter.


Fall Weed Control

Cool season annual weeds such as chickweed germinate and grow like crazy during the cooler months. Use a hoe to prevent the weeds from seeding, and smother them with mulch. If problems are severe, you might resort to using a pre-emergent herbicide to prevent them from germinating.  Read and follow the label directions.


Mulch Flower Beds Before Winter

Rodents love to nestle in mulch where its fluffy insulation keeps them warm and toasty all winter. Wait until after several hard freezes before you mulch.  In most areas, a three inch deep layer is adequate.  In severe climates, you may need to spread it as thick as six inches. Also, do not cover the plants.  The correct method is to mulch around your plants.  Snow is the perfect insulator.  In mid winter, after the ground is frozen and there is no snowyu lay evergreen boughs over your plants as well.

Wait Until Late Fall to Protect Roses for Winter

In severe winter areas, hybrid tea roses, tree roses, and climbing roses will need special winter protection. Wait until late fall before protecting the roses for winter.  to do that, for now allow the roses to slow their growth naturally in response to the changing season.


fall garden maintenance
Via https://www.flickr.com/photos/photosu/2038604070/


Save Fall Leaves for Compost, Soil Amendment, or Mulch

Also, autumn leaves from deciduous trees are everywhere.  Don’t let this seasonal bounty go to waste. Chop the leaves in a chipper/shredder or run over them with your lawn mower.  You can also suck them up with a leaf vacuum and crush them.  Stockpile these carbon-intensive leaves.  They will mix well with green, nitrogen rich material next summer.  Most importantly,  the leaves alone will break down to yield superb organic soil amendment for flower beds.  Or, use them now as mulch.

Subscribe to Gardening Catalogues

Next, send in the information request cards from magazines.  Also, visit seed supplier and nursery web sites and register for the tips and catalogues.  Study the catalogues over the winter, and get ready to shop for spring.

Finish Planting Spring Bulbs

You can plant spring bulbs (crocus, daffodils, etc.) up until the ground freezes.  However, they do better with a little time to root before then.

fall flower gardens


Enjoy the Fall Flower Garden

Last, many perennials show exceptional fall color.  Fall flowers are in many ways the most precious of the gardening year.  Take a minute from your fall chores to enjoy the last of the gardening season.  Garden maintenance and clean is essential, but is so is savoring the fall colors and scents of from you fall flower garden.


The Top 5 Landscaping Trends of 2018

Every year, we see amazing new landscaping trends that inspire us to revitalize our outdoor living spaces.  A home is so much more than just the interior rooms.   It’s also the space outside your home, where you can enjoy time with friends and family.  I love gardening and just enjoying the nature and the beauty that surrounds me.  So, today I’m sharing gardening tips on landscaping trends.


landscaping ideas


2018 brings us landscaping trends that focus on turning the exterior of our homes into a true living space, for humans and wildlife. 2018 incorporated new plants and encouraged the integration of edibles and non-edible plants!

1.   Embracing Multipurpose Spaces


landscaping Ideas

Credit: Garden Design Magazine


Your backyard doesn’t have to be just for the kids to play or just where you grow veggies. Embrace multipurpose – everything in your backyard should have several uses.

A seat can also be a storage location for gardening tools or toys for your kids. A concrete fireplace can also serve as a planter or as a way to grill food by adding hooks for a grate. Garden Design Magazine shows us this beautiful fireplace that also serves as a place for family and friends to gather together. When you add elements to your landscape and yard, make sure they aren’t just a one purpose item.

Remember that your fence can be a place to hang flowering baskets or an area that a plant can grow upwards.


2.   Water Management


gardening ideas

Credit: Love Your Landscape


Sustainability is a popular word right now, and it no longer just means focusing on a sustainable lifestyle. A sustainable landscape influences how landscapes are created and maintained, especially when you focus on the years to come. One of the major trends in 2018 is focusing on eco-friendly watering practices

If you haven’t heard of xeriscaping, now is the time to learn about. Xeriscaping is about how to create a landscape that uses low-water plants and focusing on plants native to that particular region. It also uses trees and shade plants properly, as well as creating dry streams to utilize rainwater better.

Another trend that goes along with water management is incorporating succulents into the landscape. These plants come in exotic and fun shapes and forms. The benefit of using succulents in landscaping is that they are easy to maintain and create a fun statement. They are great for new gardeners!


3.   Colorful Plants

+

gardening ideas

Credit: Love Your Landscape


Who wants a garden with just green or boring colored plants? Not you! 2018 brought us landscaping trends that jump with vibrant and creative plants. At one time, a garden of simple greenery was in, but this year, we saw landscape designers integrating plants with color like violets, verbena, iris, clematis, and other vibrant plants.

Another trend is using patterned plants that might have stripes or over intricate details. It wasn’t unusual to see plants with striped leaves or colored veins.

Some other exciting plants in the latest landscaping trends include:

  • Onyx Red Ornamental Pepper
  • Queeny Lime Orange Zinnia
  • Prima Ginger Coneflower
  • Rockin’ Deep Purple Salvia
  • Bee Balm
  • Sky’s Edge Scutellaria


4.   Creating Natural Habitats for Wildlife


landscaping ideas

Credit: Garden Design Magazine


Everyone knows that our bees are in danger, but did you know that our native pests and birds also need a home to live? Butterflies are on the decline, and habitat loss is a huge factor in the decline. Even frogs and turtles feel the loss!

As cities and suburbs continue to grow and expand, species are losing their homes. For years, gardeners and landscapers created designs without little thought to the wildlife. Now, landscapers realized that there is no reason that we cannot create beautiful, thoughtful landscapes that also meet the needs of the local wildlife, especially the ones in danger.

It isn’t unusual for people to create landscapes specifically for animals and wildlife. For example, you can include different plants that are loved by the monarch beautiful and become a verified monarch butterfly garden, where they might stop on their great migration.

 Here’s how you can create a habitat for wildlife:

  • Create seed-producing and berry-bearing plants
  • Don’t use any insecticides or pesticides
  • Replace some of your lawn
  • Don’t clear out your plants in the fall, allowing insects to overwinter in your garden

Make sure you include plenty of bee-friendly flowers in your landscaping to encourage pollination. Pollinators can also increase the yield of your flowering veggie crops like cucumbers, melons, and squash. Bees love flowers like zinnias, nasturtiums, alyssum, cosmos, and calendula. Calendula is also a well-known medicinal herb.


landscaping ideas


2018 brought the integration of new edibles, perennials, and funky plants to landscapes, commonly known as “food-scaping”, according to WikiLawn Fort Worth. Gardeners are more and more likely to experiment with new plants and finding cool ways to showcase the plants.

Right now, vertical gardens are hot! Grow a funky new cucumber variety up your privacy fence or grow pole green beans – that aren’t always green – along with your pergola.

There is a whole world of plants that you can grow. Perennial plants are a huge hit in 2018. Plant them one time and they continue to grow each year. Did you know there are perennial veggies, like asparagus and rhubarb? A single asparagus plant can produce for 20 years! That’s a lot of veggies!  Don’t you love this landscaping trend idea?


Try things like cucamelons, which are the size of grapes but taste like cucumbers. Plant a few ground cherries that are in the nightshade family but can be used to create pies and jams. So, experiment! Add new plants you’ve never tried before. It makes for an exciting and unique landscape.

Jackie Greene is a blogger, gardener, and nutrition enthusiast. She enjoys creating organic meals for family and friends using the fresh ingredients she produces from her backyard homestead.

Types of Garlic for Home Gardens

Today, I’m sharing gardening tips on the types of garlic for home gardensFall is the perfect time for planting garlic in my home gardens.  I have planted garlic in the spring, but I didn’t get the big bulbs that I had hoped for.  So, planting garlic cloves in the fall for harvest the following summer works best for me.  When I take this step, I harvest huge, flavorful garlic bulbs.    


types of garlic


When I first started gardening I was amazed at the different types of garlic available.  I was used to the garlic in the grocery store.  However, I had no idea what type of garlic I was purchasing.  It came in a pack of 4, and that was good enough for me.

I was visiting a farmer’s market one Saturday, and picked up a few cloves of garlic.  I used the garlic in a dish shortly thereafter, and it was than that I realized the flavor was unmatched.  It was hot and spicy, just the way I liked my food.  I visited the market again to have a chat with the vendor, and we ended up in an hour discussion about planting and growing garlic.

At that point I decided to start growing my own and I haven’t looked back.  I love checking out the catalogues and websites, and deciding what I want to plant each season.  If you want to grow garlic, there’s few things to consider before purchasing.  For example, do you like mild or spicy garlic?  Do you plan to store the garlic through the winter?  Do you want large cloves etc.?  Making selections for home gardens can be confusing. So, here’s a few tips.


Types of Garlic for Home Gardens:


Subspecies of Garlic:


Hardneck  –  Most of the garlic that I plant is hardneck.  The neck is the stalk that grows from the clove of garlic. Hard neck garlic produces a scape or flower stalk.  It is recommended that the scape be removed in the summer to avoid robbing the cloves of energy.  If the scrapes rob the cloves of energy, the plant will produce smaller bulbs. Some gardeners remove the scrapes to make garlic pesto, add the scrapes to a salad or use it in stir fry.

  • Hardneck garlic grows best in colder zones.  I live in Zone 6B, so hard neck garlic is perfect for me.
  • Easier to peel
  • More flavorful
  • Cloves are larger


Soft Neck –  Next, I do plant a few varieties of soft neck garlic, but not many.

  • Local grocery stores usually carry the soft neck variety.
  • Grows best in warmer climates.
  • Perfect for storing over the winter.
  • Usually lasts 9 – 12 months after harvest.
  • Great for braiding too.  Unfortunately, the cloves are not uniform.  Some are large and some are small if that matters.
  • Softneck garlic is not as flavorful or spicy as the hardneck varieties.


Elephant – Last, I have never planted Elephant garlic in my home garden.  But, if you like mild varieties elephant garlic should be at the top of your list.

  • Elephant garlic cloves are huge compared to the hard neck and soft neck varieties.
  • Doesn’t have the health benefits of regular garlic or the flavor.
  • Elephant garlic is more in the family of leeks and onions.
  • Rather than having several cloves, it is one bulb like an onion.
  • If you love roasted garlic, elephant garlic is perfect.


There are approximately 100 varieties of garlic under the subspecies of hard and soft neck varieties.  Since I like spicy garlic, I purchase from the hard neck categories. My favorite garlic is Spanish Rojo.  However other spicy varieties include:   Tibetan,  Korean Mountain,  Shantung Purple, and Chet’s Italian Red.

If you like mild, but flavorful garlic try these varieties:  Transylvanian, Early Italian, or Texas Rose.

Check out the different varieties of garlic that you can grow.  There are just too many to name here.  Most importantly, you want to purchase garlic that suits your individual taste and your growing zone.  Before you leave, check out my article on 13 Ways to Use Garlic for Health and Food Uses and Planting and Harvesting Garlic.


Planting and Harvesting Garlic

Are you wondering how to plant garlic in your backyard gardenPlanting garlic in your backyard vegetable garden will give you a reward for sauce, salsa and more.  Today, I’m sharing gardening tips on how to plant garlic in your backyard garden.  You see I planted garlic last year and had no success.  So, I decided to try again in the fall. Look at the nice healthy garlic plants that I harvested from my backyard kitchen garden below. 


planting and harvesting garlic

I planted onions in this space last year and they did great. So, I decided to amend the soil with my homemade organic compost.  My compost is leaves and kitchen scraps.  The garlic cloves loved it.


growing home grown garlic


Harvesting garlic was at the top of my list this week.  The size of the bulbs were glorious!  However, harvesting garlic requires muscle.  The roots at the end of a garlic bulb run deep.  As a result, you can’t pull the bulbs out as you would an onion.  Since this was my first year planting and harvesting garlic, I didn’t realize how much muscle would be required.

To avoid damaging the bulbs, you must remove the dirt until the entire bulb until it is exposed.  Once the bulb is exposed, it is easier to get to the bottom of the bulb.  First, I used my garden shovel and my hands to remove the dirt around the bulb. Please wear a good pair of gardening gloves to protect your hands and nails.  You will be digging!


Next, I place the shovel under the bulb and worked it until the garlic bulb became loose and I was able to pull it out.  Nice way to get an upper body work-out, trust me.  I recommend lifting weights during the winter so you can be prepared for this job in the summer!


harvesting garlic

     
It’s amazing what can happen in 2 – 3 weeks in the garden.  Take a look at the picture directly above.  I harvested the bulb on the bottom 3 weeks before I harvested the other plants.  You can see how much smaller it is than the other cloves, but it cured beautifully.  It is actually ready to use.

Some people braid their harvest, but I’m just going to store mine in a garlic bag in a corner on the counter since it’s a small batch.  It won’t take me long to use it when I make tomato sauce.


harvesting garlic


The newly harvested bulbs will cure for 3 – 4 weeks.  Once they turn white and achieve a covering like paper on the garlic bulb, I’ll shake off the dirt.  I cut off the roots and stem with gardening shears and they’re ready to go.  Some gardeners leave their harvest in the garden to cure.  But, I brought mine in the house and allowed them to cure in the kitchen. Stay tuned for a post on what it looks like after it has cured.  Do you plant garlic? How do you allow your plants to cure?

You may also like What You Should Know Before Growing Garlic.

13 Ways To Use Garlic: Health and Food Uses

gardening, garlic uses,


I harvest around 30 cloves of garlic in the spring from my fall planting.  I’ve been growing my own garlic for about 3 years now, and I love it.  It tastes so much better than the garlic purchased from the local grocery store.  It’s more flavorful, and you get to choose what you grow.  Last year I planted Georgia Fire and Red Toch.  The Georgia Fire is hot and great for making salsa.   Red Toch is great eaten raw or in cooked dishes.  Both do well in cold climates.  I live in Zone 6B, which has a short growing season.  Unfortunately, we experience very cold winters so , we must make everyday count during the growing season.


Image-Home-Grown-Garlic


Here are 13 ways to use garlic, and some of favorites:

Pesto – Toss pasta with garlic pesto or use it on toasted bread.  Either way using Genovese basil will give the pesto the flavor needed for delicious Italian dishes.  So, add pesto to your ways to use garlic list.

Garlic Butter – Also, butter like garlic is one of my loves when it comes to food and cooking.   So, it should come as no surprise that I make garlic butter.  I use it on bread, potatoes and as a dip for my crab legs.  However you decide to use it, use plenty of garlic when  you make it.

Garlic Knots –  Pair Garlic Knots with a salad, Baked Ziti, Lasagna, Spaghetti and many other dishes.

Roasted –  Furthermore, roasted garlic can added to your ways to use garlic list too.  Roasted garlic can be used in mashed potatoes, to make hummus, or as a spread on bread.  There are other uses, but these are a few of my favorites.

Stir Fry –  I love chicken and garlic stir fry.  When I’m preparing my chicken, I add lots of chopped garlic.


Use in Pickles – I use garlic gloves in my homemade dill pickle recipes.  You can a jar of refrigerator dills when you just can’t wait to indulge or can a few jars to eat over the winter.

Mashed Potatoes –  I love creamy mashed potatoes.  They go with beef, chicken, turkey and pork.  I make my mashed potatoes several ways, but adding chopped/pureed garlic is my favorite.  So, add garlic mashed potatoes to your list of ways to use garlic.

Chimichurri Sauce – I love a good chimichurri sauce over steak or other beef dishes.  You can also use chimichurri sauce as a dip for meats.

Hummus –  My grandson is a fan of hummus with celery.  Unfortunately, his vegetable palate is limited.

Salsa – There’s nothing better than fresh salsa with loads of garlic.  Check out my fresh salsa recipe here.


benefits of growing garlic


Tomato Sauce –  What’s tomato sauce without garlic.  Not to brag, but my homemade tomato sauce is delicious and kid approved.  Get the recipe here.

Source of Iron –  For many years I had an iron deficiency, which lead to me being anemic.  As a result, I included leafy greens and garlic into my diet.  I struggle to include with the leafy greens at times, but my love for garlic has never wavered.

Heart Healthy –  High blood pressure, hardening of the arteries, and high cholesterol runs in my family.  Unfortunately, I have high blood pressure.  As  a result, ways to use garlic has been added to my list of health regimes.  It helps to keep my blood pressure in a normal range.  I use it chopped in salads as well as cooked dishes and I eat tons of it.


So, we hope that you add a few of my suggestions to your list of ways to use garlic!  Use a fresh lemon to remove the smell of garlic from your hands.  Mouth wash, milk and or a good brushing will remove the garlic smell from your mouth


Best Vegetable Plants for Fall Gardens

Today, I’m sharing backyard vegetable garden tips on the best fall vegetable plants. There are plants that grow better in the fall than in the summer.  Furthermore, there are plants that should be planted in the fall so they can harvested in the spring or early summer. Planning is important when it comes to your backyard garden. 


fall gardens


Best fall vegetables plants:


Garlic – I plant garlic in the fall for harvest in early summer.  The garlic bulbs are huge and the garlic is flavorful.  I use garlic to make homemade tomato sauce in the fall.  I usually have a few cloves left to use through the winter.  These garlic plants are just about ready to be harvested.  They were planted in the fall for summer harvest.


backyard gareden fall vegetables


Brussel Sprouts – Brussel Sprouts are called little cabbages in my house.  They are loved by my granddaughter, my daughter and me.   Brussel Sprouts are rich in antioxidants and Vitamin K.  Vitamin K helps to prevent blood clotting and bone health.  I love my Brussel Sprouts either sautéed with garlic and butter or roasted with olive oil and garlic.

Turnips – Personally, I’ve never eaten a turnip.  My grandfather used to grow them when I was growing up, but for the life of me I can’t remember anyone eating them.  He bartered, so turnips may have been one of his bargaining chips, lol.  My mother said that you prepare them by peeling and than boiling them as you would potatoes until tender.  Season as desired.

Collard Greens – My son-in-law is from the south, so Collard Greens are big in my house.  My daughter fixes the best greens ever.  I saw a pot disappear at a family gathering in 15 minutes.  It was truly incredible.  She doubles the amount of greens that she fixes now for large dinners.  In my opinion, collard greens become more flavorful after the frost hits them.  As a result, fall is a great time to plant collards, turnip and mustard greens.  Furthermore, they are high in Vitamin A.  This makes them great for the hair and skin.

Green Onions – I love green onions in my beef and broccoli recipe.  They give a dish an extra kick, and great flavor.

Radishes –  I love adding radishes to vegetable trays.  I think home grown radishes are a little spicier and have better flavor.  They are great with dip, and in salads.  Also, radishes have great water content.  They are great for hydration.

Peas –   Peas like cooler weather.  So a fall planting is perfect.  My grandchildren love shelling them, but not eating them.  I freeze them for soup.  Both of my grandchildren love soup, but the peas get left in the bowls.  Personally, I love them.  They’re always a winner in the garden.

Green Beans – I plant both bush and pole green beans.  I prefer bush beans because I can harvest them at once, while pole beans produce throughout the season.  Green beans are expected at family gatherings.  I freeze them so I can use them for Thanksgiving, Christmas and New Years dinners.


Carrots –  Planting carrots is a good project to do with the kids.  You can plant the regular orange or go bold and plant bold colored carrots.  You can freeze them for soup or casseroles over the winter.

Broccoli –  Next, my granddaughter loves broccoli.  My grandson not so much.  She loves broccoli steamed with a little butter and seasonings.  It’s my go to when I have my grandchildren.  No matter, the broccoli will be devoured.  You can also freeze fresh broccoli.  So, add broccoli to your list of best vegetable plants for fall gardens.

Cauliflower –  I love cauliflower raw.  I eat it with dip or in a salad.  However, a friend of mine fixes it with a cheese sauce.  I love that too.

Cabbage Another vegetable to add to your list of best vegetable plants for fall gardens is cabbage.  My granddaughter loves it.  Simmer a head of cabbage with a little bacon or a ham bone.  Peel and quarter Yukon Gold potatoes and add to them to the pot.   Simmer until tender.  If you love slaw and sour kraut, add cabbage to your backyard garden.  It definitely goes on my list of best vegetable plants for fall gardens.

Kale –  I love kale with apple cider vinegar.  Cook Kale the same way you cook collard greens.  They are in the same family as the cabbage, broccoli and cauliflower.

So, here are my suggestions for best fall vegetable plants for fall gardens.  Plant according to the packet to direct sow or get a head start and start seedlings under grow lights about 6 weeks before planting outside.


Turn Your Garage Into an Indoor Vegetable Garden for Winter

garage space


You recently discovered your love for gardening. You were influenced by your friends.  As a result, you spend most of your time tending to your vegetable garden. You also consider gardening an excellent way to relax.  Especially, when you have a stressful day at work.  Winter is approaching, and you dread all of your vegetables dying. You know that these plants don’t do well in weather that’s too cold.  But, all is not lost. You can grow your vegetables during winter.  Simply use your garage space as an indoor garden.  Sounds exciting, right? Here’s a few things you will need before you turn your garage space into an indoor vegetable garden:

indoor gardening


  1. What will you use as containers?

Your vegetables were originally planted in the ground.   Since, you’ll be growing them inside your garage, you will need to transfer seedlings into containers. Depending on the size of your plants, you can use pots or recyclables for this one.  If you have a container garden on your deck or patio, you can move the pots into your heated garage area. Remember, the temperature must be hot enough to continue the plants growth.

  1. How’s the space inside?

Space is the most important things you should think about when planning your indoor garage.  You should consider how large or tall your vegetables will get. You don’t want to cramp them and prevent them from growing. For example, if you have tomatoes you must allocate space so they can grow up.  Furthermore, you can organize your area based on the kind of vegetables you have.

indoor gardens


  1. How about the lights?

Just as important, vegetables need a good source of light and heat to grow.  Unfortunately, you won’t get enough light during the winter even if you’re using garage doors with windows like Costco Garage Doors.   So, you should come up with an artificial lighting and heating system.  Fortunately, you can purchase artificial lighting from a variety of stores.

Next, consider how you want to set up your lighting system.  Do you want the lights low or high?  For example, if you’re starting seedlings you will want the  light within inches of the plants.  They need the light and heat to germinate.  If your plants are established, keep the light at least a foot from the plant. You will have to adjust the lighting as the plants grow.

 And the water?  

In addition to heat and lights, water is a necessity for your vegetables. And since your garage can’t “naturally” produce water for your plants you will need to manually water your plants. In watering your vegetables, be wary of the amount of water you put in each of the containers.  It’s important to not overwater them.


Indoor gardening


In Conclusion

Finally, indoor gardening might be new to you.  But, there are several benefits you can get from turning your garage space into an indoor garden.  You can have fresh vegetables year round regardless of the weather.   So, turning your garage space into an indoor garden is an excellent way of  using the space.   However, you must consistently put in time and attention to maintain them.  Your vegetables still need TLC even if it’s sunny, raining or cold outside!


Garage Space    About the Author: George Anderson 

George is a specialist when it comes to garage doors. Working in the industry for over 20+ years he takes pride on helping his clients fulfill their needs when it comes to garage construction. He currently writes on behalf of Shop Garage Door. In his spare time, he loves spending time with his family.