How to Attract Pollinators to Your Garden

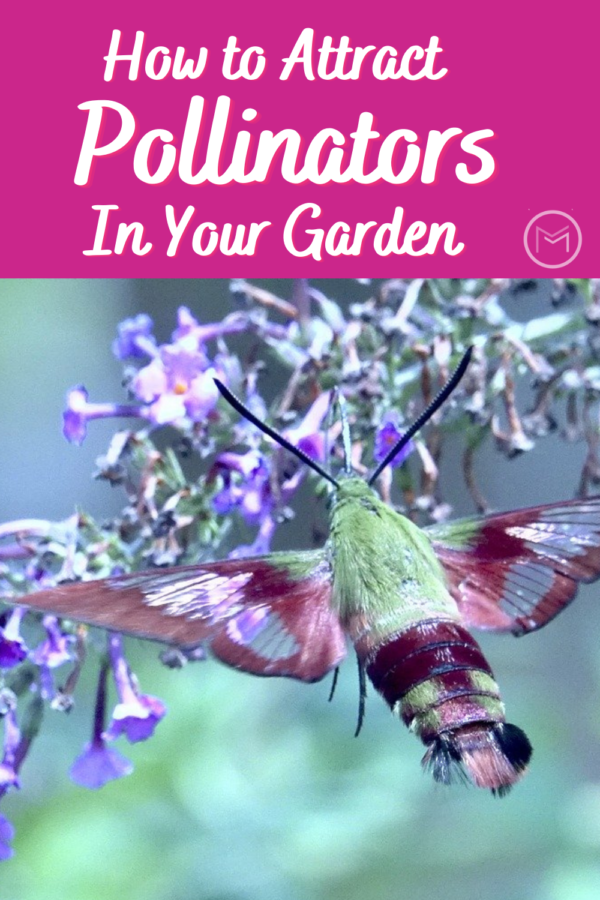
Today, I’m sharing tips gardening tips on how to attract pollinators to your garden.  What are pollinators and why are they needed? New gardeners often have these questions.  First, lets start with what are pollinators.  Pollinators carry pollen to plants so they will product flowers/blooms.

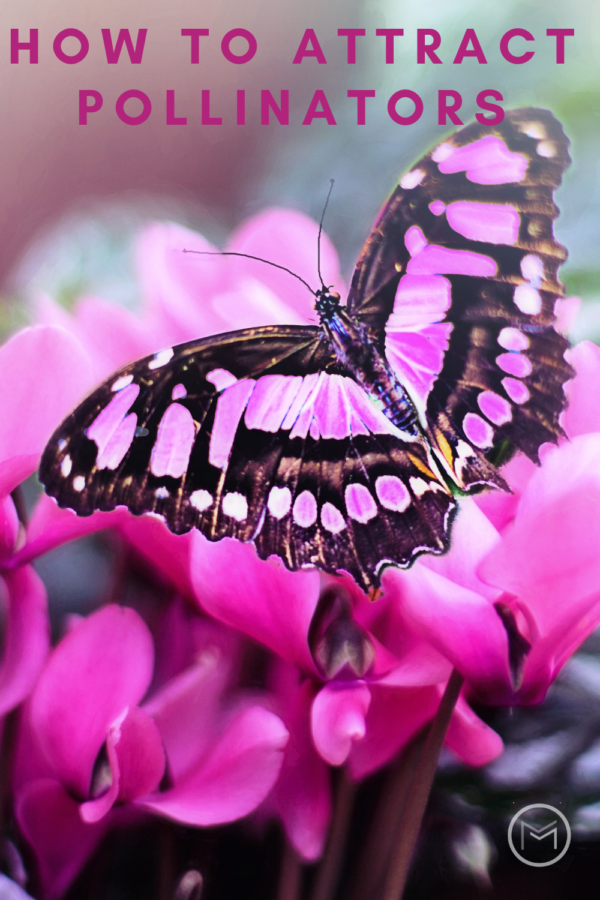
So, it’s important to plant flowers and plants that produce nectar.  Nectar will attract pollinators, which include butterflies, bees, beetles, humming birds, wasps and moths.  These insects and birds are our top pollinators.  However, the wind is also a pollinator.  Flowers, fruits and vegetables are produced by pollinators carrying pollen from one plant to the next.  Without them, there will be no fruit or vegetables to harvest or beautiful flowers to enjoy.  As a result, we must attract pollinators to our gardens.


how to attract pollinators


How to Attract Pollinators: 


Plant Native Plants –  Plant native plants rather than annuals.  Native plants are those that grow naturally in a particular area.  Furthermore, they act has a host for butterflies and they provide support for pollinators.  Native plants require less water, fertilizer, pruning, and they require little or no pesticide.

Provide Shelter – Bumblebees need open ground and bare patches of soil to nest.  Provide an area away from your entryways.  I had Bumblebees make a nest in the shrubbery bed leading to my front door.  That was not a good thing.  Also, dead wood and tree stumps make good nesting areas.  Compost piles, brush and hedges make good nesting areas too.


how to attract pollinators


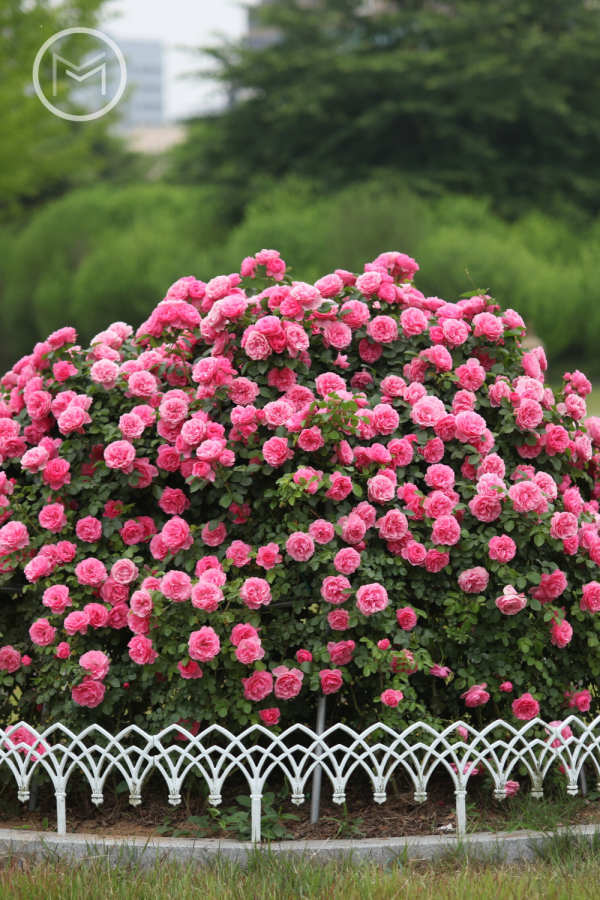
Use Different Colors in Your Garden –  Make sure your garden has a variety of color and texture.  Red, yellow, lavender, white, pink mix it up. Different sizes and shapes should be considered too.

Provide Water – Pollinators are living creatures, so you must provide water for them to survive.  Install a pond, bird bath, fountain or shallow dish with water.

Have Something Blooming at all Times – When purchasing native plants, consider their bloom times as well as planting zones.  Having a plant blooming from May to September is ideal.


Provide Flowers and Plants in Masses – Plant native plants/shrubs in masses.  Five or more is great.  If your garden area is not large enough to accommodate 5 or more, plant at least 3.

Provides Food – Our backyard birds need food, so look for plants that will help produce food for our feathered friends.  Sunflowers, asters, coneflowers produce seeds and dogwoods, cedar and holly produce berries.  Consider planting a few in your garden.

I hope these tips on how to attract pollinators were beneficial.  Give some thought on what plants would work well in your backyard.  Start with a small area, and increase your plantings yearly.  Finally, saving seed and starting new plants can be a big money saver too.


How to Create an Outdoor Survival Kit

Today, I’m sharing tips on how to create an outdoor survival kit. If you love all things relating to camping and the outdoors you will love this post, and the great tips that we have.

First, you can find tons of online sources such as this one where you can learn more about survival methods.  This article has just what you will need for when you’re looking for a quick and easy guide on the basics of survival.  Additionally, you will find information on basic items that you will need to withstand any situation in the woods or outdoors when stranded.


outdoor survival kits


How to Create an Outdoor Survival Kit:


These items below will give you an idea of the basic requirements needed when going on a trip.  It can include camping, a zombie apocalypse, or any other fun thing.

A First Aid Kit

A first aid kit is a lifesaver.  We cannot control nature, but we can control some of the things we encounter while enjoying nature.  This includes snake bites, bug bites, ants, mosquitoes, hypothermia, headaches, diarrhea, poisoning, burns, and cuts to name a few. Please note that infection can occur if bites and cuts are not treated immediately and correctly. This is where having a first aid kit is crucial.  As a result, it is necessary to make sure you have the necessary items in your kit.  Make a list, and ensure your items are included before stepping out the door.


outdoor survival kit


Making a Fire

It is important to have the right equipment to make fires when camping or just enjoying the outdoors.  Black powder firearms can be useful, but make sure you practice proper gun safety when using this method.

The technique involves pushing a cotton cloth down the barrel of the gun till it touches the powder charge and firing it, away from yourself or anyone else.  Once the cloth is fired out of the gun it should be ‘lit’, at which point you pick it up and blow on it to ignite the flame. Oxygen and fuel together, produce heat.  Thus, when you blow on the cloth it already has heat and you will be providing the oxygen.

Other things you can use to light a fire is setting a match to dry grass and adding other flammable items.  Use a match to light the grass.  Next, blow on it until it ignites.  At this point you can add other flammable items that you have collected including reeds, more grass, or elements that are flammable to make it bigger.

Pinecone fire starters are great for camping trips or other outdoor activities.  You can make them prior to making your camping trip or outdoor activity, and it’s a great project to make with the kids.


Shelter or Shade

Shelter or Shade is just as important as the other components. Weather conditions can be harsh if not expected.  And, getting sick from it  is not worth it.  So, in the case where it’s raining or possibly too hot, you can build a shelter out of the things around you.  This is a crucial skill to have in any situation.  Make your shelter while it is still daylight.  You can find tips online on how to build an outdoor shelter, like this one for example https://www.outdoorlife.com/survival-shelters-15-best-designs-wilderness-shelters/.

Unfortunately, people have been known to die from animal attacks and hypothermia.  To avoid these unfortunate events, make sure the shelter is away from any hazards such as cliffs, or food sources.  Furthermore, there must be proper insulation such as a tent with a zip to block cold or the wind.  If you have more than one person, try and group under one shelter.


outdoor survival kit


Food and Water

Make sure you have enough food and water.  It’s imperative that you think long-term to ensure that you don’t run out.  Packing food items that are non-perishable such canned goods, powder form, or dry like rice and pasta will ensure food lasts longer.

If you’re not out for too long, you can pack things that give you energy such as beans, pulses, fruits, nuts, and seeds.  If you don’t have bottled water, always make sure you boil or filter any water you need before drinking it.  Don’t ever get tempted to take a sip or two of water from a lake or river. You need to avoid water-borne diseases as much as you can as they can be fatal.  Many plants found in nature can be consumed too. Such as root tubers, moss, cacti, algae, and mushrooms to name a few.  However, be sure you are picking the correct plants before consuming any.

Last, make sure you use our tips on how to Anyone can make proper use of these basic tips.  things as spelled out above. If you know a little about each one, you’re better off than the next guy!

How to Create Tropical Container Gardens

Today, I’m sharing gardening tips on how to create tropical container gardens.  You can transform your  balcony, patio, garden or backyard into an exotic getaway.  Using simple planters or containers and a variety of tropical plants can create an exciting new look. Dramatic annuals and decorative planters provide rich foliage and astonishing blooms.  Furthermore, outdoor spaces can be transformed with little money and uses the trend toward container gardening.  Lets get started with your transformation.


tropical container gardens


How to Create Tropical Container Gardens:

The Environment

  • When people think of the tropics, their first thoughts are generally sun-kissed beaches with palm trees.  But, that’s not the whole story. Most tropical plants come from the floor of the rainforest.  They get little sun and have high levels of humidity. So, they don’t need as much sun as a cacti. And, tropical plants can live comfortably on balconies or shady backyards.  As a matter of fact, tropical plants prefer indirect sunlight.
  • Because tropical plants need high humidity, they require lots of watering. So, when using decorative planters they need to have good drainage. Choose planters with plenty of drainage holes to ensure the roots of the plants are free from standing water.
  • There is one element tropical plants need less than other plants to help them grow, and that’s phosphorus. Look for fertilizers described as NPK on the label. These types have nitrogen, phosphorus, and potassium as the primary nutrients. Iron and magnesium will help sustain the bright colors of the tropical flowers.  Plant food is recommended as well as adding Epsom salts to the soil at planting.  This will give your plants a magnesium boost.
  • Because the soil in planters and containers is above ground, it’s more exposed to heat and drying winds.  As a result, it loses moisture more readily. This is especially true in a warm weather.  So, tropical containers need to be monitored closely.  It’s imperative that the humidity level around tropical plants not fall too low.Also, the soil should be moist but not soggy.  Overwatering can cause rot and disease if the roots are allowed to stand in water for a long time. The soil in decorative planters should never be allowed to thoroughly dry out.  If so, the sides will shrink. This gap means any water will pour through the container and not reach the roots.  If this happens, push any soil that has shrunk from the edge around the pot to fill in the gaps before watering. One option to reduce evaporation, and maintain the humidity around the plant is to cover the surface with decorative mulch such as orchid bark.

Selecting a Planter or Container

With such a large variety of planters and containers to choose from, where do you start?  Many gardens use the traditional terracotta clay pots.  However, there are advantages and disadvantages for the tropical gardener.  Terracotta pots are heavier than plastic or fiberglass pots and are easily chipped or broken.  Most are more expensive too.

The style of the planter used for tropical container gardens are really a personal choice and the effect you want your tropical garden to project. The size of the containers will be limited by the space available, which will, in turn influence the size and plants  they can accommodate.

Always try and buy brand new planters for tropical plants.  Used pots may have been infected by disease or have chemical residues. If you do want to re-use planters make sure they are washed well.  Wooden containers need to be lined with plastic, so the water and soil don’t cause them to rot.

If you don’t want your planter to become a water logged, make sure there are plenty of drainage holes in the bottom. Without these holes, the organic compost will become saturated with stagnant water and kill off your tropical plants.


Designing with Plants

Wherever you’re putting your tropical plants, you need to make the design look harmonious with the surroundings.  You want to create an atmosphere you’ll be happy with. Think about what outdoor live plant displays you want the eye to focus on.  Also, think about how the other plants flow around that the center plant. Each planter needs to have a balance of plants.  You want the eye to go to the planter’s focal point. This can be accomplished with asymmetrical or symmetrical designs.

The form of the planter is dictated by the growth habit of the plants you put in it. Some plants like to grow tall, others like to hug the ground, and others want to flow over the edge of a planter. Each can be used to create an overall aesthetic for your tropical container gardens. And then there is texture, as the different types of foliage will give a different feel to a container. Broad leaves juxtaposed with linear leaves like grasses break up the eye line and bring a variation to your design. The best designs work on a variety of textures to add variance to the display. By repeat planting of the same plant in containers a rhythm is achieved. When looking at the planters admirers eyes can move from one planter to the other.

And, the final consideration when designing planters is proportion. There needs to be a balance of heights as well as plants. Garden designers have a rule that plants should not be higher than three times the height of the containers. For large and tall planters, medium to large plants with large leaves work well.  And, for short and shallow planters smaller plants with small leaves and excellent coverage.


tropical container garden


Shape, Texture, and Color

To get tropical container gardens or a garden planter to have a real exotic feel, you need to have plenty of tropical foliage. Most foliage will be green; however, you can break up the green with flowering annuals. There are lots of varieties that work well in planters such as, Vinca, Bacopa, Torenia, Verbena, Lantana, and Wax Begonia to name a few.

You can also break up the green foliage by using Caladium cultivars.  They are available in a range of foliage shapes, sizes and colors. You can choose foliage colors that compliment the flowers or contrast. Think also about the texture of the foliage as some tropical plants have shiny leaves they can draw the eye easier to the highlighted plant in the container.


Designing a Planter

The central plant in tropical container gardens should fill the crown of the planter with compact upright growth. The filler plants are more compact and are there to round out the top of the planter. Allow corner plants to grow over the edges, and allow their growth in more than one direction. Plants place at the side of the container can soften the look, and fill out the space between the corners. When thinking about the plants you’ll put in each individual planter, pick those that have similar watering, feeding, and light requirements.  It’s important that they all thrive in the chosen location.


tropical container gardens


Planter Location

We’re dealing with tropical plants, water retention is a prime consideration. Don’t put your tropical plants anywhere in your garden that is windy. The wind increases evaporation water evaporation. If you have a spot that gets anything from four to twelve hours of sun a day, you can use plants that like full sun or part shade. If the location gets only two to four hours of sun a day then you need to select plants that will accept whole or part shade. A lot of tropical plants can survive with varied light and will grow in the shade.  However, this often means they will have reduced flowering.


Fertilizer

Tropical plants are pretty much like any other and like to get regular feeds a slow-release fertilizer in the soil and water with liquid fertilizer. Add a slow-release fertilizer at planting.  Be sure to mix it thoroughly with the soil.


Maintenance

Like all gardens, tropical planters need to be maintained. It’s not just a matter of planting and forgetting. In the early stages to promote leaf growth, the plants will benefit from pinching, that’s the removal of young shoots. As the plant begins to grow, gentle trimming may be needed later in the season. As part of your watering regime, spraying with insecticidal soap or oil will keep pests and disease in check. Oh, and don’t forget the weeding!

How to Use Your Outdoor Living Space

Today, I’m sharing gardening tips on how to use your outdoor living space.  We’re living through some pretty unprecedented times. The rapid spread of coronavirus has seen the establishment of a worldwide pandemic.  Instead of getting on with our day to day lives, those who aren’t essential workers are expected to stay home.  Except for when we are shopping for essentials like food and medication. 

Unfortunately, this can be difficult for many to face. But, I have a few suggestions on easing the boredom or loneliness that you may be experiencing.  The summer months are approaching and the weather is improving. If you’re lucky enough to garden, you can benefit from getting some fresh air and enjoying the sunshine on your face.  So, it’s essential that you get started on working on your garden now so you can enjoy your summer


outdoor living space


Here are a few tips on how to use your outdoor living space:


Take Care of the Basics 


There are basics that you’ll need to complete in almost any yard.  First, start with cutting the grass.  If left unmaintained, grass can quickly become unruly and overgrown. Not only is this an aesthetic problem, but it can prevent you from spending time out in your yard.  Furthermore, an unmaintained yard can pose potential safety issues.  For example, debris, brush or small rocks can made its way into your yard, and be concealed by tall grass. 

If your grass is particularly long, you might want to use a strimmer to get it down to a reasonable height.  Afterward, you can mow over it. The trimmer will be useful for cutting grass along the edge of your yard too!  Next, you should focus on finding any weeds that have established themselves. Weeds are notoriously difficult to completely get rid of.  But, by using proper technique and being committed to the cause, you can eventually get there. Make sure to pull any weeds up from the root and to dispose of them properly.  


Trim Bushes and Prune Trees

Cutting back any overgrown bushes and trees should be on your list of things to do.  It’s a simple task, but one that you need to carry out safely.  Use shears to cut back hedges. Go slowly and be precise. Just hacking away at the bush can cause it to become too small or poorly trimmed. Taking your time will help you to get a neater finish.

For trees, look into the type of tree you need to trim.  Some trees should be pruned at different times of the year.  If it’s a tall tree or one with particularly large or heavy branches, consider a professional. 


Make a Wish List 

There are so many things you can do to make your backyard look like something out of a landscape design magazine. Take a look at some of the additions Archadeck Outdoor Living can offer you! Decks, porches, patios, sunrooms, outdoor kitchens and more. Not only can these additions make your home more functional, but they can make it more appealing. You will want to spend time in yard, and entertain family and friends. Start making notes on what interests you. You could even request a quote so you can have a ball park figure on how much you need to save.


outdoor living space


Install a Vegetable Garden

So, we can get all of the food we need from our local grocery store or supermarket. But, that doesn’t mean you can’t still grow your own food.  Growing a vegetable garden is a great way to use your outdoor space and can introduce you to a hugely rewarding hobby. Digging up a vegetable bed is pretty simple.  Or,  you could look into outdoor planters if you don’t have the space for a vegetable bed.  Google the vegetables that will thrive in your local area.  Also, learn what times of year you should try planting them and how you should take care of them. 


Install a Flower Bed 

Additionally, you may want to dig up some flowerbeds and grow some flowers too. So why not give this a try? It’s a great hobby, and you’ll feel great when they flourish and bloom!  


Finally, it’s a good time to start making the most of your yard.  So, start planning how to use your outdoor living space.  Your garden will be blooming by the time summer arrives!

Fast Growing Vegetables for Beginner Gardeners

Today, I’m sharing gardening tips on fast growing vegetables to plant in your backyard garden or containers.  These are easy to grow vegetables, and I highly recommend them for beginner gardeners as well as experienced gardeners.

Several of these delicious and nutritious veggies find a place in my garden every year.  I hope you will find a few that you want to plant, and they become favorites in your summer garden.


fast growing vegetables


Fast growing vegetables for your garden:


Radishes – I love radishes sliced or diced in a salad or on a vegetable tray.  You can also roast or sautéed radishes with chives or garlic in olive oil, and be sure to add lots of your favorite seasoning.

Lettuce – If you love a fresh salad and BLTs in the summer like I do, you will be planting lots of lettuce.  You can grow lettuce in your row garden, raised beds, pots, containers, lined baskets, colanders and any other container that will drain.  There’s Black Seeded Simpson, Leaf Bowl, Romaine, Butter Crunch (one of my favorites),

Spinach – I love fresh spinach in a salad or in my smoothies.  I add a banana, a handful of spinach and frozen berries with almond milk for a refreshing smoothie.

Squash – I love squash fried, in casseroles, sliced and baked in the oven with a parmesan cheese topping.  Yummy!  And, you don’t more than a plant or two.  They are heavy producers.

Cucumbers –  I love fresh cucumbers.  I use them in salads, vegetable trays and infused in water with fresh basil.  Cucumber water is so refreshing on a hot summer day.


fast growing vegetables


Swiss Chard –  Personally, I’m not a fan of swiss chard unless it’s in a smoothie.  I basically use it in the same manner that I use spinach, with a banana, handful of frozen berries and almond milk.  It makes a very healthy breakfast drink.  And, I love the colorful stems on this veggie.  So pretty.

Green Beans – My family loves green beans at family dinners.  Also, I love using them in my vegetable soup in the winter.

Scallions –  Great in stir fry, potato soup, chopped on a baked potato or in salads.


fast growing vegetables


Beets – My mother, may she rest in peace, loved beets in vinegar.  My sister and a cousin love them as well.  Me, not so much.  But, I will plant a few for family.

Broccoli – Another delicious vegetable that can be used on vegetable trays, fried or in a stir fry.  It finds a place in my beef and broccoli stir fry often.

Zucchini –  Zucchini is very similar to squash.  I use zucchini in casseroles, and it make a delicious zucchini bread.

Finally, I hope that you will plant a few of these fast growing vegetables in your garden this year.  You will be harvesting fresh and delicious vegetables in no time.


Foraging for Purple Dead Nettle for Beginners

Today, I’m sharing gardening tips on foraging for Purple Dead Nettle for beginners. My yard is filled with it. It can found in the front yard, along my back property line as well as in my vegetable garden. I bet you can find some in yours too.

So, I became interested in medicinal herbs when I was enrolled in my master gardening course.  I had already incorporated kitchen garden herbs into my life.  But, learning about medicinal herbs and how to use them was a new experience. I was amazed at the wild/medicinal herbs that I had growing in my own backyard.


foraging purple dead nettle


First, many herbs that people forage are known as weeds to many.  They don’t realize that our ancestors used wild herbs for food, medicine, salves and more.  Sadly, I was new to wild herbs so I was hesitant about ingesting and using wild herbs when I first started foraging too.

Fortunately, Purple Dead Nettle is packed with Vitamin C, iron, antioxidants, and fiber. It’s an herb worth foraging. I love making infused oil with it. It’s great as a salve for dry skin or skin irrigations.


Foraging for Purple Dead Nettle:


Here’s a few uses for Purple Dead Nettle:

  • Salve
  • Astringent
  • Culinary (Salads)
  • Smoothies with bananas
  • Pollinators
  • Spring bouquets
  • Diuretics
  • Laxative
  • Tea
  • Pesto
  • Garnishes
  • Spring Bouquet


So, Purple Dead Nettle is a member of the mint family. You can tell that it’s a member by the square stem.  It originated in Europe and Asia.  Mint is consider an invasive plant.  However, Purple Dead Nettle grows outside so let it grow.  Also, it grows about  8 – 10 inches high and boasts delicate purple or pink flowers.  The darker the leaf on the plant the sweeter it’s taste. In addition to the purple and/or pink flowers, the stem on the Purple Dead Nettle is square giving it a unique appearance.  Also, the leaves are fuzzy rather than smooth.


foraging for purple dead nettle


Look for Purple Dead Nettle in the spring. In the summer, it has a tendency to falter.  As a result, stock up in the spring.  You can always dry and store it for use in tea and making infused oils.

First, here’s a few pictures on what you should look for when foraging Purple Dead Nettle.  Dead Nettle doesn’t sting, but the wild herb Nettle does sting. Study the pictures.  I guarantee, you have plenty growing on your property or can find some on one of your walks.  All of these pictures are from my yard.


foraging for purple dead nettle


Foraging for Purple Dead Nettle:

  • Take a pair of scissors or garden shears
  • Bring a basket or container
  • Take a few pictures
  • Know that they house ants
  • Ants carry the seeds to their colony
  • Use the shears or scissors to cut the plant
  • Shake your plants to dislodge ants.  They are there, trust and believe that.


Last, if you have decent weather I would suggest that you dry your newly harvested plants outside.  If you don’t have an herb drying tray, use an old towel.  Actually, if I’m drying the herb inside I prefer using an old towel. I pick up the harvested Purple Dead Nettle, and drop them numerous times on the towel.  The ants will scatter.  Do this several times a day for several days to dislodge all of the ants.  Take your towel outside and shake it vigorously to get rid of the ants.

If I’m drying the herbs outside, I take the same steps.  Remove the herbs, turn the tray over, and tap the bottom until the ants are removed.

Finally, have fun foraging this valuable herb.  Once you start foraging for one, you won’t want to stop.  You may also like The Benefits of Lavender and Lamiyum Purpureum (the scientific name for Purple Dead Nettle).

4 Delicious Fruits To Grow In Your Garden

Today, I’m sharing gardening tips on fruits to grow in your garden. Isn’t it every gardener’s dream to have a  garden that’s full of delicious fruits? Some fruits are high-maintenance and challenging to grow, which isn’t exactly ideal for a beginner. Thankfully, there are plenty of yummy fruits that beginners can grow. 


growing fruit

Here’s a few fruits to grow in your garden:


Apples

There are many types of apples. First, choose what type you want to grow. If you’re an apple lover, you know that not all apples have the same taste. You’ll want to grow an apple that you like.  So, sample a few before you start planting! Once you’ve decided, you need to buy these seeds and another type. Apples need pollination from a different variety to grow. Next, you need to choose a rootstock.  The rootstock will determine how big the tree gets. You should plant your apple tree in a sunny spot, using well-prepared soil. Remember, your trees will be need to be pruned regularly to keep their shape. 


growing fruit in your garden


Blueberries

Blueberries are an easy to grow fruit. Furthermore, they work well in containers. It’s best to choose a self-pollinating type of blueberry, you’ll only need one plant to yield fruit. Blueberries love acidic and moist soil. However, the soil will require a PH level of around 4.5-5.5. Blueberries can tolerate the shade well; however you’ll produce much better plants when growing them in the sun. Blueberries grow very well in aged compost.


Figs

You can plant figs in warm conditions, such as Zone 8 or above. When winter temperatures drop below -12°C you’ll need to bring your figs inside.  So, growing them in a container is recommended. If you plant your fig tree in a container, add bark chips to improve the drainage. It’s best to add a fertilizer with a high nitrogen content each month too. You can grow figs in many types of soil; just ensure that there’s plenty of organic matter and it’s well-drained. Remember, fig trees need to be at least 20 feet away from other trees. 


growing fruit in your garden


Strawberries

You can grow strawberries in a container, strawberry planter, or a well prepped strawberry bed. To grow strawberries, you’ll need lots of rich garden compost or horse manure (well rotted). It’s a good idea to choose ‘ever-bearing’ strawberries as these will continue to produce fruit for the whole summer. So, plant your strawberry runners or bare-rooted strawberries in the springtime. It’s also fine to plant in the late summer or even in the fall. You can prep the soil with a dressing of potash fertilizer. When you plant the strawberries, the roots should be buried, and you should space them about 12 inches apart. Strawberries will be a delicious addition to the fruits to grow in your garden.  

When you are growing your fruits ang vegetables, consider pest control. For a great pest control service take a look at animalcontrolspecialists.com.

Last, before you start growing fruits in your garden, it’s important to perfect your compost. Remember, you need an equal measure of green and brown materials. It’s helpful to buy a compost bin so that you can easily turn your compost, generating the air it needs to thrive.


Getting Your Yard Ready for Summer

Today, I’m sharing tips on how to get your yard ready for summer.  Warmer weather is on the way, so now is a good time to get your backyard ready. 

First, start by looking at what you have in your yard and what you have to work with. You’ll be surprised with how some basic garden maintenance can really perk up your outdoor space.  And, make it somewhere that you will want to relax in.


getting your yard ready for summer


How to get your yard ready for summer:


Planters and borders

You need enough space to place smaller plants with larger ones planted behind.  Use evergreen shrubs on the ends of your borders and add in smaller shrubs along the way.  Additionally,  allow room for a few pretty flowering plants in between. Create a pattern and coordinating colors so that it looks coordinated and easy on the eye.

Weed out anything that isn’t healthy, and add fresh mulch for a maintained look.

When choosing your plant layout, keep in mind how the plants perform seasonally.  Consider if the plants will add color throughout the year.  Combine those with plants will fade out and not provide much color or contrast in the garden.  


getting your yard ready for summer


Lawn

Keep your lawn mowed.  Not only will it smell amazing, but it will look lovely.  If your grass is a little sparse and patchy in areas, then you can re-seed it.  Additionally, use Liquid Lawn and water regularly.


Patio and decking

Take the time to remove any weeds or moss from between paving stones.  Furthermore, if you have deck or patio and want to give it a new lease on life, use a power washer to make it look new again.  Once you have power washed your deck and patio, treat your deck with a stain or protectant.  

If you’re looking to add more color and general interest to your patio area, then you can arrange your planters and borders to have different plants of different sizes to make them visually pleasing.

Think about adding some beautifully scented flowers and shrubs, such as lavender and jasmine too.  They will really add a lovely aroma to the air on a warm evening.


getting your yard ready for summer


Coordinate your plants and paving

If you really want to make your garden stand out, know that attention to detail is the key. You might have a color scheme in your house, so why not in your garden? Try coordinating your flowers and plants with the paving stones you have or the color of your deck.  Black and grey shades can look great with bold colors like yellow, orange and red.


Fencing

During the winter months, there is likely to be some wear and tear to your garden fence.  A good way to really revive the look of your garden is to paint your boundary fence.  You could tie in the color with your planters and deck to create a fluid look throughout your outdoor space. Not only can you paint your fence, but you can also add trellis along your fence.  The trellis will allow some climbing plants and incorporate more color and texture around the edges of your backyard.


Ambience

Those summer barbecues and al fresco meals outside won’t be complete without some outdoor lighting.  There are many types of lights from festoon lighting, fairy lights and solar powered lights.

If you want to create some rustic charm, then you can use lanterns or jam jars with candles inside, to achieve that flickering effect.


Plan your seating

It is wonderful to be able to make use of outdoor space when the weather is warm.  So, you need to make sure that you have enough space to accommodate whatever seating and tables you plan to use.  

Think about what you want to use the space for.  Are you more likely to be eating outside at a table or are you more inclined to want to sit more comfortably in a lounging area?


Get your shed in order

It’s easy to shove everything you’re not using into the shed during the winter months.  Start by removing everything from your shed.  Next, sort through the items that you need and don’t need.  Clean off your items, and place back only what you intend to use.  You’ll be more inclined to keep on top of your pruning and mowing duties, if everything is easily accessible and in working order.


Finally, I hope that you will find a few tips useful on how to get your yard ready for summer.  Pick out 1 or 2, and you will have a beautiful yard in no time.


12 Best Slicing Tomatoes for Backyard Gardens

Today, I’m sharing gardening tips on the best slicing tomatoes for backyard gardens.  First, when I’m planning my garden, I think about the tomatoes that I want to plant.  Do I want them for my BLTs, to make sauce or to can for my soup and chili later in the winter.

Slicing tomatoes are great for sandwiches, covering burgers, using on hoagies and subs or smeared with may and salt and pepper. 

For the record, I have planted numerous varieties of tomatoes over the years.  Some have become a staple in my garden, and some I have vowed to never plant again.  So, lets not waste any time.  Lets check out the list.


best slicing tomatoes


Best slicing tomatoes:  


Cherokee Purple – First, my favorite tomato is the Cherokee Purple.   It has a smoky flavor and pairs perfectly on my BLT.  Additionally, I love it sliced with a little mayo, salt and pepper.  You will find them in my garden every year.  The Cherokee Purple is similar to a beefsteak and is a heirloom tomato.

Mortgage Lifter The Mortgage Lifter can weigh as much as 2 lbs. with the right conditions.  So, make you have it staked well.  The plants grow heavy enough to lift a flimsy cage out of the ground.  This tomato originated in West Virginia in 1922.

Paul Robeson – Next, the Paul Robeson tomato is a deep purple color that almost looks black.  It is second on my list of favorite heirlooms.  The Paul Robeson was named after the famous opera singer and civil rights activist, Paul Robeson.  I love these tomatoes on BLTs and sliced with mayo.


best slicing tomatoes


Brandywine Red – The Brandywine Red is one of the most popular heirloom garden tomatoes.  It has a wonderful taste.  Additionally, it’s a beefsteak.  So, it’s great for slicing.  One of my favorites.

Brandywine Pink– Next, the Brandywine Pink is an heirloom tomato like its counterpart, the Brandywine Red.  I love the color of this tomato.  This tomato is a rosy-pink and has a little bit of a tang.

Celebrity  The Celebrity tomato produces large fruit.  So, it’s actually considered an all purpose tomato.  They are large and can be used for slicing, canning and sauce.  Additionally, you can also plant these in large container. So, you can grow them on your patio or balcony if they get enough sunlight.  I like the flavor, and use them on my BLTs.


Black Krim –  The Black Krim has a very rich flavor.  It is high on my list of garden tomatoes.  This tomato is a dark burgundy color similar to the Cherokee Purple, Black Krim, and Paul Robeson.  They are a beefsteak, which makes them perfect for sandwiches.  They originated in Crimea.

HillbillyUnfortunately, the Hillbilly tomato is too sweet to me. So, I really don’t like it on my sandwiches.  However, other family members love them.  I share my garden harvest, so I continue to plant them so they can enjoy them.  The Hillbilly is an heirloom, which originated in West Virginia in the 1800s.  It’s a beautiful color, yellow and orange. It displays beautifully on the BBQ table for burgers.  

Delicious – Also, The Delicious tomato holds the record for the largest tomato ever grown, a whooping 7 pounds.  They find a place in my garden every year. The Delicious is an heirloom, and all purpose tomato.  It’s perfect for slicing, making tomato juice and canning.

HomesteadThe Homestead is an all purpose tomato.  It can be used for slicing, canning, and  salads.  This tomato is sweet.

German Johnson – Another West Virginia tomato that is an excellent slicing tomato.  Additionally, the German Johnson is thought to a parent of the Mortgage Lifter and Radiator Charlie tomatoes.  The German Johnson tomato is popular at Farmer’s Markets, and it is an heirloom.  It has an excellent flavor, and the color is more pink than red.

Better Boy – Last, the Better Boy tomato is great for slicing.  It has been around for about 50 years, and produces a lot fruit.  So, stake this plant heavily.  The flavor is excellent, and it will always find a place on my BLT


It’s nice to have a variety of tomatoes on the dinner or BBQ table in the summer.  They make a great conversation piece too.  Your fellow gardeners will want to know about them.

Finally, check out my list of best slicing tomatoes and purchase a few for your backyard garden.  You won’t be disappointed.


Homemade Fertilizer for Tomatoes and More

Today, I’m sharing gardening tips on using homemade fertilizer for tomatoes. Using these household items will help you grow bigger, juicy, disease free tomatoes this season.  First, I’ve been using these household items in my backyard vegetable garden for years.  I’ve had success with all of them.  So, I’m thrilled to be sharing these gardening tips with you.

Homemade fertilizers will give your plants the boost they need to grow and produce delicious fruit.  Most importantly, homemade fertilizers can be made organically.  You can add in products that will boost calcium, iron, potassium, sulfur, magnesium etc.  


homemade fertilizer for tomatoes


Homemade Fertilizer for Tomatoes:


Eggshells – I save eggshells throughout the year so I can use in my garden.  I wash them, dry them thoroughly and crush them to plant with my tomatoes.  Check out my post Using Eggshells in the GardenEggshells provide calcium for tomato plants.  Tomato plants need calcium need to produce large fruit.

Aspirin – Furthermore, you can use expired aspirins if you have them or purchase a cheap bottles from your local pharmacy to make a spray for your plants.  One bottle can go a long way.  Add 1 – 2 aspirins to a gallon of water.  Spray on your tomato plant throughout the growing season.


homemade tomato fertiizer


Coffee – Next, I brew coffee every morning, so I have plenty of coffee grounds to use in my garden. I simply put a scoop of coffee grounds in the hole with your plant and sprinkle a scoop of coffee grounds around each of your tomato plants.  Coffee grounds provide nitrogen to plants.  

Epsom Salt – You can also add 2 tablespoons of Epsom Salt to a gallon of water.  Spray your tomatoes plants with the Epsom Salt mixture once a month. Epsom Salt has Magnesium, which helps plants to absorb nitrogen and phosphorus.

Banana Peels – So, there’s lots of bananas in my kitchen.  I love them in my smoothies, and they’re great to take on the go.  So, rather than throw the peels in the trash, I recycle them.  I dry banana peels to use in the garden, a banana peel tea or use the peels directly in the planting hole.  Banana peels provide minerals to plants.  


Freeze Banana Peels


  • Begin my cutting your peels into strips.
  • Place them in a freezer bag and than freeze them.  Once you have 15 – 20 peels, it is time to  dry them.


Dry Your Banana Peels


  • Turn your oven on the lowest setting
  • Place your banana peels on a cookie sheet.  Be sure they are not touching.  You need the air to circulate.
  • Leave your oven door ajar.
  • Allow the peels to dry.  They are ready when they become brittle.
  • Use your chopper to cut up the peels.
  • Place them in an airtight container until they are ready to be used.


Finally, if growing bigger and healthier tomatoes is your goal; I hope you will make a mixture of homemade fertilizer for tomatoes.  Your tomatoes will love you for the added boost.  And, you will love your big, juicy, delicious tomatoes all summer.  Also, providing one of these fertilizers will help with preventing blossom end rot.  

You can also use the fertilizers:

  • Peppers
  • Carrots
  • Broccoli
  • Lettuce
  • Spinach
  • Celery
  • Asparagus   


You may also like homemade garden fertilizers.